Reviving the Print in Hand
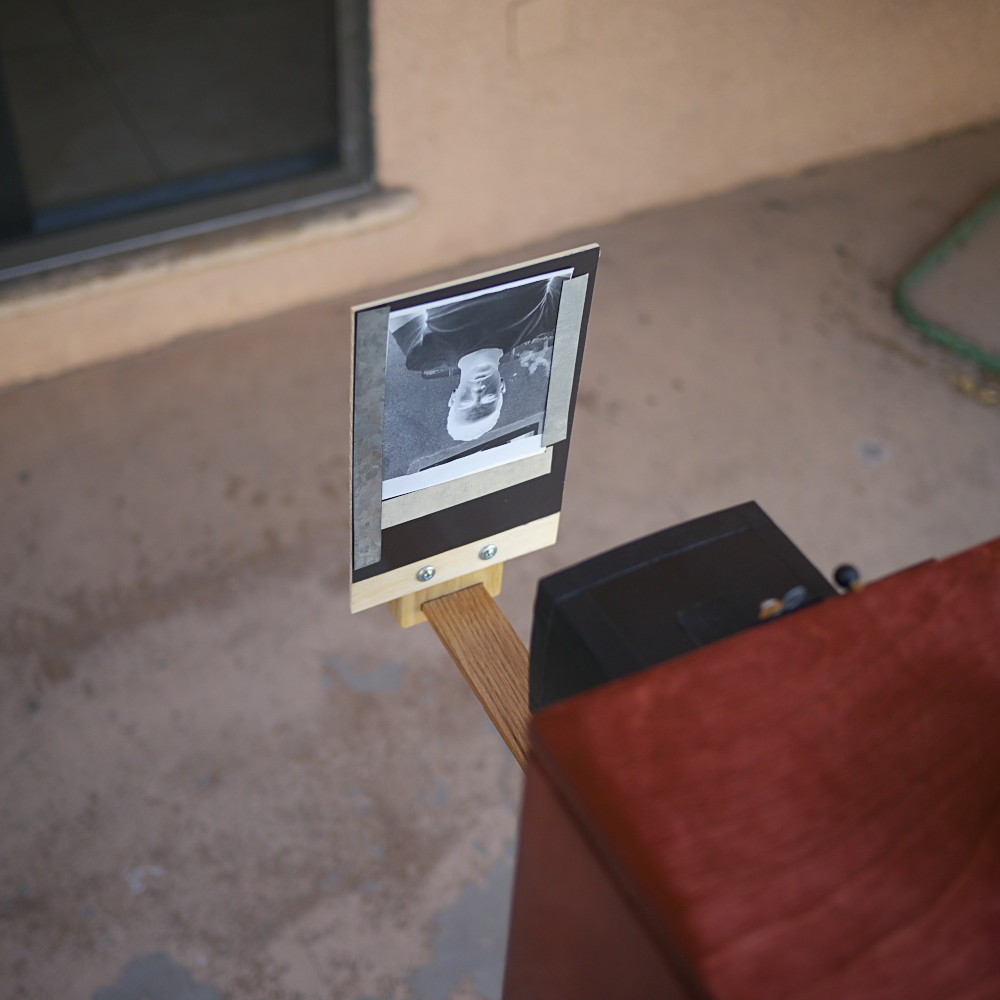
Post-Script: This morning I finished making the optical printing attachment, a wooden extension that bolts to the underside of the support platform, upon which slides the paper negative support plate, a thin piece of model plywood covered on its front side with a sheet of flexible rubber magnet. The plate slides fore and aft, meaning that I can adjust the size of the printed image. The magnetic surface enables me to hold the paper negative in place with pieces of galvanized steel, or another sheet of rubber magnet.

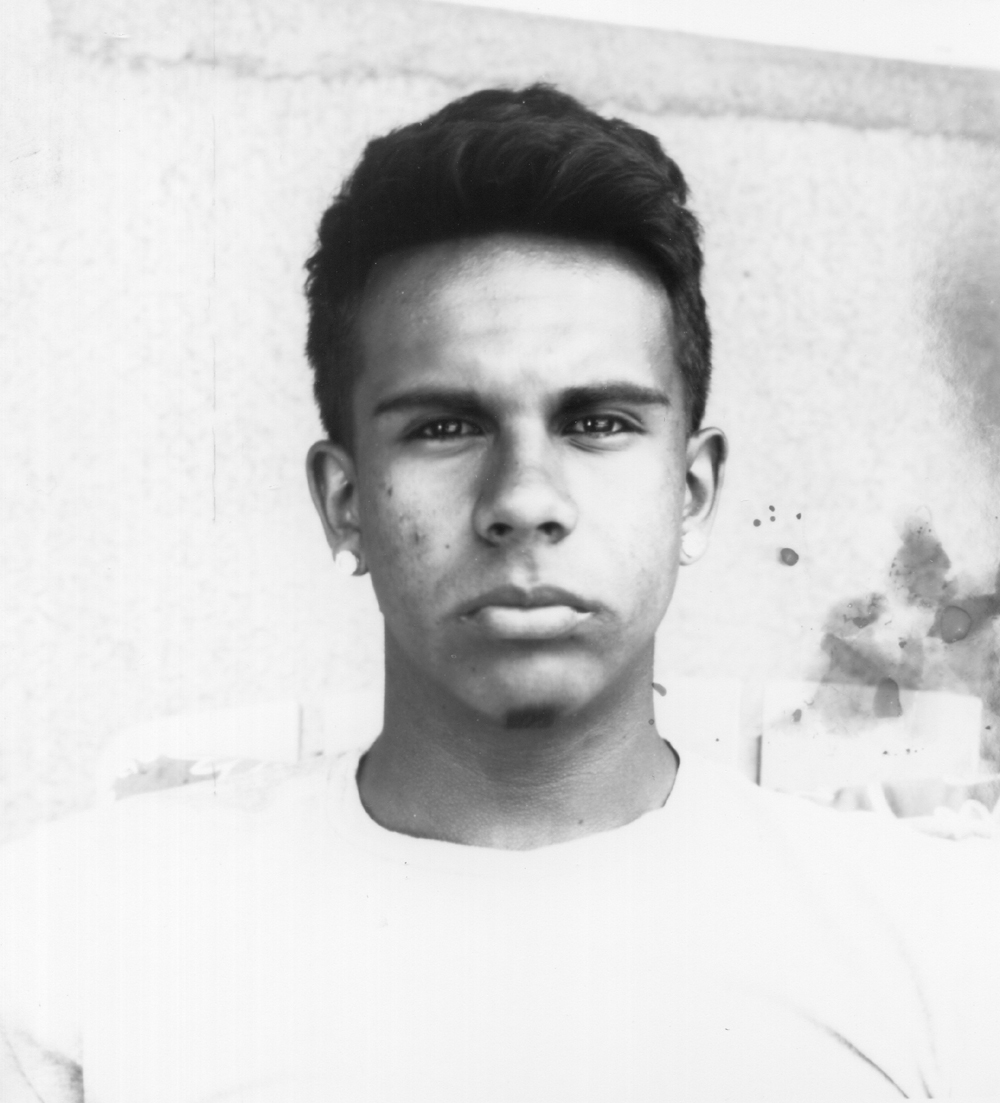
The top image in this article is a scan of the finished optical print, made upon Ilford's multigrade, resin coated, warm tone, pearl finish photo paper. I used a grade 5 contrast filter behind the lens, and rated the paper (with filtration in bright shade) at ISO 0.8 plus 1.6 stops of exposure, meaning f/8 for 10 seconds. I'm really pleased with the image's tones, as it resembles the look of such prints made in places such as Argentina, as I've seen on the Internet.
What surprised me about this print is how different it appears from an inverted scan of the negative, or the original negative itself. One problem I've noted in the past, when making paper negatives of people's faces, is that skin tones often appear darker than what you'd expect. Thus, in the original paper negative (as you can see below, with the negative mounted to the printing frame), the face was noticeably lighter than the background tones; which might present a problem in a digital scan. But when rephotographing this negative optically, using the Instant Box camera, that light facial complexion becomes the first thing to create significant tonal density in the finished print, thus recovering almost all the detail once thought lost. I'm also amazed at the detail in the subject's eyes, considering this was under a north-facing covered porch, no added artificial lighting or reflectors used.
The specific examples of camara minutera prints I've seen online show evidence of nice facial tones, floating in an almost all-white background. That seems to be the kind of look I've achieved herein, caused by effectively over-exposing the background (or, in the case of the print, not exposing it sufficiently, leaving it closer to paper-white), instead aiming toward achieving pleasing facial tones as the primary objective.
In case you were wondering what that strange splotchiness is to the right of the subject's face, it's some artifact in the negative's development process, most likely caused by residual chemicals on my fingers when handling the paper. But most of that becomes indistinct in the print, instead focusing the viewer's attention to the subject itself.
What would improve the presentation of this print even more is to matte it in an oval window matte. I've seen evidence of oval masks being used atop the paper negative at the time of the optical printing, effectively cropping the image to an oval-shaped portrait in the finished print. Perhaps in the future I'll use a sheet magnet cut with such an oval window mask.
posted by Joe V at 1:57 PM
![]()
![]()

2 Comments:
What a great portrait. Is that your grandson? He is growing up fast, if so.
Now I understand why people look the way they do expression-wise in old photos. 10 second exposure times! :D
Seriously, that's an amazing photograph - the eyes are completely captivating..
Post a Comment
<< Home