Peroxide Reversal Prints, or The Infinite Joe Series
 The Selfie Setup
I've been a photography loner for decades. Meaning that I've worked in relative isolation, as I've cobbled together box cameras from cardboard, foam board and scraps of wood; or tinkered with using print paper as an in-camera film; or, lately, trying to perfect the hydrogen peroxide / citric acid reversal process, which promises an almost straight-out-of-camera finished print -- after some processing, of course. Think wet Polaroid.
But it's not exactly correct that I've been working in isolation these last several years, because I've teamed up with fellow Burqueno Ethan Moses (transplanted from Brooklyn), to work on camera-making projects and, more recently, the peroxide reversal process.
One of the benefits of having a partner is that no two people see things the same way. What one person perceives one way, the other see it differently. That's a good thing when you're tinkering with new photographic processes. You need an atmosphere of experimentation, even a bit of confusion or turmoil.
As an aside, many significant discoveries in science and engineering happened because someone was working on some process, or idea, and things didn't go as planned, and some new discovery was found, by accident. Take flash memory for example. It happened by accident, someone misprocessed a lot of silicon memory chips and they ended up getting extra layers deposited in the transistor's gate structure, which created the floating gate, where data can be stored as nonvolatile electric charges. If that operator hadn't goofed and misprocessed, perhaps we wouldn't have flash memory; or it would have taken longer to develop. Were they repromanded, or even terminated, for their goof, I wonder? And what would have happened if that chip factory had perfected their manufacturing process such that no mistakes could be made? Yes, they could have engineered out all unpredictable process deviations, but at the price of no new discoveries.
When you're tinkering with making a process better, you have to walk that razor's thin edge between consistency and planned deviation. But your exploration of alternative process methods is only as good as your mental model of how the thing works in the first place. And sometimes you don't really know how it works, you're working blind, groping in the dark.
This is how Ethan and I felt at times, these last few years, as we've toyed with the citric acid / hydrogen peroxide reversal process for black & white paper. We, both of us, aren't chemists, or educated in advanced photographic processes. We're tinkerers mainly, though Ethan's a bit more educated than I. And so, we don't exactly understand how the process works, except it involves using the citric acid to ionize metallic silver molecules, so they can be selectively dissolved by the peroxide.
When I first read of this process on APUG, a few years ago, people were mixing the citric acid and peroxide as one solution. Then we hit on the idea of separating out the chemicals as discrete steps, but we'd go back and forth between the two in multiple passes, before the negative image could be completely bleached out. There was also experiments around which to do first, the acid or the peroxide.
More recently, Ethan has hit on the idea of using a longer processing time in a stronger solution of citric acid, to more fully saturate the emulsion, before exposing it to the peroxide. And it seems to work better, at least when we were doing the large 20 inch by 24 inch prints in Ethan's recently complete mega-sized camera. But I wanted to try it myself.

Ethan's mega-sized camera prototype.
During our many experiments with these processes someone has to sit and pose for the pictures, since we're hoping to be using these processes for portraits. And so it's usually happened that I sit and pose. And thus we've built up a good collection of Joe pictures in all our many experiments, enough such that Ethan has taken to calling it the Infinite Joe Series. I kind of like the ring to that name.
So today I wanted to try and replicate the success that Ethan has had, but I had to figure out how to pose and focus the view camera on myself. The result is seen in the top photo, a length of paracord, one end tied to the camera, the other attached to a cardboard focusing aid, with knots in the cord for adjusting the posing distance. The way this works is to tape the end of a yardstick to the focusing target, then stretch it out in front of the camera lens and focus the camera upon the target, as you stand behind the camera. Then, when I seat myself in front of the camera, I can stretch the string tight and place it adjacent to my eyes, to ensure critical focus. Once set, I carefully lower my arm and trip the camera shutter with a release cable.
I wanted to be consistent with my process, to eliminate sources of foul-ups, like the brown or yellow staining we've sometimes seen, that can arise unexpectedly. But I also had the problem that I was out of fresh paper developer, so today I ended up using some Afga Rodinol film developer, in a stronger concentration than what you'd normally use for film.
Here's a shot of my processing setup in my darkroom. I've used these little 3-drawer cube stacks for a long time, as a way to reduce clutter and make the setup more compact.

I'll explain the chemicals in each drawer and the order in which they were used, along with processing times.
The paper (Arista-brand, from Freestyle Photo, grade 2 RC paper, semi-matte finish) was rated at ISO 3.
1. Upper left drawer: Developer. Agfa Rodinol diluted 75mL into 325 mL water (about 1:4.33). 1 minute 30 seconds processing under red safelights, intermittent agitation.
2: Upper right drawer: Water, 30 seconds rinse under red safelights, intermittent agitation.
3: Middle left drawer: Citric acid, mixed 2 heaping teaspoons to 300mL water. 3 minutes processing under red safelights, intermittent agitation. Turn on white light at end of this step.
4: Middle right drawer: 35% food-grade hydrogen peroxide. 2-3 minutes processing under white light, continuous agitation, or until the image is fully bleached to white.
5: Transfer print to a water wash tray via tongs (not shown), 30 seconds rinse under white light, continuous agitation.
6: Lower left drawer: Heico Permawash, used straight (no dilution), processed for 1 minute 30 seconds under white light, intermittent agitation.
7: Lower right drawer: Water, 30 second rinse under white light, continuous agitation.
8: Upper left tray: Developer (Agfa Rodinol), quick, even immersion, continuous agitation for 1 minute 30 seconds, under white light. The positive image will almost immediately come up.
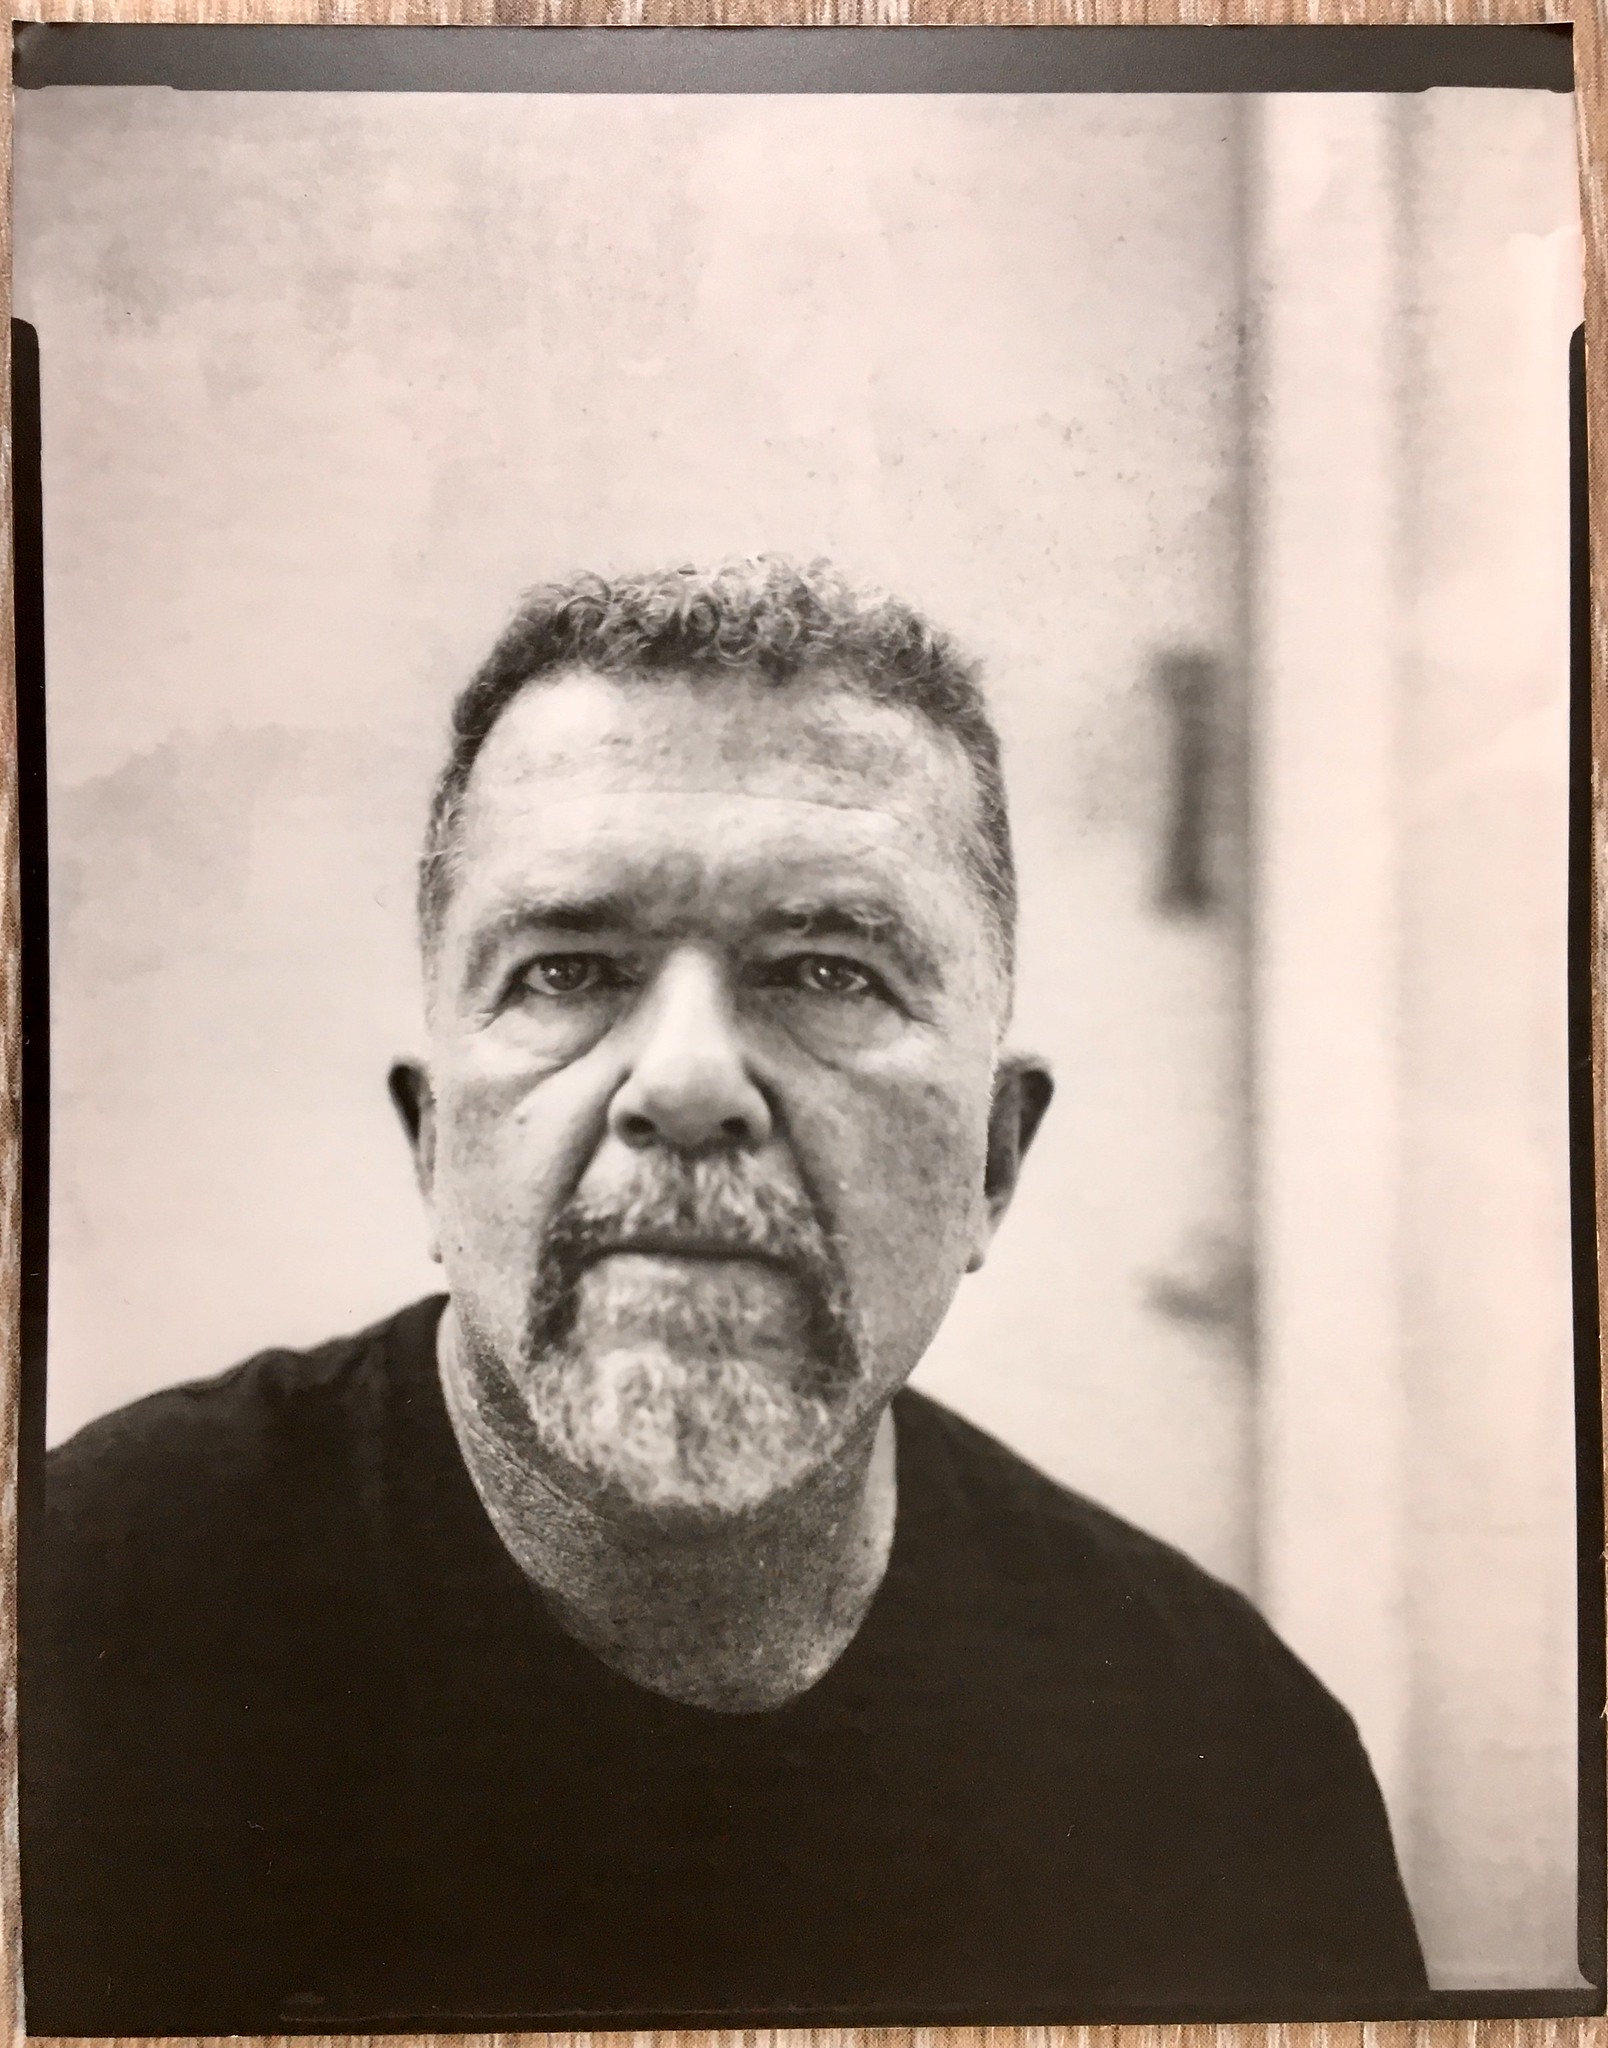
Here's the first print I made today, the exposure was 1 second at F/5.6:
 This cell phone snap of the print doesn't do it justice, it's very sharp with excellent tones. The streaks on the right are shadows on my shed behind me from the morning light.
I rotated the back on the Intrepid 4x5 to make a portrait-oriented image, but the morning light was getting brighter as I made this second exposure, which was also at F/5.6 for 1 second (a bit too much exposure):
 I still like the look of this, there's a luminance in my eyes.
For this third print I reduced the exposure to F/5.6 at 1/2 second:
 I like this one a lot.
These last two shots I had moved the camera out of the sun, so I have the door frame of my shed behind me. Here I've tried to angle my head a bit, and focused between my eyes. It should have been stopped down to F/8 for more depth of focus:

Overall I was pleased with the consistency of these images, aside from my over-exposure in the second print. I didn't see any of the brown or yellow staining that's been the bane of this process in the past, neither did I see any solarization. On the first two prints I didn't turn on the white room lights until after the peroxide bleaching, whereas on the second two I turned on the lights after the citric acid but before the peroxide. There doesn't appear to be any difference that I can see; as long as the emulsion is sufficiently acidic so it won't continue to develop from residual chemistry from the first development step.
Since someone will likely ask, I should explain now: the water rinse steps between each major chemical (but not between the citric acid and peroxide) were to prevent contamination of the downstream chemical, since I was making multiple prints using the same chemicals and wanted to preserve them. I'm not certain if this contributes to the lack of staining or other unexpected problems, but it's not a bad idea.
All of these prints were exposed under shaded daylight, not direct sun.
Some good learnings for today, along with more images for the (imaginary?) Infinite Joe Series, helping to confirm what Ethan's already learned. I think it's important to try this process under different conditions (like my darkroom, chemicals and equipment, instead of his), as verification of the process. At least for the warmer months, I now feel confident that we can repeat these results, under shaded daylight. I'm not as certain about the winter months with less UV in the sky, but we'll have to do more testing when the time comes.
Labels: peroxide reversal process, Selfies
posted by Joe V at 5:29 PM
![]()
![]()

5 Comments:
Nice work Joe.
I've never worked with alternate processing. I think it is time I start. Maybe over winter.
Very fine posting--- Very Good Information...
Thank you....
Many thanks Joe for this very informative insights. Worked now for a while with only one solution, peroxide 15% with a content of 2% citric acid to reduce the steps, but the result is not the same as when you work with two steps. Your fascinating experiments are very inspiring. Thank you so much for that.
Interesting post. You art different beautiful pictures. I like your post. Moreover, Best local movers in chantilly provide the best services. Our expert team delivers your product with complete security and privacy.
the only way I see Heico Permawash sold is in concentrate form and is expensive. Are you using the concentrate straight? or using it with the recommended 3oz to 1 gallon dilution?
Post a Comment
<< Home