Tuesday, March 31, 2015

IBC: Paper Safe & Lens Hood

DSCF3233a

Typecast050

Post-Script: The top photo shows the IBC with newly installed lens shade and lens cap shutter removed. I really like the idea of reusing the detritus from Fujifilm's Instax Wide film cassettes. These stiff, black plastic sheets come in handy for these kinds of projects. Also, the film cassettes themselves make for handy little picture frames. You can insert an Instax Wide print under the plastic light baffle flap, through the eject slot and into the cassette, which then serves as a picture frame.

Here's a picture of the camera with shutter installed. This shutter was always intended to be temporary, being composed of several layers of black foam core board, taped together with gaffers tape, with a recessed hole in one layer to fit snugly over the Kodak Ektar lens. Now, with the addition of the lens hood, gaining access to the shutter was problematic, hence the addition of this "handle," composed of a 35mm film capsule, hot glued to the shutter cap. As I indicated in the typecast, I am working on a more sophisticated shutter.
DSCF3234a

The lens hood was made to fit snugly inside the wooden frame around the lens board bracket, but it's secured in place via this angle bracket that's attached to the hood via double-sided tape, and to the lens mount bracket screw.
DSCF3242a

Here's the new paper safe, made from sheet plastic, gaffers tape and sheet magnets. It closes very nicely, and I'm able to operate it one-handed.
DSCF3240a

Here's the lid of the paper safe open. I'll use a floating cardboard divider to separate RC glossy grade 2 paper, which I use for negatives, from RC luster multigrade paper, that I intend on using for the prints.
DSCF3239a

Though this new paper safe is thinner than the old one, it just happens to fit snugly inside a 4x5 film storage box, solving for me the problem of reloading the camera with convenience in mind; otherwise, I'd have to empty the chemical trays, transport the entire camera to my darkroom and install the paper safe under red lights.
DSCF3241a

Here's the paper safe in the camera. It's the rectangular box to the left of the view screen. You can see the wooden bracket that its end fits inside. To gain access to the paper, I first slide the box backwards (to the left in this image, away from the wooden bracket), then rotate it 90 degrees so that its lid is pointing up. Then I flip open its magnetic lid and remove a sheet of paper. Once the paper is in the film holder, I close the paper safe lid and return it to its storage.
DSCF3237a

You might also note in this image that the frame around the view screen has some peeling paint. The frame was cut from a sheet of laminate flooring, and doesn't take paint all that well. I'm going to have to touch it up eventually, but for now it hasn't presented a problem. Also the black gaffer tape cloth hinge, below the view screen, shows some deterioration, but it's mainly cosmetic. This is not professional-grade construction, but it seems to work okay.

Here's a test image taken in my front courtyard under bright shade. F/32 for 4 seconds, it was a test of the light-integrity of the new paper safe. With paper loaded in the safe and it installed in the camera, I opened the right side panel to bright sun for about a minute, then closed it up and made this image. I'm hoping my problems with lens flare and fogging are a thing of the past.
Front_Porch_Chair001a

Photos via Fujifilm X10, typecast via SCM Galaxy 12.

Sunday, March 29, 2015

Instantly Obvious

IBC001a

Typecast049

Post-Script: Though I'm optimistic and excited about this project, I'm still working through teething pains. Today for instance I still had some mysterious light leaks/lens flares on my test images. I'll have to do a round of more serious partitioning tests in order to track down the source. There's also the possibility of resorting to using my more modern Fuji 135-f/5.5 lens, in place of the WWII-era Kodak Ektar 127, should the tests point to the lens as (one of) the culprit(s).

This morning's round of tests were in my front courtyard, in bright shade. My test victim again was very patient with this procedure, though she's a bit self-conscious about less-than-flattering images being posted on the Internet for all to see. Regarding her image, I'm pleased with the tones and sharpness, especially considering it was a 3 second exposure at f/32.

Andi001a

Later in the morning I did another test, this time a still-life of my Galaxy 12 typewriter, and I had more mysterious fogging/flares around the edges, which you can see in the bottom and also on the right half of the platen. But the lighting was brighter and more direct; you can just spy one source of bright light being the courtyard wall window, on the upper right corner of the image, just off-axis of the image. I'm certain a properly designed lens shade will improve this situation, if not a newer lens.

SCM_G12001a

Top photo via Fujifilm Instax 210 camera. Typecast via SCM Galaxy 12.

Sunday, March 22, 2015

Instant Box Camera: First Light

P1090934a

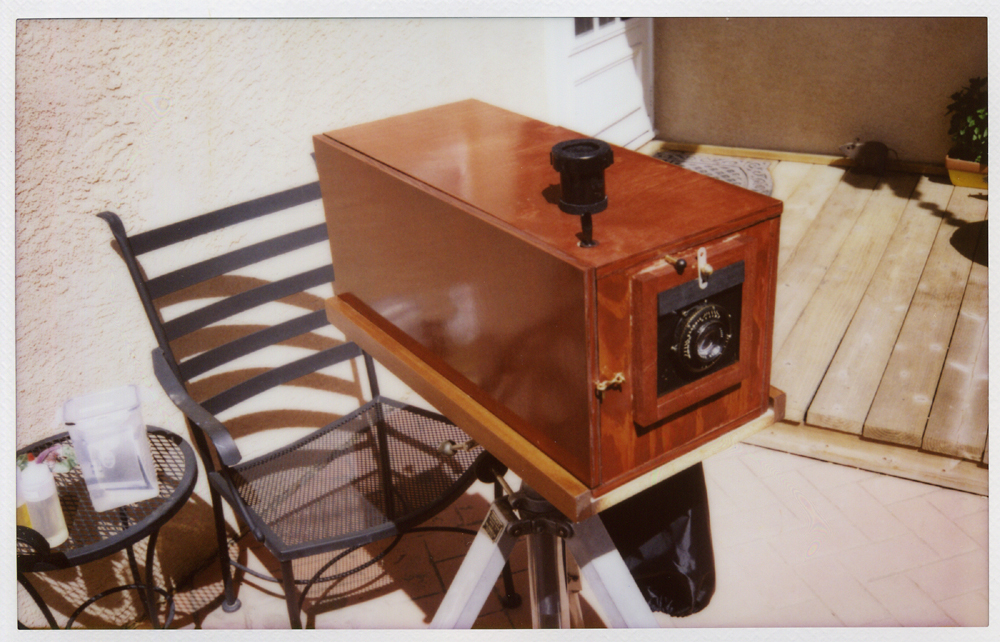
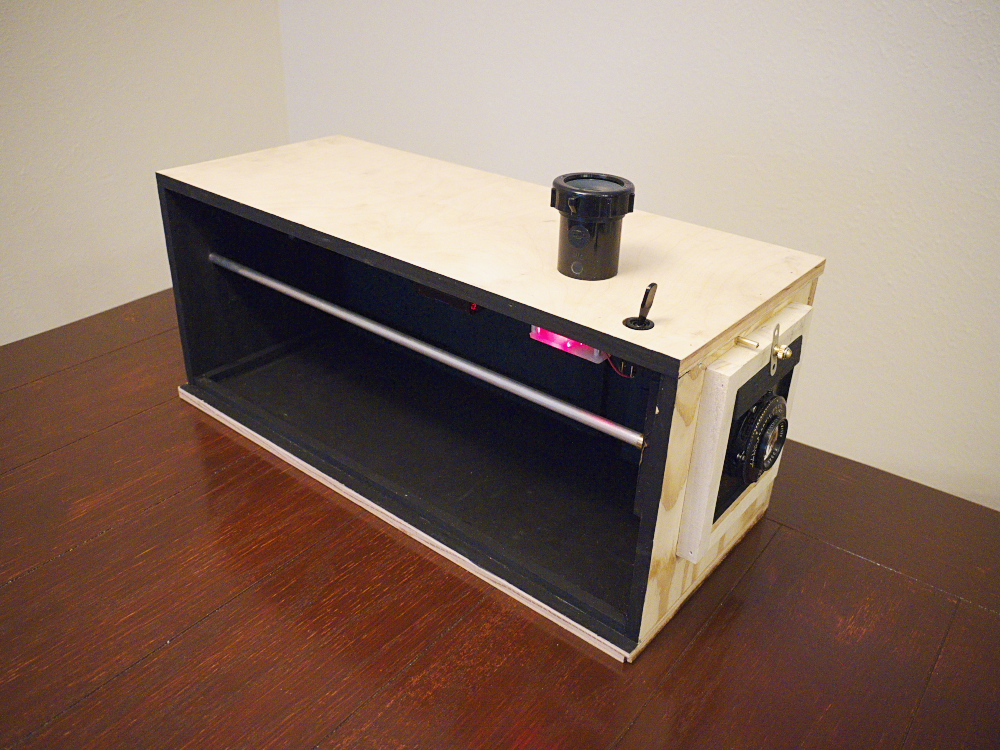
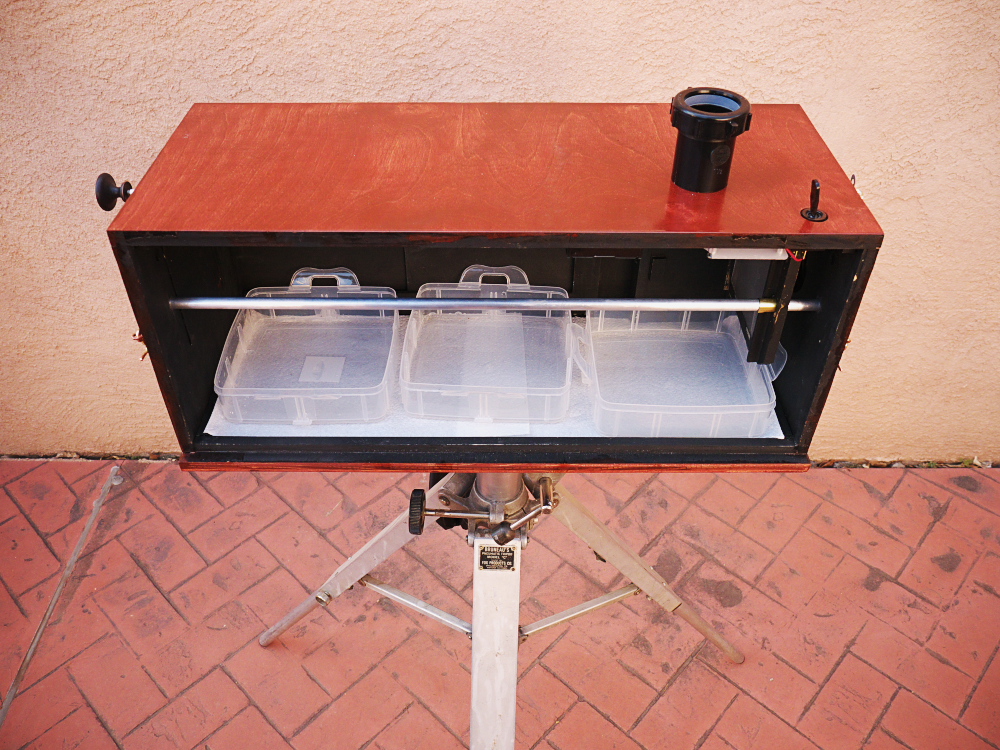
Finally, the pieces have come together into a nearly completed project, after months of preparation, planning and building. I'm referring to the Instant Box Camera project; but there's been nothing instant about it.

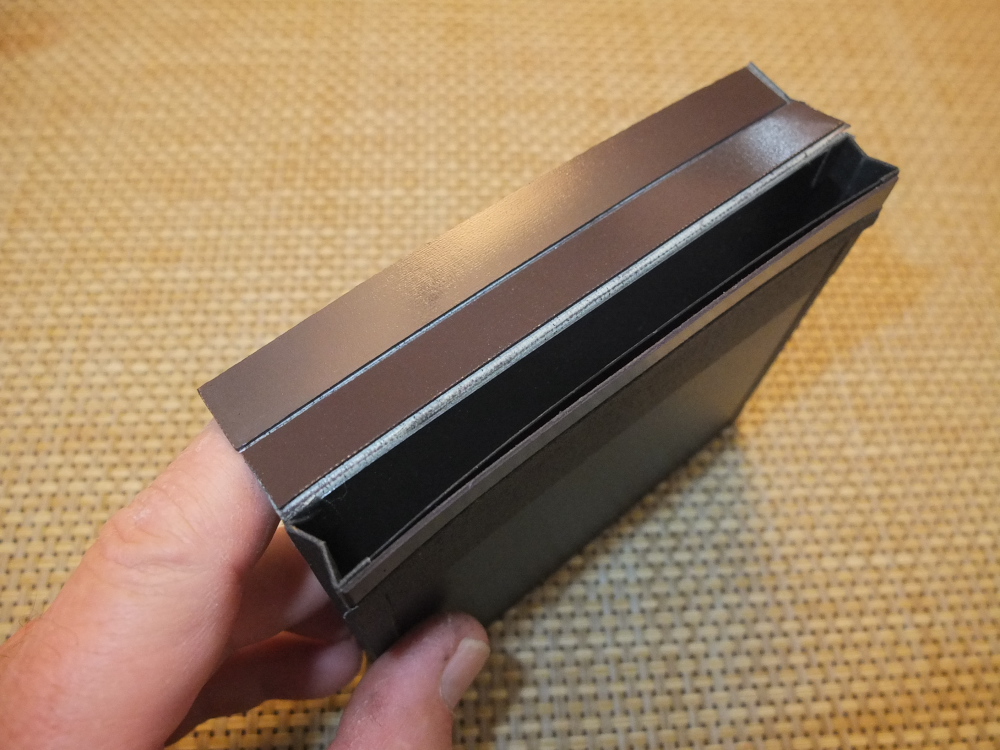
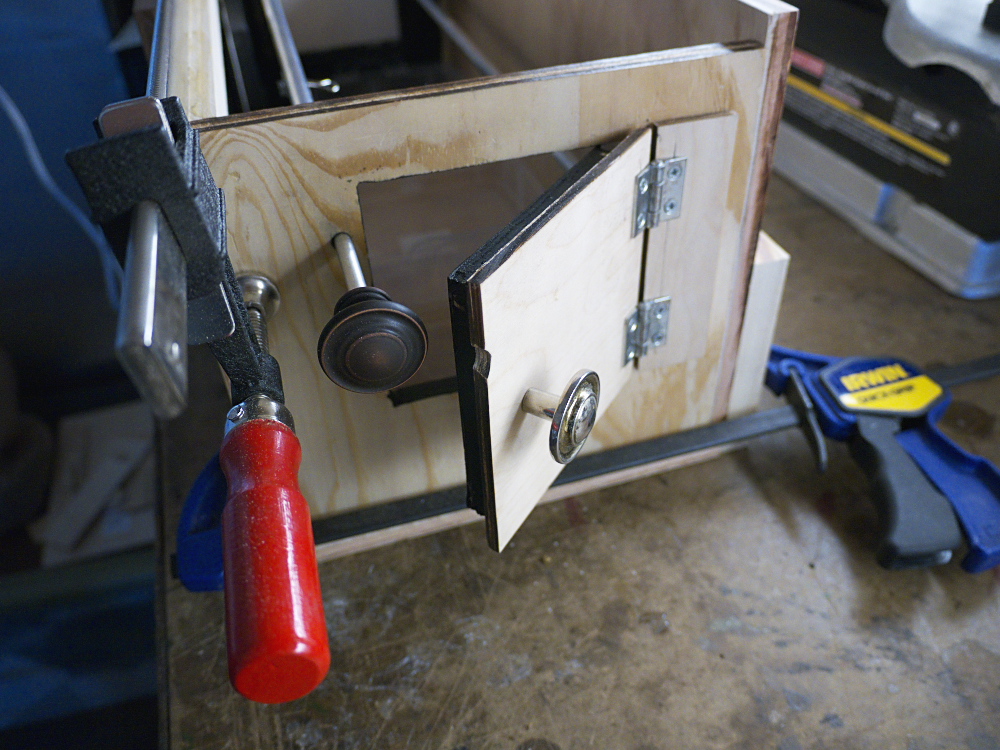
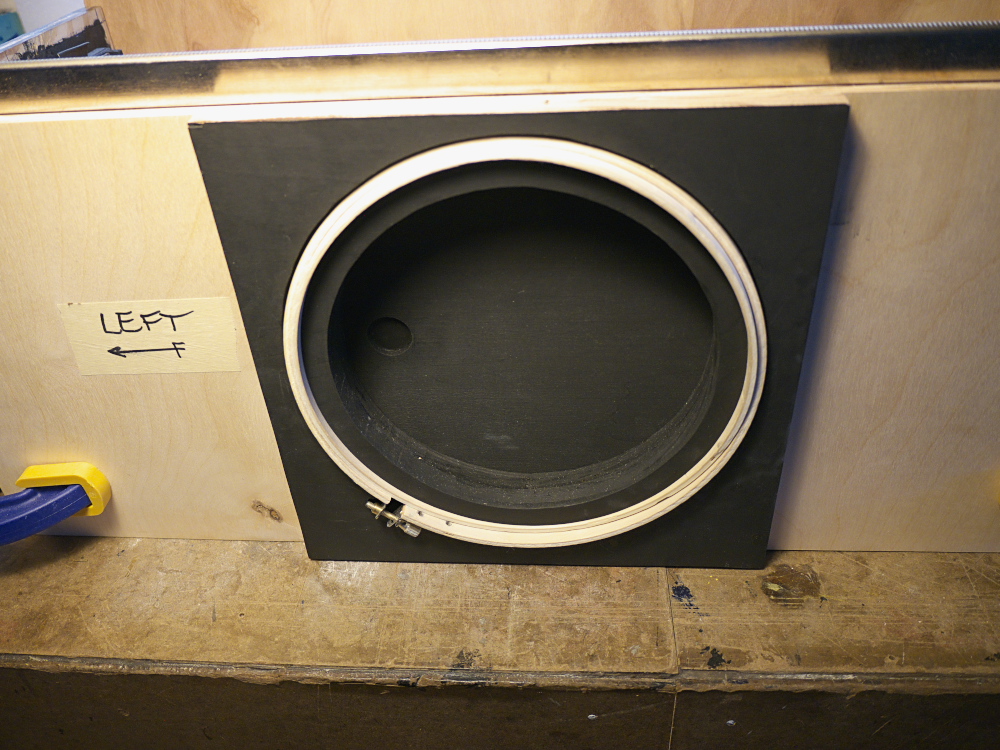
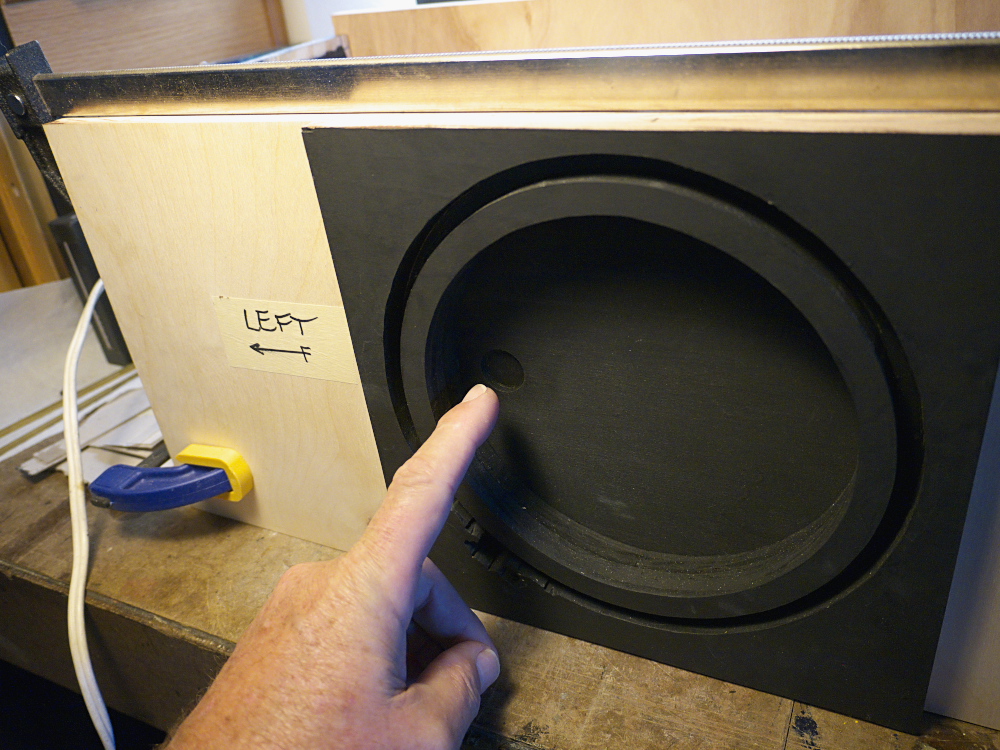
Last week, I completed staining the box and applying one coat of clear polyurethane, sufficient to call it ready for testing. This morning, I struggled with getting the black fabric arm sleeve and its wooden sewing ring clamps installed, with success found only after application of a rotary power tool to some tight spaces; anxious to begin testing the camera, I have not yet built or installed the final clamping plate over these rings.

I've yet to install a tripod socket under the box, my plan being to build a separate bottom plate that includes tripod socket and also the folding printing frame, that extends out in front of the lens for printing the paper negatives. And so for today, I just shot and developed a few paper negatives, one a portrait in my front courtyard with the camera resting on a small metal patio table, then another portrait on my back porch using as a stand an old studio tripod, the box secured with a bungee cord to the tripod's large base. My wife was kind enough to sit as a test subject for these first images from the new device.

Using the camera entails first bringing it into the darkroom, where I cut photo paper down to size (4.625" by 3.875") and load them into the cardboard paper safe inside the camera. Then the box is brought out and set up for the subject to be photographed. It's important to keep the camera as level as possible, to prevent sloshing of chemicals from their trays. And so a tripod with adjustable height will be required.

The premixed chemicals are stored and transported in small plastic bottles, the contents of which are poured into the trays, once the camera has been set up and the side of the box removed for access, after which the camera's side can be reinstalled

I then take a meter reading of the subject, ensuring I've set the paper's ISO on the meter (with Arista grade 2 RC paper I rate its speed at ISO12), and select an f-stop sufficient to permit a shutter speed of around 1-2 seconds. I'm using an old Kodak Ektar lens from a Speed Graphic, whose shutter is busted, so I'll have to use a lens cap as a shutter, meaning that for accurate exposures I need exposure times of at least one second in duration - but not too long, otherwise the subject might be blurry due to movement.

P1090937a

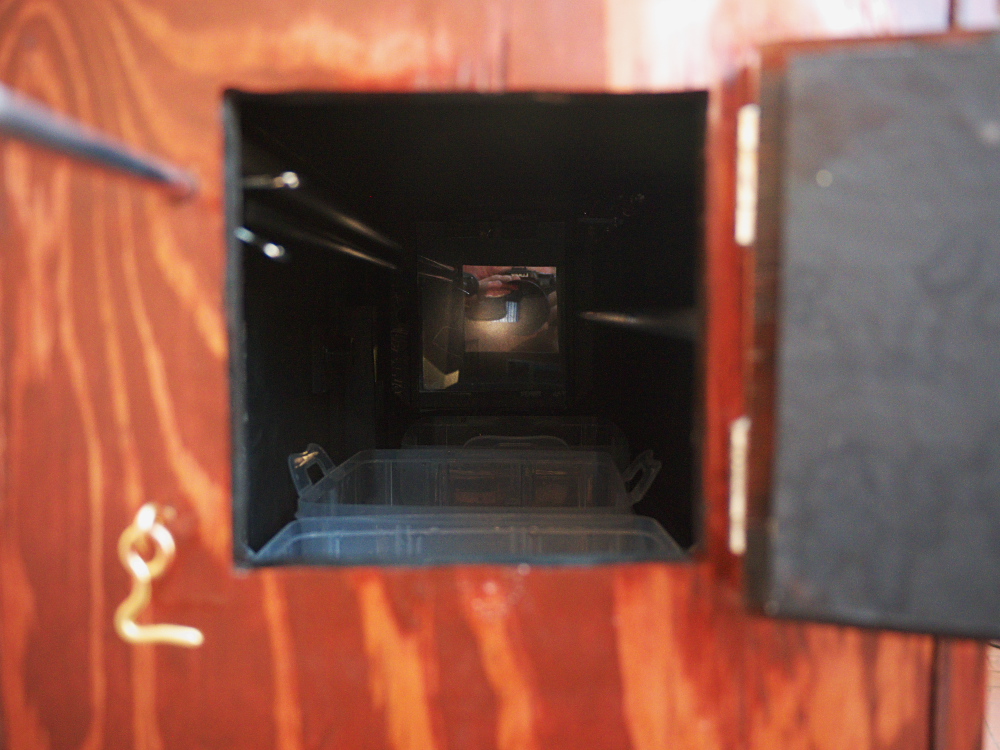
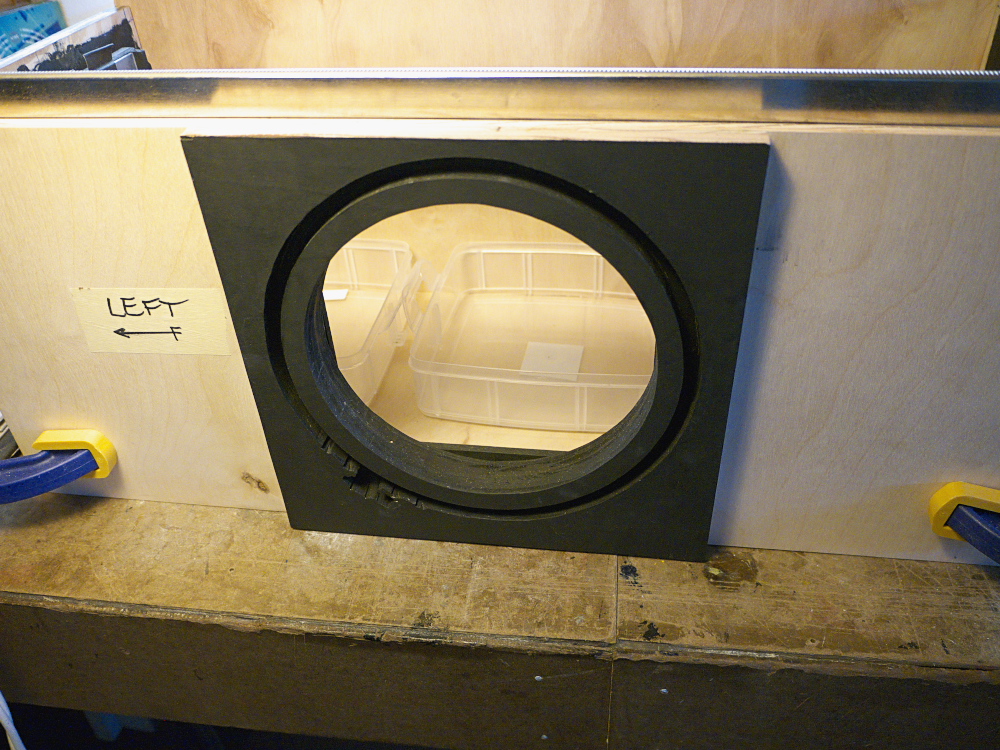
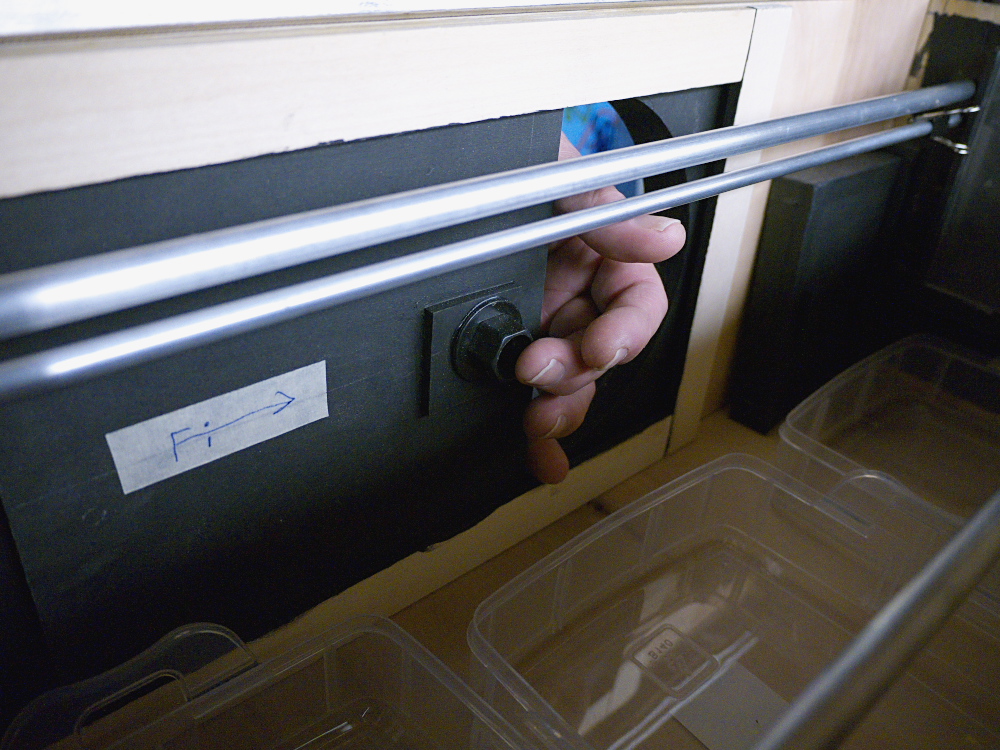
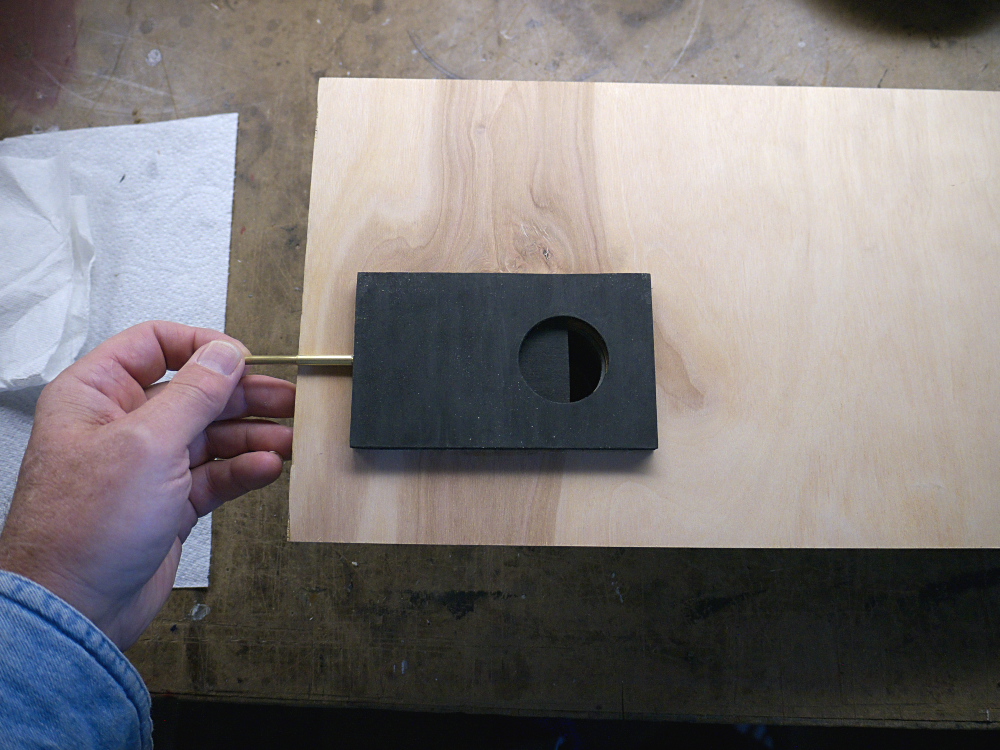
I then open the rear door and compose & focus the subject on the internal view screen. This might entail moving the camera a bit, while focusing is performed by moving the control rod in or out as needed; I mark the selected focus position on the rod by means of a metal clip, which limits rearward movement of the film holder to the preset position. Once focus is set, I secure the rear door, set the f-stop and cap the lens.

P1090939a

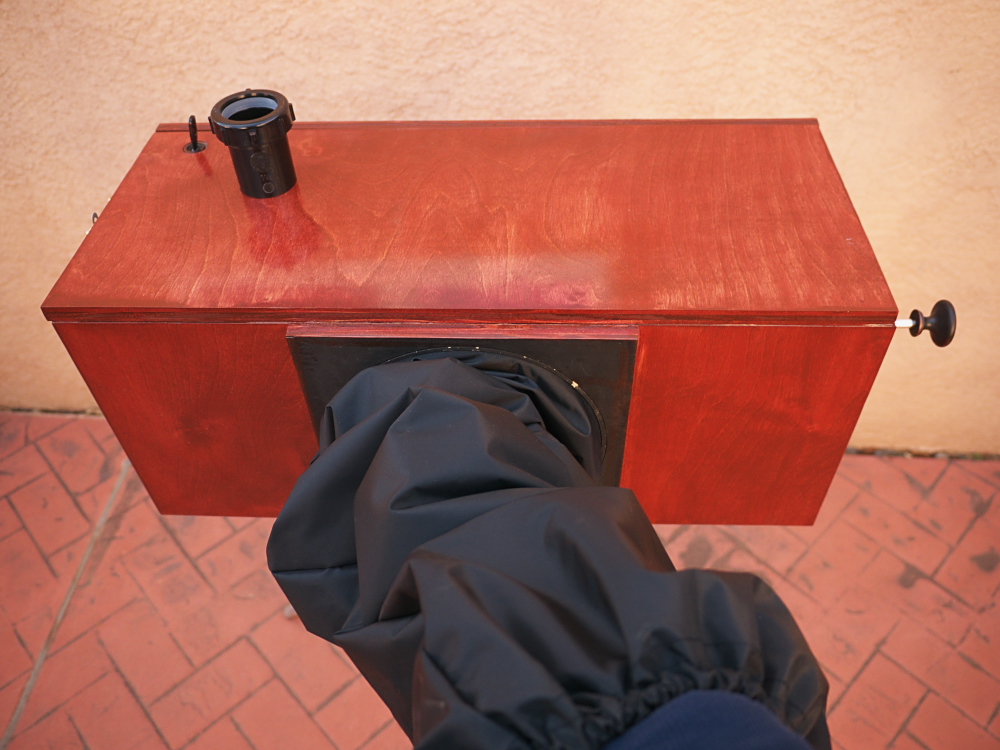
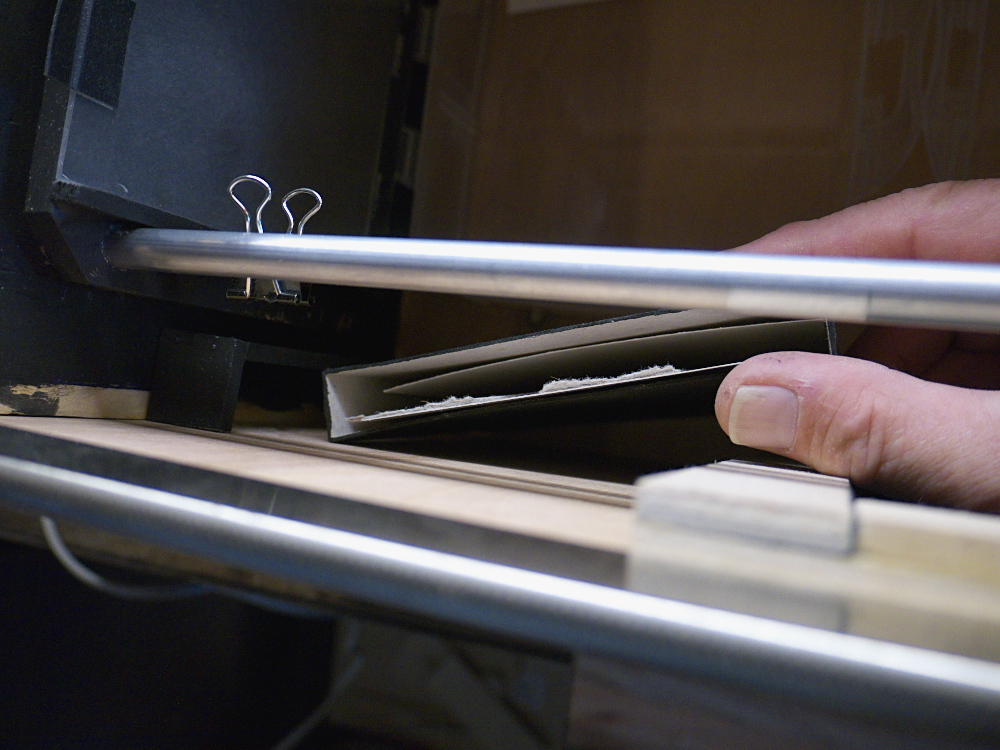
I insert my arm in the sleeve, then open the inner sleeve door. I push the film holder forward toward the lens, giving me room to open the paper safe box, sliding it back and rotating it upwards, then remove one sheet of photo paper. I can tell which side is the emulsion side by its feel, and also the paper's curl. I temporarily set the paper on end, leaning against the paper safe box, while I slide the film holder back a bit and hinge back the view screen. I must ensure that the screen does not fall down into a chemical tray (which did happen to me on one occasion). The paper is inserted in front of the screen, then the screen is hinged back up into place. The film holder is temporarily pushed forward, permitting room to rotate the paper safe box upright and slide it back into its safe storage position. Then the film holder can be slid back until stopped by the metal clip; the paper is now positioned at the preset focus position.

P1090935a

At this time, I can opt to pull my hand from inside the box, slide close the inner door, and remove my arm from the sleeve, giving me both arms free to direct the subject and operate the shutter. For today's tests, I opted to keep my arm in the box. I asked my wife to sit still, eyes open and not to blink. Then I timed the exposure via the lens cap, after which I instructed her to relax and wait until I processed the negative.

To remove the paper negative from the holder, I have to slide it back a bit, then fold down the view screen and retrieve the paper. The tricky part is then closing the view screen while keeping hold of the paper; on the second portrait, I dropped the paper negative at this point, and it fell partway into the developer tray; by the time I had the view screen secured and pushed forward, part of the paper was already developing. In the future, I must ensure the exposed negative is leaning against the paper safe box, then the screen can be hinged back up and secured safely.

Once the negative is in the developer tray (face up) I use my fingers to gently rock the tray and also ensure the negative remains submerged. The battery-operated red LED worked fine for viewing the negative; I took off my glasses before placing my eye securely to the black plumbing fitting that serves as the viewing port (so as to prevent stray light from entering and fogging the paper), then briefly opened the viewing port shutter to take a peek at the development's progress. After 1.5 - 2 minutes in the paper developer (I used Tetanol Centrobrom S, diluted 1:10), I transfer the negative to the stop bath, where it only needs 20-30 seconds; you can tell when the paper's pH has turned from basic to acidic when its wet emulsion side no longer feels slippery/slimy. Then the paper gets transferred to the rear fixer tray. At this point I slide the inner door closed and remove my arm from the sleeve.

After about 30 seconds I'll open the rear door and take a peek at the paper negative, still fixing but no longer light sensitive. After two minutes it can be removed and rinsed in water.

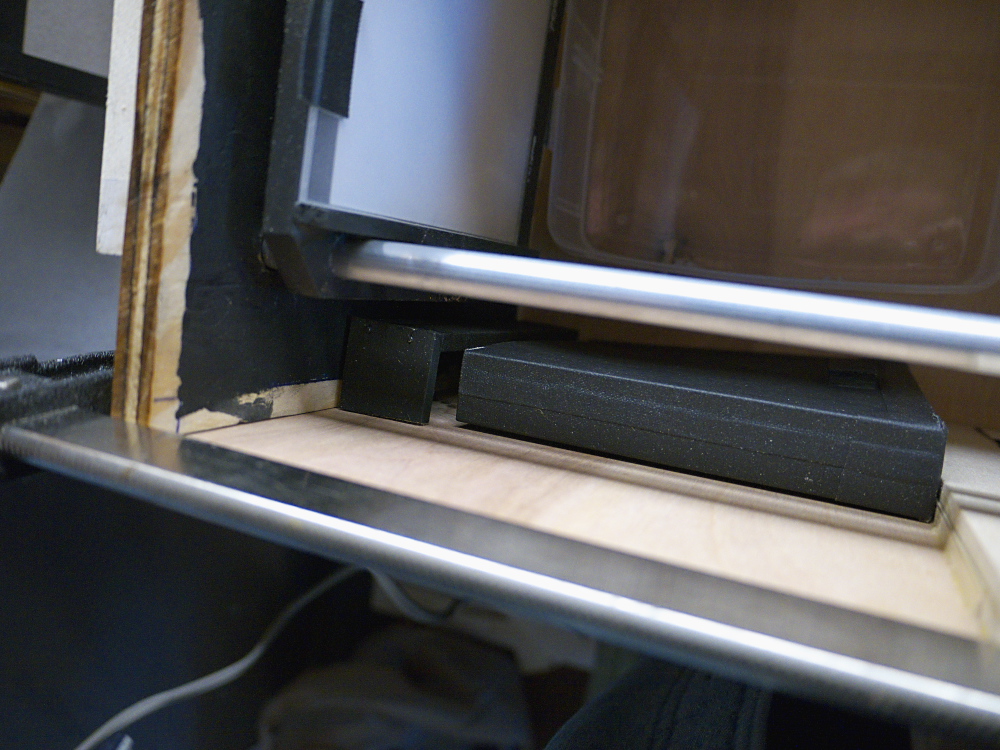
I found it handy to have a square of paper towel, folded up and located partway up the arm sleeve, close enough to reach when needing to dry my fingers but not so close as to fall into the stop bath tray (which did happen on one occasion when I got the paper towel too far into the box opening).

To warm up my chemicals (they were stored in my cool garage), I placed the clear plastic bottles in the direct sun for a few minutes. This will be a handy way of maintaining temperature out in the field.

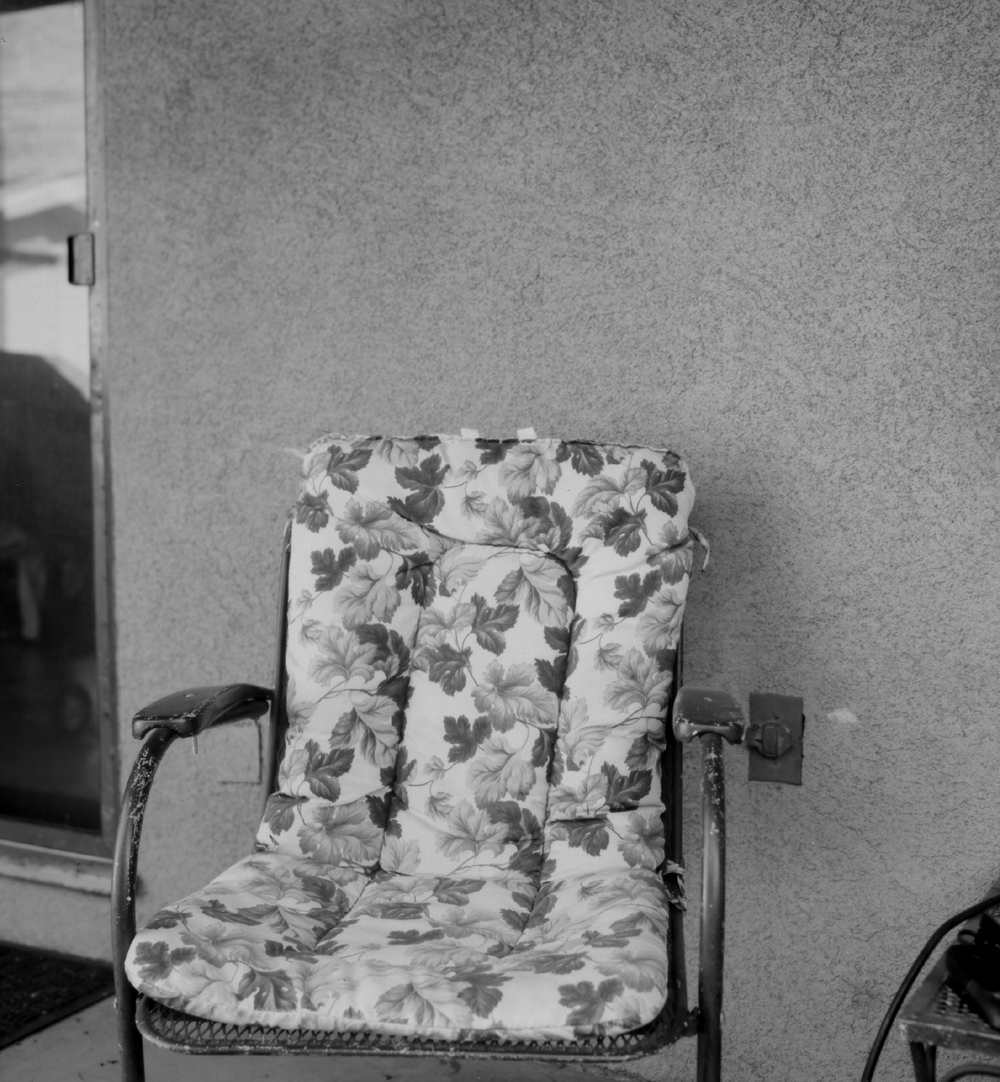
So how did these first portraits come out? The tones are very good; I have lots of experience with paper negatives, and these please me. There are some small scratches where I fumbled with the paper while it was being handled. My very first image exposed (of an empty chair, not shown here) has a vertical streak down the middle, caused by the view screen hinging back and its top end falling into the developer tray; after being rescued, a drip of wet developer ran down the front of the paper negative. The focus was good on all of these images, as I used a rather small aperture (f/11 and f/32), in order to get sufficiently long exposure times, giving me good depth of focus. Two negatives exposed while the box camera was in the direct sun have a bit of fogging along one side indicating a light leak that'll need to be found and patched. The other images taken under the shade of the back porch had no fogging.

Overall, I'm very pleased with these first results. I still have a few finishing touches to be made to the box, and also practice sessions in printing paper negatives onto multigrade paper using contrast filters. There's also the matter of making this all into a portable kit that can be transported and set up easily in some public venue. But that's down the road. For now, the camera's seen first light, and I am pleased.

Andi001a
First portrait. I had my wife lean her head against the wall. Because of the camera's low angle, she appears to be looking up. Note the scratches, adjacent to her left elbow. Overall the tones are very pleasing. Illumination was bright shade. Exposure was f/32 for 2 seconds.

Andi002a
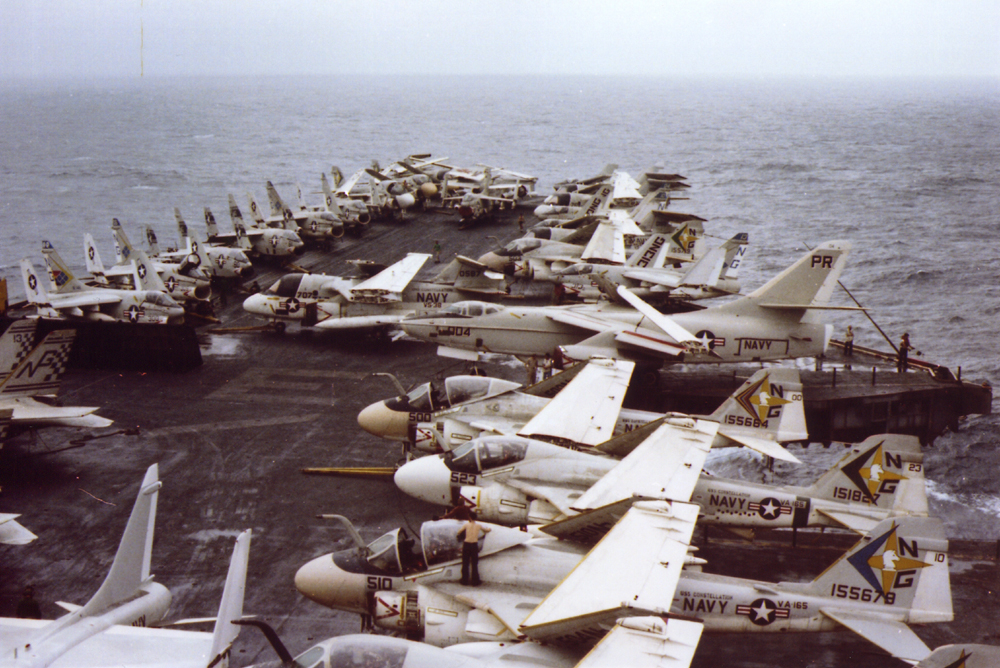
This next portrait was made under the back porch, again in the shade. I was unable to adjust the camera for a more pleasing composition, due to limitations with my tripod. The obvious flaw in this image is the development mark in the upper part of the image, caused when the negative prematurely fell partway into the developer tray. Overall, a good image, tonality-wise. I've made no attempt to adjust these files after scanning, other than reversing their tones and flipping them horizontally. Exposure was f/11 for 1 second.

Chair001a
After my wife's two portraits, I decided to expose another negative as a still-life, again under the shaded porch. This time the handling and processing went smoothly, no scratches or development marks, this one is very clean and the tones are very nice.

Wednesday, March 18, 2015

Spring, 1980: Revisited

Connie002a

Typecast048

Post-Script: In 1980, the two most common music formats were LPs (i.e. vinyl) and cassette tape. Just before leaving port in Subic Bay for the Indian Ocean, in early April, one of our crew members purchased the just-released album of Pink Floyd's "The Wall." That music was what helped us to survive the ordeal of an interminable duration at-sea. To this day, I cannot listen to that album without thinking back to those days.

Photos via Minolta SRT-101b and Vivitar 80-200mm lens on Kodacolor film. Keep in mind that in 1980, though there were computers available, photography was strictly via film. Though these negatives have faded color, through years of being poorly archived, the images are clearly evident. Typecast via Hermes Rocket.

Bonus Images: Connie001aLooking aft from atop the superstructure (i.e. the "Island"). Wouldn't you like to have one of those shipboard binoculars? In the bottom of the image are the F14s staged along the fantail; in the distance, aft of the Connie, is one of our escort ships.

Connie009aUnderway replenishment. A helo is beginning to lift a load of cargo. Prior to hooking the line from the cargo to the helo, a crewmember touches the chopper with a grounding rod, discharging the high voltage built up during flight, that's lethal enough to kill a man. These smaller ships can pitch, heave and roll while the helo hovers above, implying that the pilot has to be skilled enough to match the ship's motion, in order to hover above the deck. I was always amazed to watch the helos operate, impressed by their pilot's skill. Fighter pilots might get all the notoriety, but a navy runs on supply lines, and helos are its workhorse.

Connie003aA6s being serviced by their ground crew. The A6 was a great carrier-based bomber, could carry its own weight in ordinance. The A6 near the top of the image has live ordinance attached to its left wing. The yellow tow bars are used to maneuver the craft along the deck, via "yellow-gear" diesel-powered tractors, fueled by JP-4 jet fuel. The "brown shirt" crewmember is known as the "plane captain;" he's the enlisted man chiefly in charge of ensuring that plane is prepared for launch.

Connie006aMore cargo being transferred. The long wooden crates might be missiles of some kind (perhaps Terrier missiles; the Connie was the last carrier in the Navy to have nuclear warhead-certified Terrier missiles). Note the graffiti on one such crate, "you boys just begun."

Connie004aAlongside a supply ship. Note the 5" gun mounts, and the "Taz" artwork.

Connie007aAn F14 Tomcat, from fighter squadron VF-211, on glide slope, calling the ball. He'll most likely trap on the number 3 arresting wire (there being four such wires). Each wire is a 1" braided steel cable, that runs underneath the deck to special hydraulic machinery that plays out the cable at a controlled rate, depending on aircraft type and weight. My sleeping quarters was a top bunk on the "03 level," just below the flight deck, and just underneath the number 3 wire. Flight operations happened upwards of 18 hours per day; attempting to sleep while flight ops was underway involved a 90 second cycle of sleep, then awakening to the whine/slam/screech of an aircraft being arrested on your roof, just above your head.

Connie005aTransfering cargo from the Ike, via helo. Note the dark green metal canisters on the fantail of the supply ship, those are probably spare jet engines. Haze gray and underway.

Connie008aBell-bottom dungarees. One's hair was permitted to get just a bit shaggy while on extended deployment. Note also this plane captain is sporting a short beard. I, too, grew a beard while in the Navy, which I've had ever since. Note how dirty & greasy these planes can get while out at sea. Not to mention the corrosion from salt spray. Something the air force doesn't have to deal with.

Monday, March 16, 2015

On Record Keeping

P1090896a

Typecast047

Post-Script: I'm not naive enough to discount the possibility that physical media can suffer loss or degradation. Such is the erosion of life. We are reminded of the great stone works and monuments from antiquity, preserved for millennia, as an example of making one's mark permanent. But we too must remember that those ancient people's also had more fragile media, such as papyrus, that are now mostly lost to time. In our own age, we, just like the ancients, enjoy the choice of both fragile and more permanent media. Fragile media is easier to work, and less costly; think papyrus versus stone. A scroll of papyrus can be easily transported; not so stone engravings, or even clay tablet.

Digital media of today are like those fragile papyri from long ago: easy to work, affording distinct advantages over their predecessor formats, but questionable in longevity. Works on paper (writings, typings, photographs on archivally processed fiber paper) have become, ironically, the stone monuments of our age. Which begs the question of whether any of this will be around, a thousand years from now, as evidence of our existence; or is our only footprint to be the global changes wrought upon the natural world?

Photo via Lumix G5, typecast via Corona 4.

Tuesday, March 10, 2015

Instant Box Camera - Update

P1090895a

I've been busy this weekend, trying to make progress on the Instant Box Camera project. I'm happy to report that it's coming together, albeit slowly. This update is a quickly hurried assortment of images, for which I'll provide descriptions.

1. Assembly: As you can see from the top image, the box is assembled, with the right side panel removed to show the interior; this side panel will be removable to gain access to the interior, mainly for removing the trays of liquid chemicals. The red LED circuit is active and working, powered by two AAA dry cells, mounted in a holder that's Velcro-attached to the top panel. The large automotive-style switch on top activates the LED.

2. Rear door detail: Surprisingly, it's light-tight, at least by flashlight inspection! Though these shots were made before the interior was painted flat black. I still need to attach a locking device to the door. The groove cut in the edge of the door is to prevent interference with the focusing rod.
P1090889a

3. Paper Safe: I located the paper safe box in the front left corner, easily accessed via my right arm in the arm sleeve.
P1090881a

To gain access to the paper safe, it's first slid toward the rear of the camera, away from its retaining bracket:
P1090888a

Then it's rotated so the opening is facing up, where I can gain access to the paper negatives. I have a cardboard divider inside the box, separating the grade 2 glossy RC paper, used as negatives, from the multi-grade luster finish paper used for the final prints.
P1090883a

4. Arm Sleeve: I had the black fabric sewn into a double-thickness arm sleeve, with an elastic cuff and hemmed edge where the sleeve attaches to the box. I'm using a set of wooden sewing hoops to attach the sleeve to the box, with the fabric being captured between the smaller and larger hoops:
P1090886a

There's a groove built around the arm sleeve opening:
P1090884a

The sewing hoops will fit inside this groove snugly, then a cover piece of thin plywood will be screwed down to secure the sleeve in place:
P1090887a

5. Arm Sleeve Door: I wanted to have a closing, light-tight access door at the base of the arm sleeve where it enters the box, so I can load up a paper negative into the camera and then remove my arm so I can attend to the subject during the exposure. I built this sliding door of thin plywood. There's a round recess on the outside of this door, to assist in sliding it open:
P1090885a

While on the inside of the door there's a protruding plastic knob that I can reach to slide the door closed:
P1090880a

6. Viewing Port: The viewing port atop the box, used to monitor the paper development, is a piece of plastic plumbing fixture. A red filter will be installed in this port, to help cut down on any light leaks:
P1090878a

Based on tests I conducted last month, I know that my eye has to be pressed tightly against the port before opening the inner shutter, even with a red filter on the port. Here's a detail of the shutter mechanism, on the inside roof of the box, actuated by a brass rod protruding out the front, above the lens mounting bracket:
P1090879a

The purpose for the red LED circuit is to provide illumination inside the box, that won't fog the photo paper yet permits me to examine the paper as it develops. I mounted the LED, its white diffuser and battery holder near the front right side roof of the box, in order for it to not interfere with the focusing bracket.

What's Next: I have yet to finish gluing light baffle sticks to the removable right side panel, then paint it black. Then a set of brackets with machine screws gets mounted on the box opening at the front and back edges, which will extend through holes in the removable right side panel, to secure it via thumb screws. Also, a 1/4-20 tripod bushing still needs to be mounted to the bottom of the camera. And the rear door needs a latch mechanism installed. Then the arm sleeve and sewing hoops gets installed. Afterwards, it'll be time to test the box camera, first for fogging from light leaks, then a first round of test exposures. Perhaps next week I'll have good news to report. Stay tuned.

Saturday, March 07, 2015

What a Difference

P1090864a

Typecast046

Post-Script: A rambling typecast, composed en machina, (typos and all,) starting with the weather and ending with global politics. Perhaps this is what it might be like, were you and I to have a friendly face-to-face conversation, rambling all over the map, not knowing where it might end up.

These thoughts I've gathered through recent observations of various media sources, indicating that under-employment of young males is a crucial problem at the core of many issues faced globally, from ISIS to Greece's insolvency to gangsterism here at home. It's eery how common our problems appear, once we get beyond the surface distinctions of our diverse cultures, discovering we all share common concerns for the future of our children. Rather than seeing the world through the eyes of nationalist citizens, perhaps it would do us better to see the world as through the eyes of individual parents.

Photo via Lumix G5, typecast via SCM Galaxy 12.

Sunday, March 01, 2015

An Evening at Basement Films

P1090815a

Typecast045
(1) Basement Films
(2) Guild Cinema
Post-Script: There's a whole 'nother art genre at work here, that being the Basement Films show poster, produced zine-style upon the glass face of a copy machine. I recall, well nigh upon 15 years ago, when I accompanied Keif Henley, the master of Xerox machine zine art, to a local Kinko's store, where I observed him produce the poster for my workshop. They've produced many more such posters since then, including this compilation postcard flier illustrating just some examples:
P1090834a

Just one row of shelves in their vast subterranean, nuclear-proof film archive:
P1090824a

Mr. Keif Henley himself:
P1090838a

More filmstrip funkiness:
P1090829a

The aura of grungy film goodness envelopes all:
P1090823a

The grounds of the Harwood Art Center, site of the Basement Films compound:
P1090809a

Photos via Lumix G5; typecast via SCM Galaxy 12.