Royal KMM Storage Case Project

It's been several weeks since we -- Ethan Moses and myself -- began designing a storage/transport box for my 1947 Royal KMM. I've had this machine for a few months, since purchasing it from John Lewis Mechanical Antique Repair, here in ABQ. John's been servicing these machines for over 50 years, and the typical way he approaches these projects is a complete teardown, cleaning and rebuild. When you walk into John's shop, he's seated at his bench, which is visible from the front door, with some machine in front of him that's completely torn down to the bare chassis.
On the day I visited John, he had another Royal torn down, which look surprisingly smaller than when completely reassembled. Across from John's bench is a showrooom area comprised of shelves stocked with reconditioned machines for sale, along with a desk area in the middle of the floor, complete with typing paper and comfortable chairs, for clients to test out whichever machine they wish. John is very hands-on and enjoys taking a break from the tedium of repairs to engage with customers.
I've been a portable typewriter collector for some years. One thing I like about portables is, not only being able to easily tote them around but, that they have carrying cases serving to protect the machine while in transit and during storage. Not so with standard (so-called upright) machines; which originally came shipped from the factory in a rugged wooden crate, which typically were discarded after the machine arrived at its final destination, often at some office or school. These kinds of machines are also large and heavy, and don't have carriage locks, important for protecting the delicate escapement mechanism from damage should the machine suffer some sudden shock while being transported.
I live in a small house where storage and space is at a premium. I will typically have only one typewriter out on my desk at any one time, with the rest of the collection safely stowed away in their cases in the closet. It's been difficult, therefore, to justify getting a large standard machine, permanently taking up valuable desk space, given the constraints of my situation. Yet, standing in the showroom at John Lewis's shop that day, I couldn't help but ogle that sweet looking black beauty sitting up on the shelf. I've used standard machines before, notably one or two from Kevin's collection, and so I knew that they typically outperformed portables in terms of build quality and especially their typing action and feel of the keyboard. This also wasn't the first time I've ogled a standard machine at John's. Last year I almost pulled the trigger on a beautiful Underwood Model 5 that had exquisite black lacquered paint, gold decals and chrome trim, fully gone over by John; but I balked, knowing I had too many machines in my collection at home that I wasn't using. I needed to clear up some room, pare down my collection to just the essentials, before I could think about taking on a full-sized standard machine.
This wasn't John's first rodeo, as they say. He probably saw the gleam in my eye, as he quickly helped me get the big KMM down from the shelf and set me up in a padded chair to try it on for size. It was love at first tap. Though the 1947 KMM has round keys, the clear keytops are dished in, offering more comfort to the fingertips from long typing sessions. The touch was marvelous, and I found myself easily touch-typing with no interference from the shift lock key when hitting the letter "A", a common problem I have with many other keyboards. I was sold; but I had to think about it, because one thing I've learned over the years is never try to hide a purchase from the wife, it never ends well. I thanked John and told him I'd be back. He knew I would be, too.
The next day I returned, and the deal was done. He even threw in a new typewriter cover. I could sense John's pride in seeing one of his beauties, gone over with the thoroughness that only comes from 50 year's experience, finding a new home. As for the homecoming, it was surprisingly pleasant and pain-free, as I was directly up front with my wife about the purchase, she also knowing that I'd recently offloaded some little-used typers to better homes -- and the cost of the purchase was covered completely by a gift card I had.

I've been using the KMM extensively since its arrival, and I remain completely satisfied. It has an elite, 12 character-per-inch typeface, and a darkly inked ribbon, so the loops and swirls of some characters tend to fill in with ink, but I've learned to lighten my touch and use certain kinds of paper, which lessens the effect. I expect it to only get better as the ribbon ages a bit. My touch typing has only gotten better on the KMM, which has a carry-over effect of making me better on other portables. I'd say the KMM has afforded me a bit of typerwiter therapy. The machine sits on a metal typing table, so my desk actually retains its usual cluttered appearance, with sufficient room perhaps for one more machine, should the need arise.
Yet, even though I was enamored enough to want to continue using the KMM, I knew that, down the road, there might come a time when I might want to store it away in the closet for a spell; or transport it to some typing event. And so the idea of a storage case came to mind. And when, some weeks later, I mentioned this to my friend Ethan, he immediately offered the idea of helping me design and build such a case, as it would give him opportunity to test out his recently acquired laser cutter on thicker grades of plywood, in preparation for some ULF (ultra-large format) camera-building projects he has planned. I'd call this serendipitous.

And so, one day a few weeks ago we gathered at Ethan's shop and began the design/build process. Ethan has evolved his design process to hand sketching before he starts in on the Solid Works CAD (computer aided design) software, which is then rendered in a file format compatible with his laser cutter.
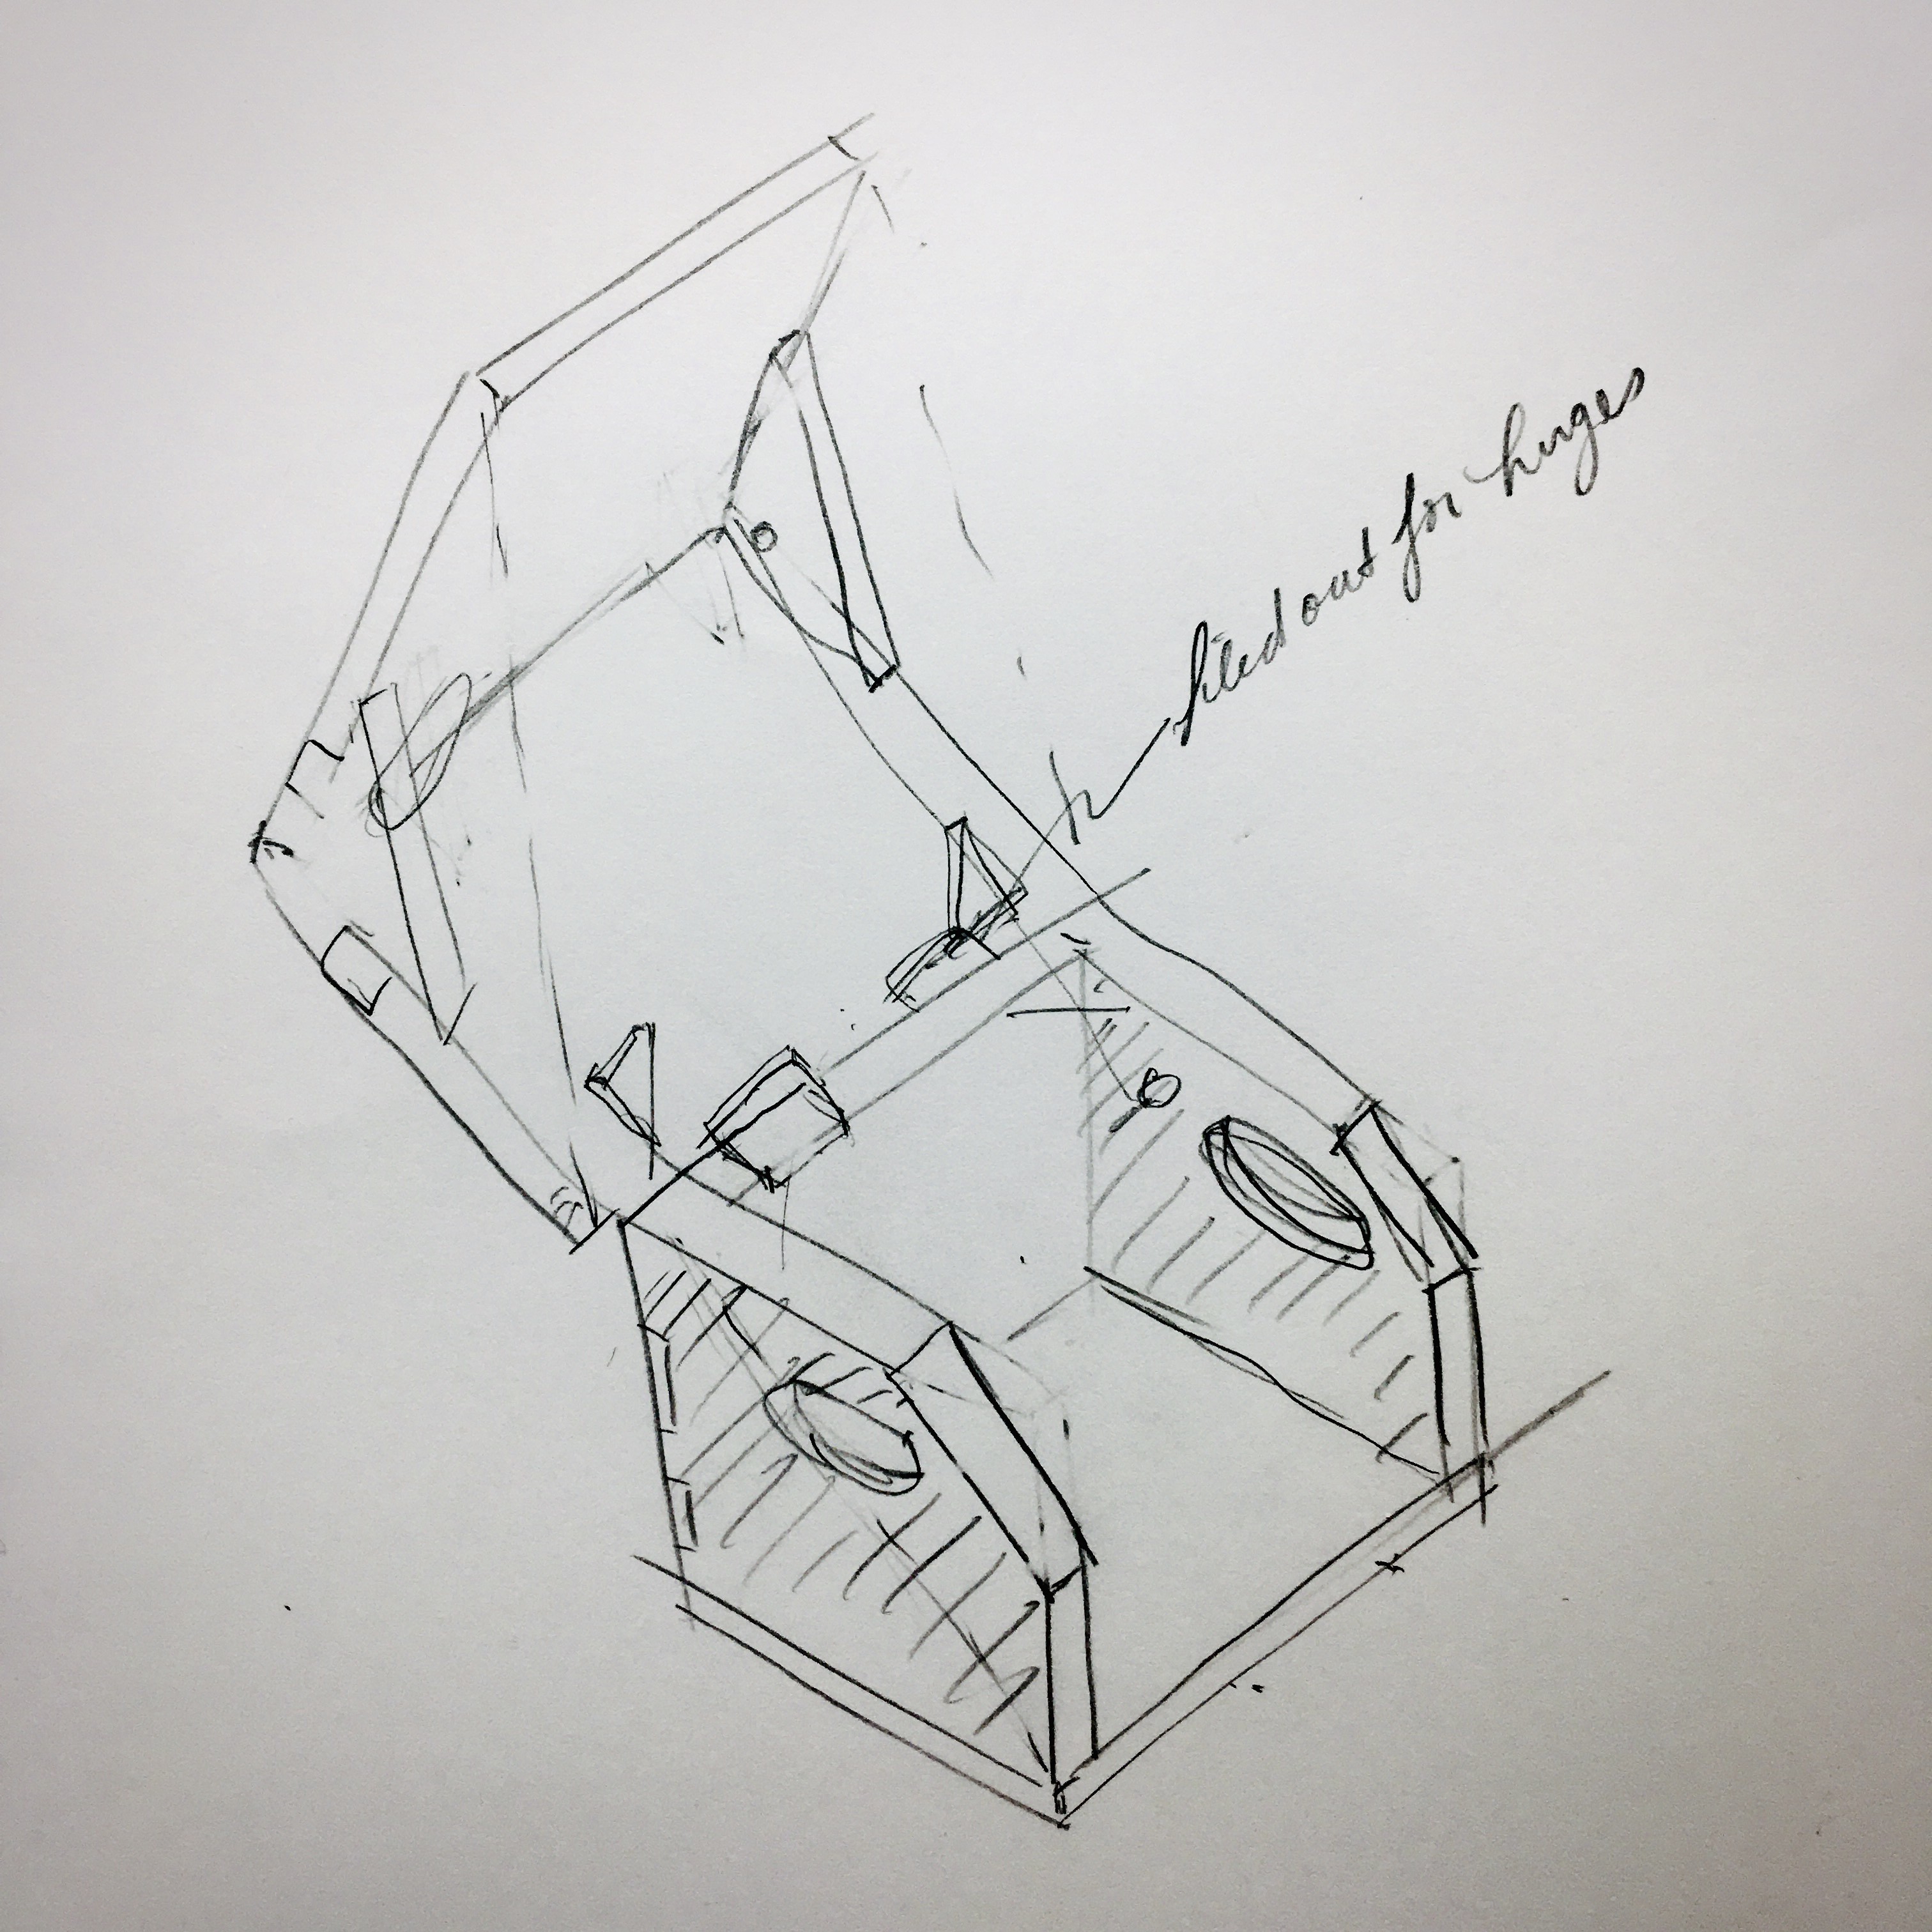
Inspired by our conversation, and the fact that I'd brought the KMM with me for reference, Ethan began with a pencil sketch of the basic layout we were thinking of.
The design evolved through several iterations.

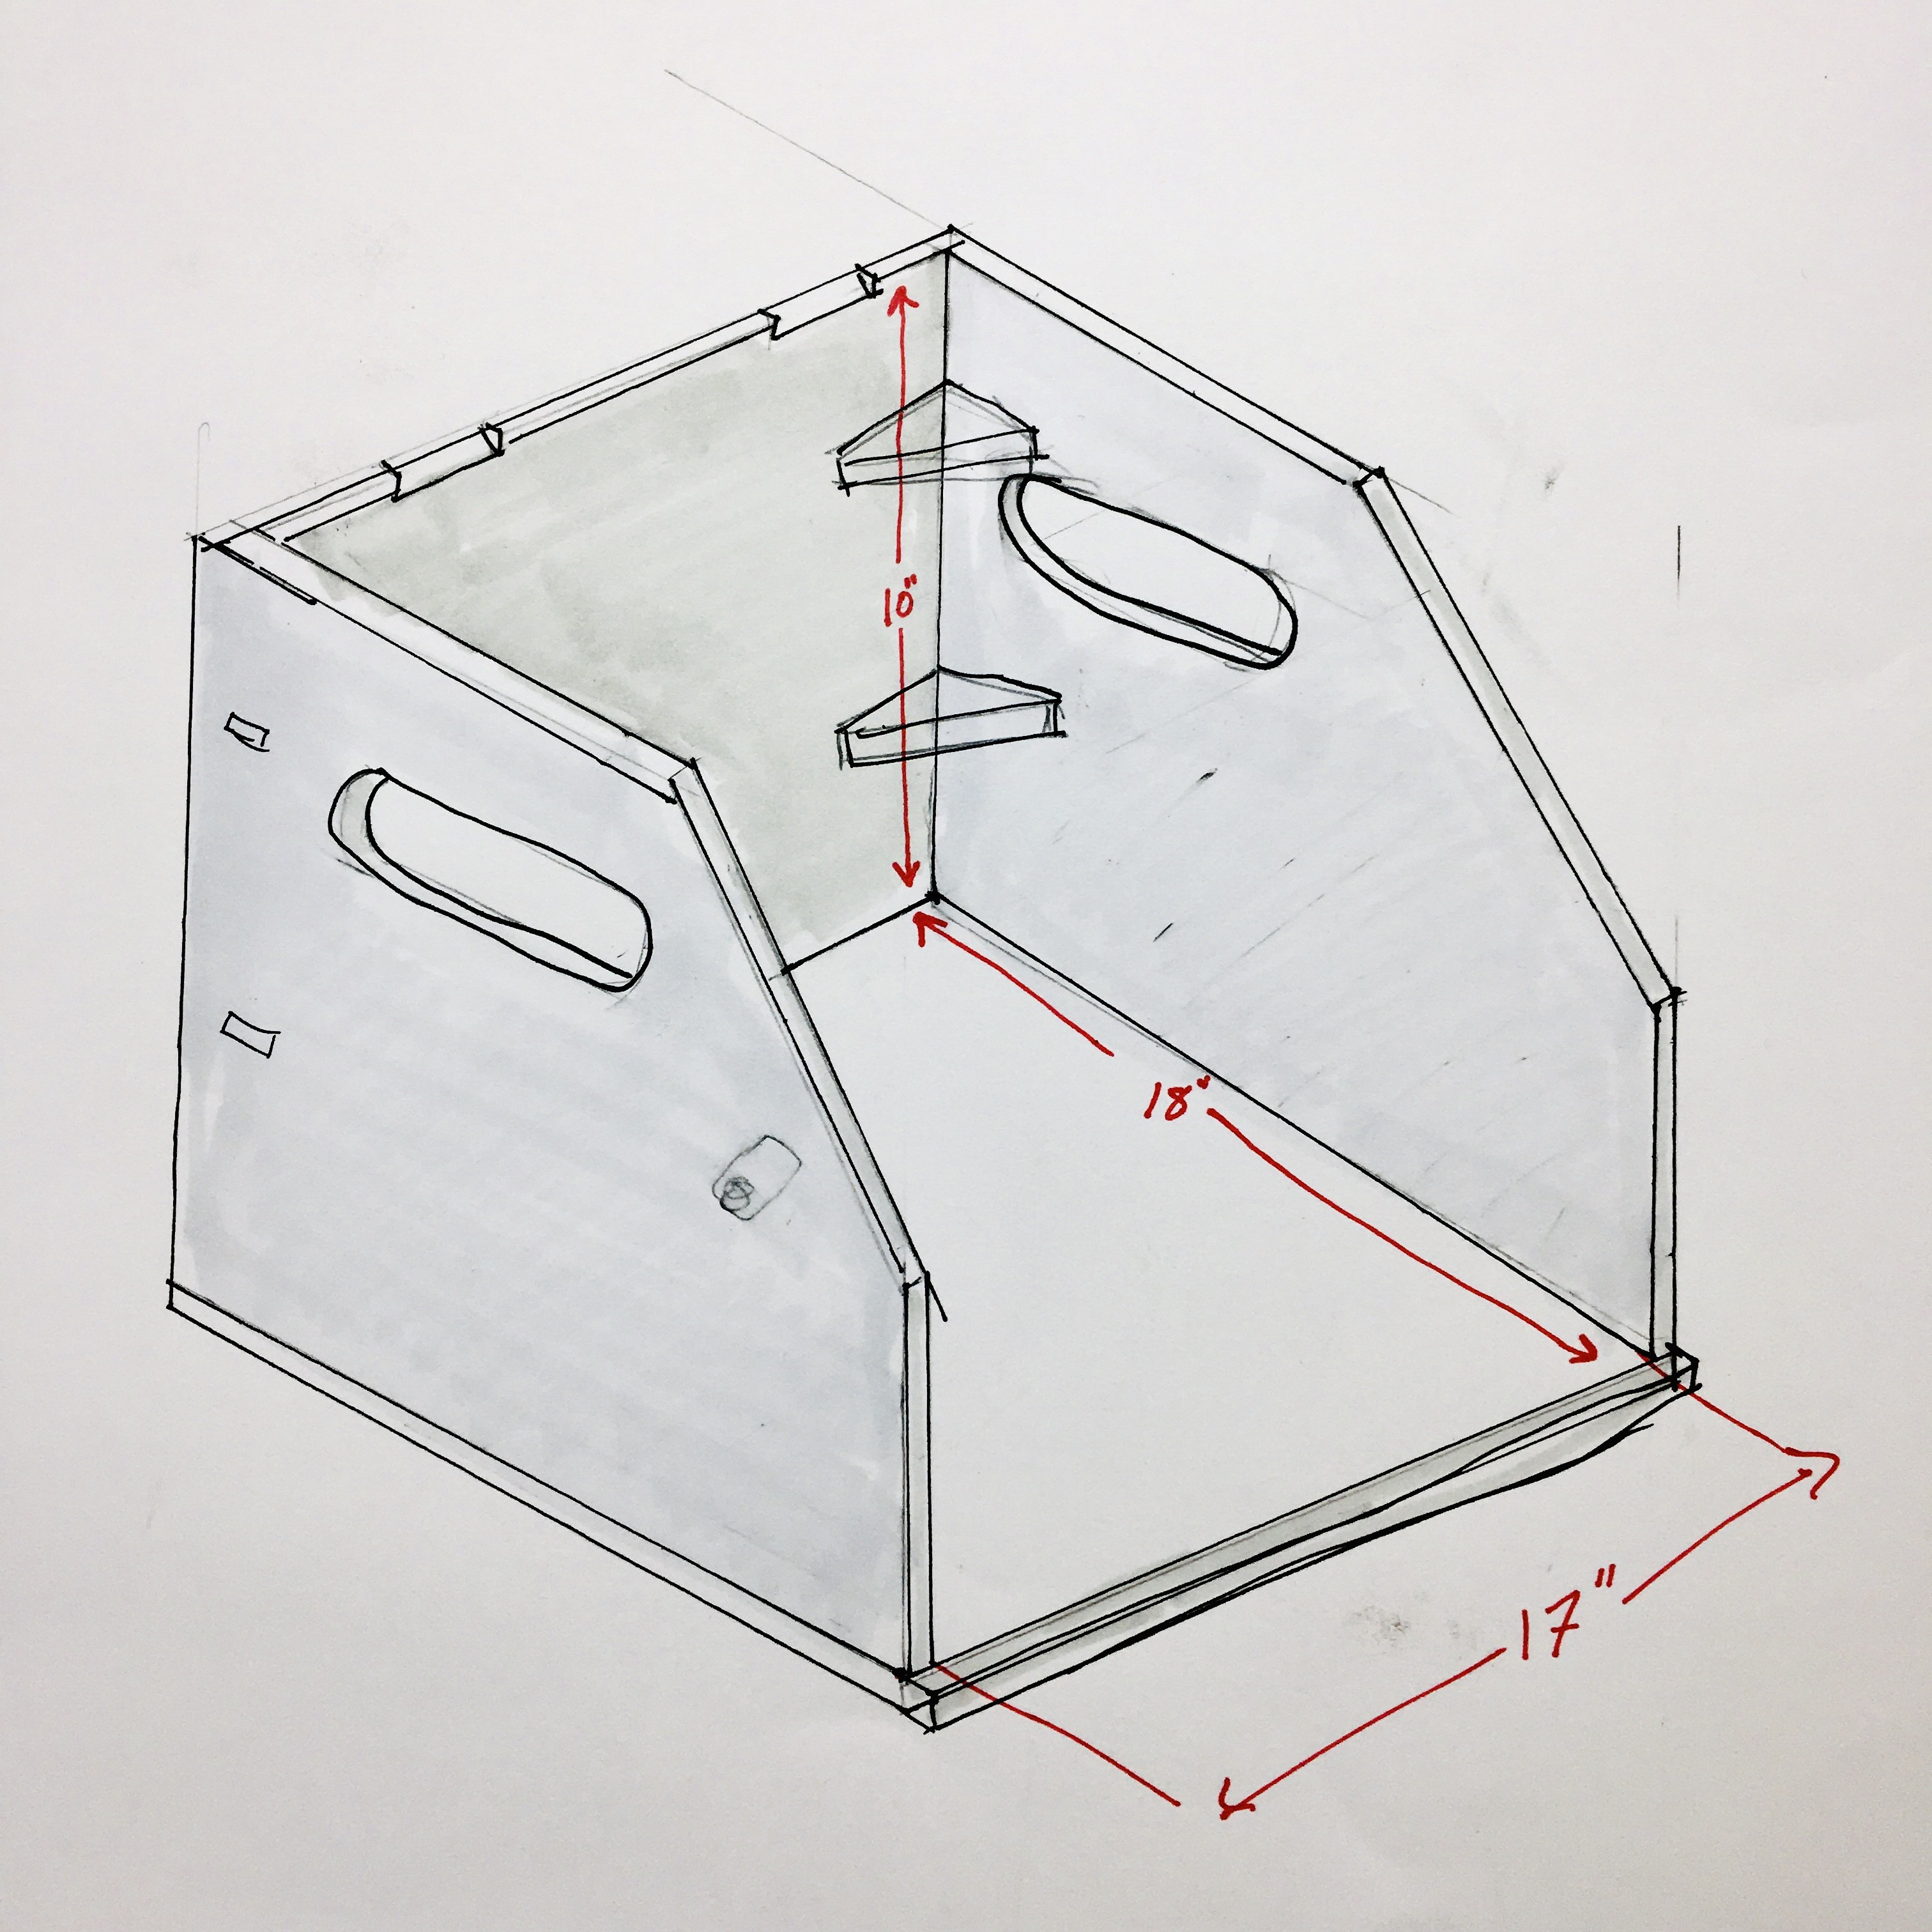
Finally arriving at this version, which seemed close enough to begin the CAD process. We'd also taken a break and made a trip to the hardware store for hinges and latches, which we measured and transfered the dimensions to our drawing. It was starting to take shape.
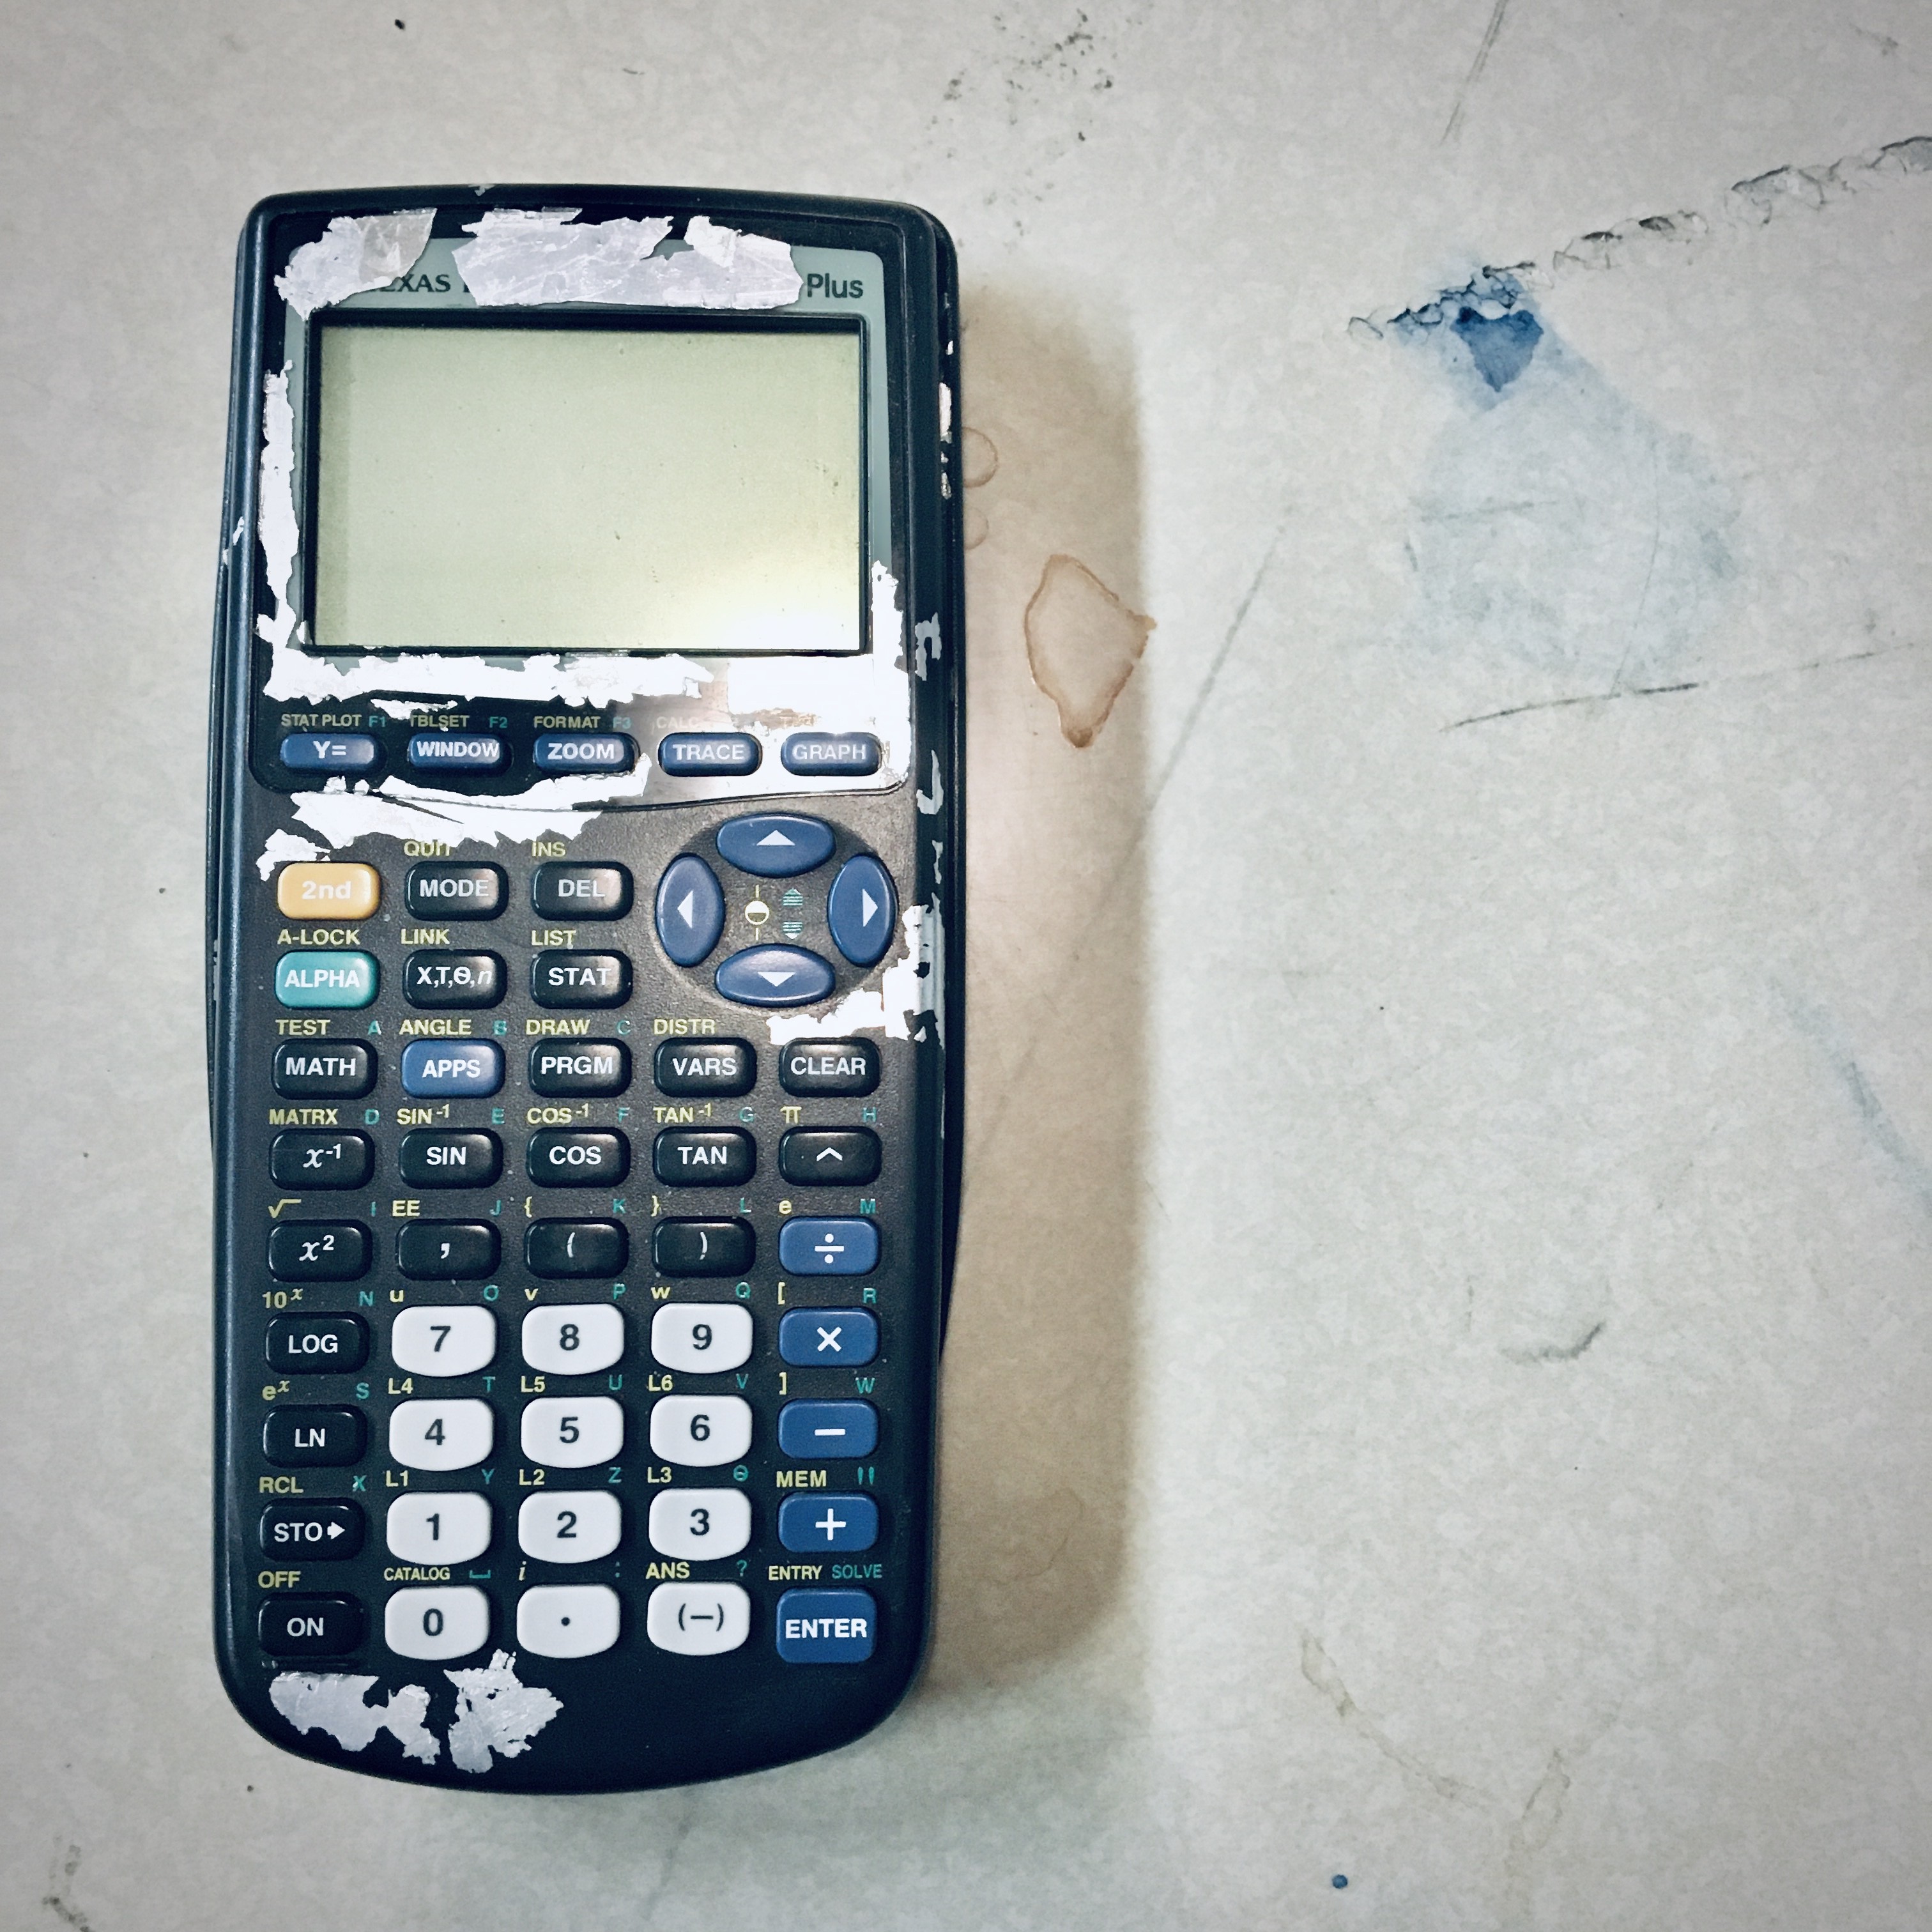
Ethan's high school calculator still finds usefulness even today.

Putting the finishing touches on the Royal logo.

Once the files were done, we had to do some calibration runs on scraps of wood to figure out the optimal laser power and cutting speed for the 1/2" thick plywood. Laminated wood contains layers of adhesive, which can burn at different rates than the wood itself. Also, the gasses and vapors from the cut can defocus the beam, which causes further issues during the cut. But finally we had pieces cut, and the assembly process could begin.
Laser cutting thick plywood, though fast, is frought with difficulties. Ignoring the extensive setup and calibration runs ahead of time, what you end up with are pieces of wood with charred edges. The char can vary in thickness, so it needs to be cleaned up, which results in finger joints that are not as precise as you'd get with mechanical cutting methods. There's also the fact that, once you start glueing up the pieces, you'll inevitably end up with gluey fingers getting caked with messy black powdery char, which then makes unsightly finger prints on the otherwise clean plywood, which then necessitates extensive sanding afterwards; but you can't sand too much, because the outer plywood lamination is rather thin. The result isn't what you'd expect if fashioning perfectly formed, gleeming jewelry boxes -- which wasn't our intent, either. We were looking to create more of an industrial, rugged look, and that's what we got.
We met again that next week to finish up the sanding and some of the finish work. Then this week I put the finishing touches on the box, including sanding the interior and applying a coat of Danish wood oil, then measuring and fitting the mounting blocks which serve to accurately position the typewriter in the case so it's near perfectly centered. The result is as you can see in the top photo of this article.

Here's the case with the lid opened. I used paracord and screw eyes to serve as holding straps to keep the case lid from falling backwards when opened. Inside you can see the mounting blocks for precisely positioning the typewriter feet.
As for protecting the carriage and escapement from unwanted movement, what I did was use a plastic clothespin to lock the carriage release lever in the released position, which disconnects the rack gear from the escapement pinion, thereby protecting the escapement from damage; then I built a set of foam rubber end caps that fit over both carriage knobs, which serve to snuggly position the carriage immobile in the case.
The whole project is documented in the video below. I can easily say that the KMM can now be transported with safety to any venue, and stored securely in my closet should the need arise. It serves to transform what was once a desk-bound typewriter into a mobile (er, luggable) writing tool, in the spirit of those early suitcase-sized luggable computers from the 1980s. Which is no small bit of irony.
posted by Joe V at 11:08 PM
7 comments
![]()
![]()