Monday, February 27, 2017

On the Other Side of the Lens

P1120697b

I have a couple of typewriter-related things to share with you today. The first concerns my seemingly perpetual and tenuous planning for what I hope to be the first ever ABQ Type-In. Since I first had an inkling about planning such an event, late last year, it seems I've dragged my feet, not quite knowing how to go about planning such an event. I needed to decide on a date, time and venue, while also needing some idea about how many people might be expected to show up with typewriters, which dictates the size of the venue.

So earlier this year I put together a simple flier, soliciting interest in attendance, and posted it around town, hoping for the best. I've thus far received about a half-dozen replies to the affirmative.

I also created a gmail account for this project (abq.type.in@gmail.com), through which I put together an informational email packet about Type-Ins, to be sent in reply to any respondent to my fliers.

The biggest hurdle has been finding a suitable venue. I've visualized the event as taking place on a Sunday afternoon at a public place with food and drink, the kind conducive to creatives and the general public alike. I needed it to have some separate meeting room big enough for a sizable turnout (not knowing how many people might show up), yet able to attract people who might just wander in for lunch.

Initially I had limited my search to the area of Nob Hill and UNM, the part of town where one might expect to find creative peoples in mass, but I widened my search after realizing that the ongoing reconstruction of Central Avenue, due to the ongoing Albuquerque Rapid Transit project/fiasco, would hamper access and parking. I also wanted to avoid the time when the NCAA basketball tournament is being televised, while also wanting to avoid Good Friday and Easter weekends.

Then this last weekend I had lunch at Nexus Brewery, in north-central Albuquerque near I-25 and Montgomery, and discovered they have a suitable meeting room, a great selection of award-winning brews, and a good food menu, including the ever-popular chicken and waffles. So today I called their business office and was able to confirm a date and time, that being Sunday, April 23 starting at 1 PM.

I'm excited that this major hurdle has been passed. Now I have to wait on my graphic designer to finish the poster and fliers, and to get some media attention. I'm not a publicist by nature, so this is all new territory for me.

The second typewriter-related item to share with you is that last week I spent several hours at my home being interviewed by an Associated Press reporter for a story about the typewriter revival. He had found me through one of my fliers left at John Lewis's Mechanical Antique typewriter repair shop; where he was having one of his two typewriters serviced. I won't know for several weeks how the story ends up, or in what venue it will be published. During the interview we spent considerable time discussing my background and how I came into typewriters, and why I like and use them. He also was shooting video during this time, much more than taking notes (in a Staples-branded reporters notebook, for those of you office supply geeks). I don't know if the video will be used in some footage online, or if he uses the camera as an alternative note-taking device.

This week I got back to making another episode of my "Confessions of an Office Supply Junkie" series, this being about handmade letter envelopes. Since I'm engaged in several pen-pal correspondences, I use envelopes and preprinted address labels every week. I got to thinking that if I could make my own envelopes I could preprint the addresses via laser printer and dispense with the cost of labels. I ended up with a novel design that is folded from a standard letter-size 8.5"-by-11" sheet of paper, uses only two small cuts and is taped shut for closure. It ended up being just a bit larger than the so-called "6-3/4" small letter envelope size. I did a cost comparison, using for prices the Staples brand of copier paper and premanufactured envelopes. The paper is about 1 cent per sheet, while a premade envelope is around 6 cents per. Of course, the cost of a few inches of adhesive tape also has to be factored in; but it is still less expensive for this homemade version, even though it looks a bit novel in design (the term "novel" being a more polite alternative to "weird").

Speaking of YouTube videos, while I'm nowhere near being a heavyweight in the YouTube arena, I was heartened to see the Samsung commercial at the beginning of last Sunday night's Academy Awards telecast, featuring YouTube star Casey Neistat, who played himself giving a mock awards presentation in a dark, rainy, empty parking lot (implying the huge gap between established Hollywood personalities and us small-time YouTubers). His short speech honored all of us unknowns who follow our dreams of creativity through video production; unlikely to be walking down any red carpets in designer clothes anytime soon. Of course, it was a Samsung advertisement about mobile phone tech, we must remind ourselves - ultimately for commercial purposes, but I felt heartened by it anyway.

I'll keep you informed of any further developments pertaining to the upcoming ABQ Type-In. Happy typing and envelope-making.

Post-Script: Here's my video on handmade letter envelopes:


Here's a link to the Samsung commercial about us YouTubers:


Here's the link to Nexus Brewery's website.

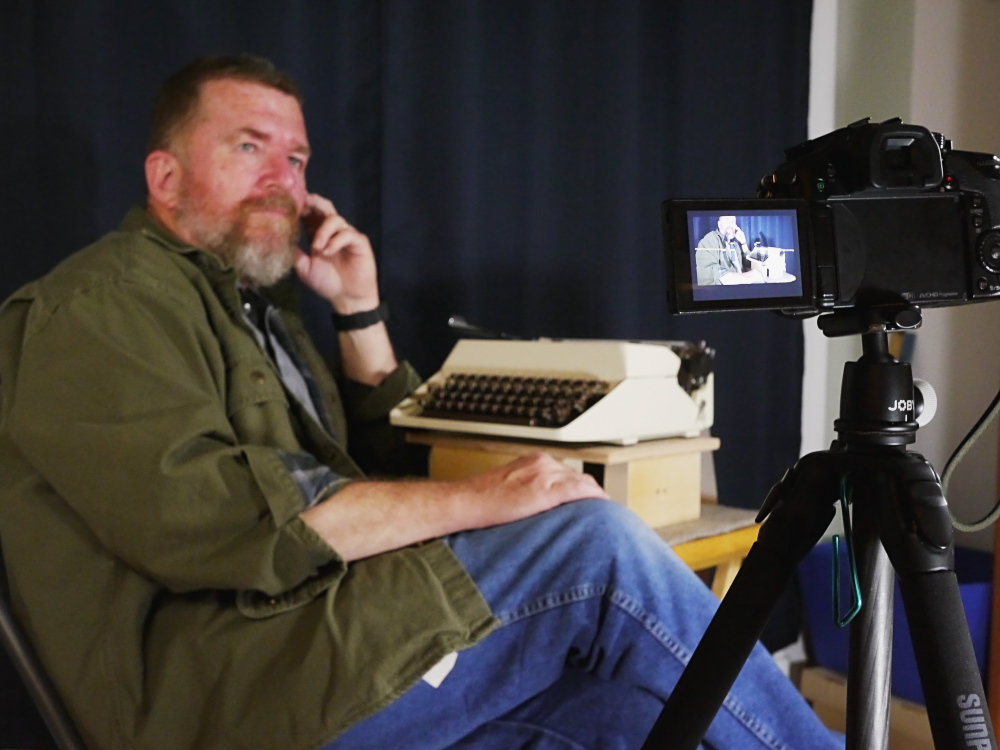
Final thought: The lead photo in this post has me posed in front of my video camera setup (Lumix GH3), adjacent to the Facit 1620 typewriter. Even though the focus of the shot was intentionally directed at the screen of the GH3, with the background left soft, you might be able to tell that the Facit is sitting propped up on some kind of wooden platform upon a folding tray table . This was a cobbled-together contraption to get the typewriter at a more ergonomic position while seated in my office chair, whose height I didn't want to keep adjusting between my main desk, which is higher, and the tray table, which is lower. The platform is very stable, and the newer typing position is much more conducive to extended typing. This post's first-draft was composed using the new setup onto the roll of teletype paper. I would have made it a typecast, but I didn't want to interrupt my stream-of-consciousness typing with correcting my numerous typos; and I'm too self-conscious to post that messy of a typed sheet.

Labels: , , , ,

Monday, February 20, 2017

Firmness of Intent

To Be Filed
Typecast275

Post-Script: Perhaps I'm wasting opportunity by writing random nonsense while test-typing, instead of something more worthwhile like memorizing and typing the Gettysburg Address, or one of the Articles of Confederation, or a bible verse. But I see it as an opportunity to test my creative mettle while engaged in typewriter maintenance, a kind of right-brain/left-brain mashup. And I've come up with some funny stuff, some of which isn't appropriate for mixed company.

One thing I enjoy about building up a backlog of papers waiting to be filed is the pleasure that comes from reading back through those pieces and rediscovering them anew. I'm going to make a point of revisiting my old writings more often, for inspiration if for no other reason.

Today I spent some time organizing my typewriter collection, in preparation for an interview to be conducted tomorrow. I won't say anything else about it for now, but will update you when appropriate. I attached tags to all of my typewriter cases, so they can be more easily identified; some of those mid-20th century, medium-sized portable look very similar in their cases.

Typecast via Brother Charger 11. Yes, it's a stripped-down student's model, lacking tabs, touch adjustment or a repeat spacer. But it is solidly made and types fine; and is very portable, a pleasure to take out to the front patio on a cool winter day.

Labels: , , , , ,

Tuesday, February 14, 2017

Type-A-Sketch

Writing_Flowchart001

Typecast274

Post-Script: See Typewriter Video Series Episode 56 for more on using the manual typewriter as a mechanical drafting machine.

Here's the line maze I drew today, using the Facit 1620 and Bic Cristal blue medium point pen:

Facit_1620_001
As is the case with all of my so-called "line mazes," you follow the line itself, rather than the space between the lines. Conventional mazes use the space between lines as the passageway, with the lines to either side representing the walls of the maze. My line mazes are more like 3D routing diagrams. The lines cross over one another and don't make a turn until you get to an elbow (or corner); lines only connect to one another at a "node." There's only one node in this maze, the bold dot where four lines converge.

You might notice that I had to hand-draw the node dot; I tried typing an asterisk for the node, but the alignment between the typed characters and the pen holes in the paper guide of my Facit 1620 are not exact.

This was more of a test drawing than a really challenging maze. I find using a typewriter as a form of mechanical drafting machine is rather fun. The horizontal spacing of the vertical lines is governed by the character spacing as defined by the escapement mechanism; while the vertical spacing of the horizontal lines is governed by the ratcheting of the line advance mechanism. Thus, the smallest resolution you can draw - the closest the lines can get to each other - is limited by this mechanical, orthographic grid system of the typewriter's mechanism.

You can move the drawing point in any of four directions. Horizontal movements are done by either the space bar, the backspace key or manual movement of the carriage via the carriage release lever. It's best to draw from left to right (move the carriage from right to left), because backspacing causes the carriage to overshoot the end point, due to the nature of the escapement mechanism. Similarly, I find it better to draw vertical lines from bottom to top, since you can see more easily the drawing and where you need to stop.

If your typewriter has more than one notch or hole for a pen in the paper guide, it's best to choose one and stick with it, since the two holes or notches might not be exactly aligned to the grid system of the mechanism, or each other.

I used a ballpoint pen for these drawings, but another type of technical drawing pen would be preferred. As well as better quality paper than the newsprint-quality teletype paper roll I was using.

If you have a wide-carriage machine, this would be ideal for drawing landscape-oriented illustrations on full-sized paper.

Bonus: Here's a line-maze version of a labyrinth, hand-drawn. It could have benefited from the orthographic alignment of the Type-A-Sketch, so as to make the lines much straighter. Being a labyrinth instead of a maze, it only has one passage, so you can't get lost. Start at either end. As with all line routing networks, the lines cross over one another without connecting. Lines go straight until they bend at an elbow. I rather enjoyed coloring the various cells in. My personal rule is two adjoining cells can't have the same color; similar colors can only touch at their corners. Oh, the title of this piece is "Centripetal Labyrinth with Hysteresis, 1.0." Don't ask me why. I think it has something to do with the way the lines converge on, then fly away from, the center point, like a comet in a highly elliptical orbit. As with all "art-speak," it only really matters to the artist, and the academic community. In this case, there's only me, since no one would seriously consider this to be "art."

Labyrinth001

Typecast via Brother Charger 11, lap-typing in the front courtyard on a cold day.

Labels: , , , , ,

Tuesday, February 07, 2017

Notes on Lap-Typing


Typecast273

Post-Script: As you can see from above, I did end up making another video, on lap-typing. I happen to love portable and semi-portable typewriters, and what I find most distinctive about them is their relatively compact size and weight makes them ideal for moving out from the traditional office/desk setting, into more creativity-spurring environments. After all, this is why they are called "portables" in the first place.

I was hoping to try my hand at making a medium-size portable like the beloved Smith-Coronas Silent into a more take-anywhere machine, by removing the top of the hard case and, keeping the machine secured to its base, enclose it in a soft material like an old pillow case, then slip into a backpack, for carry-anywhere portability. But alas, my little day pack is a bit too narrow for that idea to see fruition. Perhaps a slightly wider back pack. Of course, a person could lug the case by its handle, but who wants to do that for more than just a few minutes at a time. I was also brainstorming some idea for attaching straps to the hard case, so it could be portered on one's back, but no winning ideas have yet to see the light of day.

Speaking of Smith-Corona Silents, yesterday I brought out the Silent-Super for a bit of test-typing, and noted that, after it's been sitting for several months unused in the cold garage, the troublesome escapement issue returned. I spent several hours yesterday afternoon with it and its stablemate non-Super Silent next to each other on the bench, as I used the less problematic machine for a comparison, and found a few mechanical adjustments needing to be made, and some hardened pivot linkages needing to be freed up. Afterwords I spent an extended period of time with the machine and it hasn't skipped once. But that doesn't necessarily mean that it's fixed, no sir, because one has to remember where it came from: a Craigslist ad from a fellow who I'd generously describe as a "hippie," living in the filthiest house I'd ever stepped foot into (and I used to do TV repair service calls, years ago, and have seen a few grungy dwellings in my time). I spent several days initially cleaning and degreasing this machine. Even now there's a bit of funky odor emanating from the hard case, just a subtle reminder of its colorful pedigree.

This typecast was via the recently acquired Brother Charger 11, a humble but willing writing companion, and truly fit for lap-typing.

Labels: , , , , , ,

Wednesday, February 01, 2017

3D Line Mazes

1-31-2017001
(Click to embiggen)
Follow the lines themselves, from Alpha to Omega. They cross over but don't connect to any other line except at the large square nodes. A line goes straight until it makes an elbow bend.

It's strange how events that transpired long ago in one's life can leave a lasting impression. That's the case here, and the reason why there's a colorful, hand-drawn maze adorning this blog posting. Permit me to spin a yarn.

It's the spring of 1971 and I'm several weeks from graduating 8th grade middle school when I come down with a bad intestinal flu. I'm home-bound for several weeks, missing the end of 8th grade, and the illness isn't getting any better. Then one day the pain begins, and gets worse and worse. Finally my dad drives me to the hospital and we find out I have a ruptured appendix that is badly infected with gangrene and peritonitis. I go into surgery an hour or two before dying, or so says my surgeon, Dr. Goddard, a relative of the famous rocket scientist. The hospital was Lovelace Clinic at Bataan Hospital, the same place the Mercury 7 astronauts underwent their pre-flight testing.

I'm in the hospital for several weeks before being sent home, during which I get rather used to the nightly morphine shots administered by the pretty nurse; by now I'm age 13 and already beginning to notice such things. The doctor advises me to take it easy during the summer recess and to not go out for sports that next school year; this decision has a life-long effect upon me being non-athletic.

So what's a kid to do? Hang out at the public library, that's what. Read up on interesting subjects; some that will end up holding my interest throughout my adult life. One of those topics was mazes, and I read every book I could find on the subject.

During that long, lazy summer I began to draw a maze on a sheet of notebook paper. When I filled the page I realized the maze was far from complete, so I taped on another sheet and continued. By summer's end it was done, a scroll of paper about 8 feet long containing blue Bic cristal inky pen lines of swirls and whorls. I'd figured out this graphic design element of double- and triple-spirals, where a pathway leads into a vortex, at the center of which is a decision point node that spins its way back out, only to connect to more such vortices.

Proud as I was by the maze, I had opportunity to show it off in a 9th grade class where our assignment was to "show-and-tell" what we did over the summer vacation. Naturally I didn't want to tell about my illness and resulting operation, so instead I brought The Scroll Maze to class. Much to my chagrin, the teacher demanded that I prove, right then and there, that the maze actually worked, otherwise I wouldn't get credit for the assignment. So I spent the rest of the class ruining my maze with the pencil line tracings of my route from start to end.

I was so incensed by having to ruin my maze that I tossed it out when I got home. Of course, in retrospect I now wish I hadn't. But that maze-drawing experience stuck with me. A few years later, while in military service, I began collecting maze books. One such book was the classic Dover Publications edition of "Mazes & Labyrinths - Their History & Development" by W.H. Matthews, a thorough, historical analysis of mazes ancient and modern.

The book that changed my understanding of maze design was Greg Bright's "The Great Maze Book," which introduced to me the idea of what he called "one-way valving," a topological method of steering the subject away from the correct path, so as to make it as difficult as possible.

I eventually came upon my own method of drawing mazes, what I call "line mazes," meaning the pathway to follow is the line itself, rather than the space between lines, as in a normal maze. Then I realized that the maze could be rendered in 3D if the lines were permitted to cross each other without connecting; actual connection nodes were explicitly drawn so as to reduce ambiguity. The final topping on the cake came years later when I realized that a finished 3D line maze could then be colored, Mondrian-style. The result is what you see at the top of this article.

I'd first advise you to click on the image for a larger rendering, as the 650-pixel wide default image is a bit too small. Follow the maze from Alpha to Omega. Or you could try it backwards, but there's no advantage in doing so. And mazes can be designed to purposefully foil those who try working them backwards. Because us maze designers can be a cruel lot.

Follow the lines themselves. They cross over but don't connect to any other line except at the large square nodes. A line goes straight until it makes an elbow bend. You can appreciate the colorful graphic design on its own merits, but there's no hint or clue to the solution given by the colors themselves.

I've included below the schematic diagram for the maze's solution, along with a template map that labels each node and the corresponding letters associated with each path entering or leaving the nodes, as an aid in the puzzle's solution.

I designed the maze by drawing the schematic diagram first. You'll notice there are no dead-ends in this design; instead, I use loops, where a path exits a node (such as path "C" from node 4) and later reenters that same node. After designing the schematic I then laid out the location of all six nodes, then began drawing the lines themselves.

When designing the maze it's all too easy to crowd the lines together too closely early on such that later on, toward the end, it's more difficult to finish. I've thought of ways to prevent this, such as using an under layer of grid paper and assign each segment of the maze its own portion of the grid. For example, this maze has ten discrete pathways (count the lines connecting the various nodes). So using engineering grid paper that has a major grid in bold lines divided into tenths, each pathway would be drawn such that its lines stay on only its portion of the grid; i.e. pathway 3 would only be drawn on the grid lines three spaces over from the major lines, etc.

The result would be a more homogeneous design, with the lines more evenly covering the canvas and each path segment geographically encompassing more of the entirety of the page; with conventional 2D mazes, you'll often find pathways limited geographically to certain areas of the layout, which can give the solver clues to the maze's solution.

It's also possible to use a graphic design program and make the lines absolutely straight and true; whereas in this maze it's pretty obviously hand-drawn and colored with Prismacolor pencil.

Regarding the "one-way valving" principle of Greg Bright, he never actually explained in his books how this works, but I figured it out by assuming that when the solver reaches a node the decision of which branching point to take is made at random; thus, probability theory can be employed in the maze's design.

In this example maze, one-way valving would be evident if I had made nodes 4,5, and 6 with four branches instead of three; when entering node 1 the solver would have a 50% chance of choosing the correct path to node 2; but if he makes an incorrect choice and heads to node 4, then he only has a 33 1/3% chance of getting out of node 4 back onto the correct path. So probability can be used to steer (or "valve") the solver away from the correct path, by making it easy to wander off the correct path and harder to get back on. Just like as in real life.

I also figured out a difficulty rating system for these mazes, involving the odds of solving the maze first time with no backtracking, by multiplying the odds of choosing the correct path through each node. In this example maze, the chance of threading nodes 1, 2 and 3 first time with no backtracking is 1/2 x 1/2 x 1/2, or 12.5%. The lower the number the harder the maze.

Another design concept involves multiple correct routes from start to end, instead of just one. This maze is a classic example of there being only one correct solution path. But suppose the schematic diagram were more like a grid instead of only one correct route? The start could be in the upper left corner of the grid and the end in the lower right corner, for example; most of the nodes would each have four branches; or the sides could be wrapped around to the opposite, so every node has four branches. There wouldn't be just one correct solution through the grid, but many. And no dead-ends or loops. Would that make the solution easier? Perhaps; or, it could also make it more difficult, since it would be easier to get tied up in the complexity of connectivity and never reach the solution. Given my limited mathematical background, I have no idea how to determine the probability rating for solving such a multi-solution design. But these were the kinds of thoughts that kept me preoccupied all those years.

There are ways to make these mazes fiendishly difficult, besides employing one-way valving. For example, take advantage of the propensity for people's eyes to wander off the correct line. Surround the correct path with other lines that don't connect anywhere else but form an isolated, dead-ended loop; once your eyes mistakenly cross over into this nether region, woe betide you, you'll never get out without starting over. And the more graphically complex the maze, with lines drawn tightly together, the more likely you are to slip up. These kinds of graphic features are difficult to model mathematically. My triple-spiral graphic method from long ago was one such technique that can be used in this manner, since while threading the spirals it's all too easy to skip over a line into a neighboring pathway.

I'm interested in these mazes as much for their graphic design potential as for their connectivity as puzzles. This example maze is not great art, nor is it particularly complex as a maze. But it does introduce you to my idea of 3D line mazes, which I may share with you once again, the next time I find myself sitting at the kitchen table late at night for hours on end when I should be in bed. I also have a number of mazes from long ago, which might find themselves herein.

Post-Script: Here's the solution to the maze, including the schematic diagram and the location mapping of the nodes. Have fun.

1-31-2017002

Labels: , ,