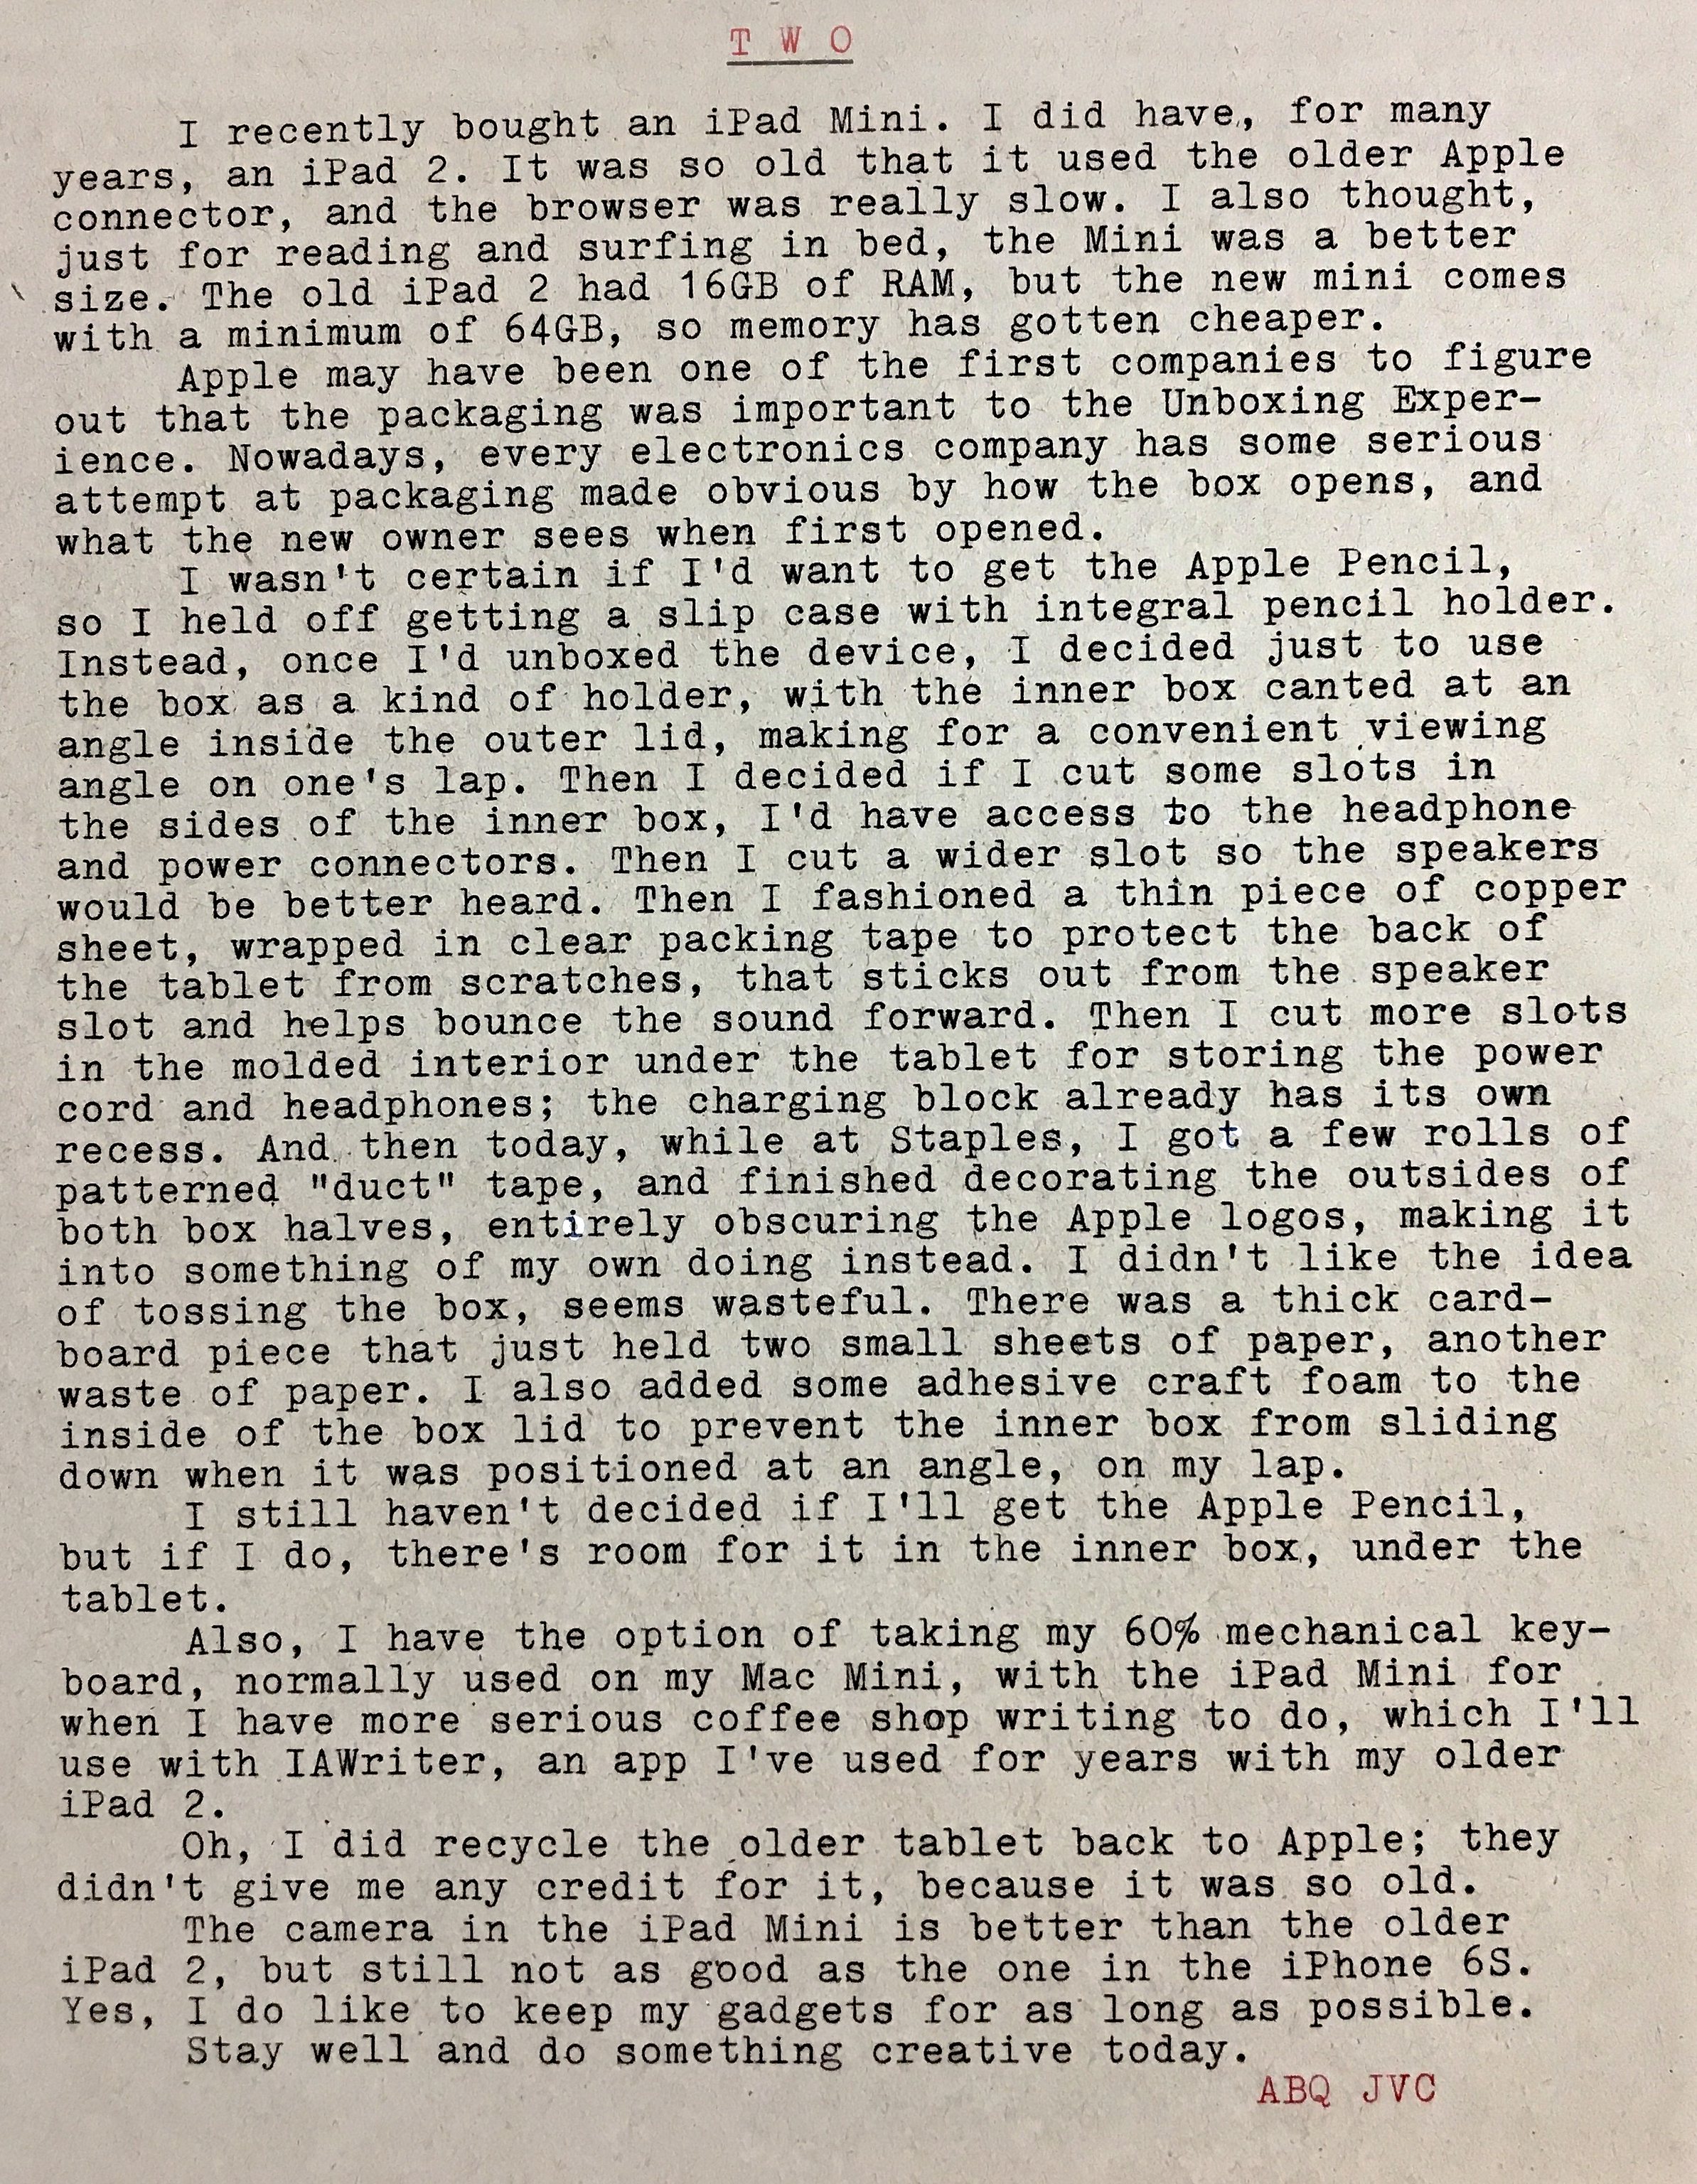
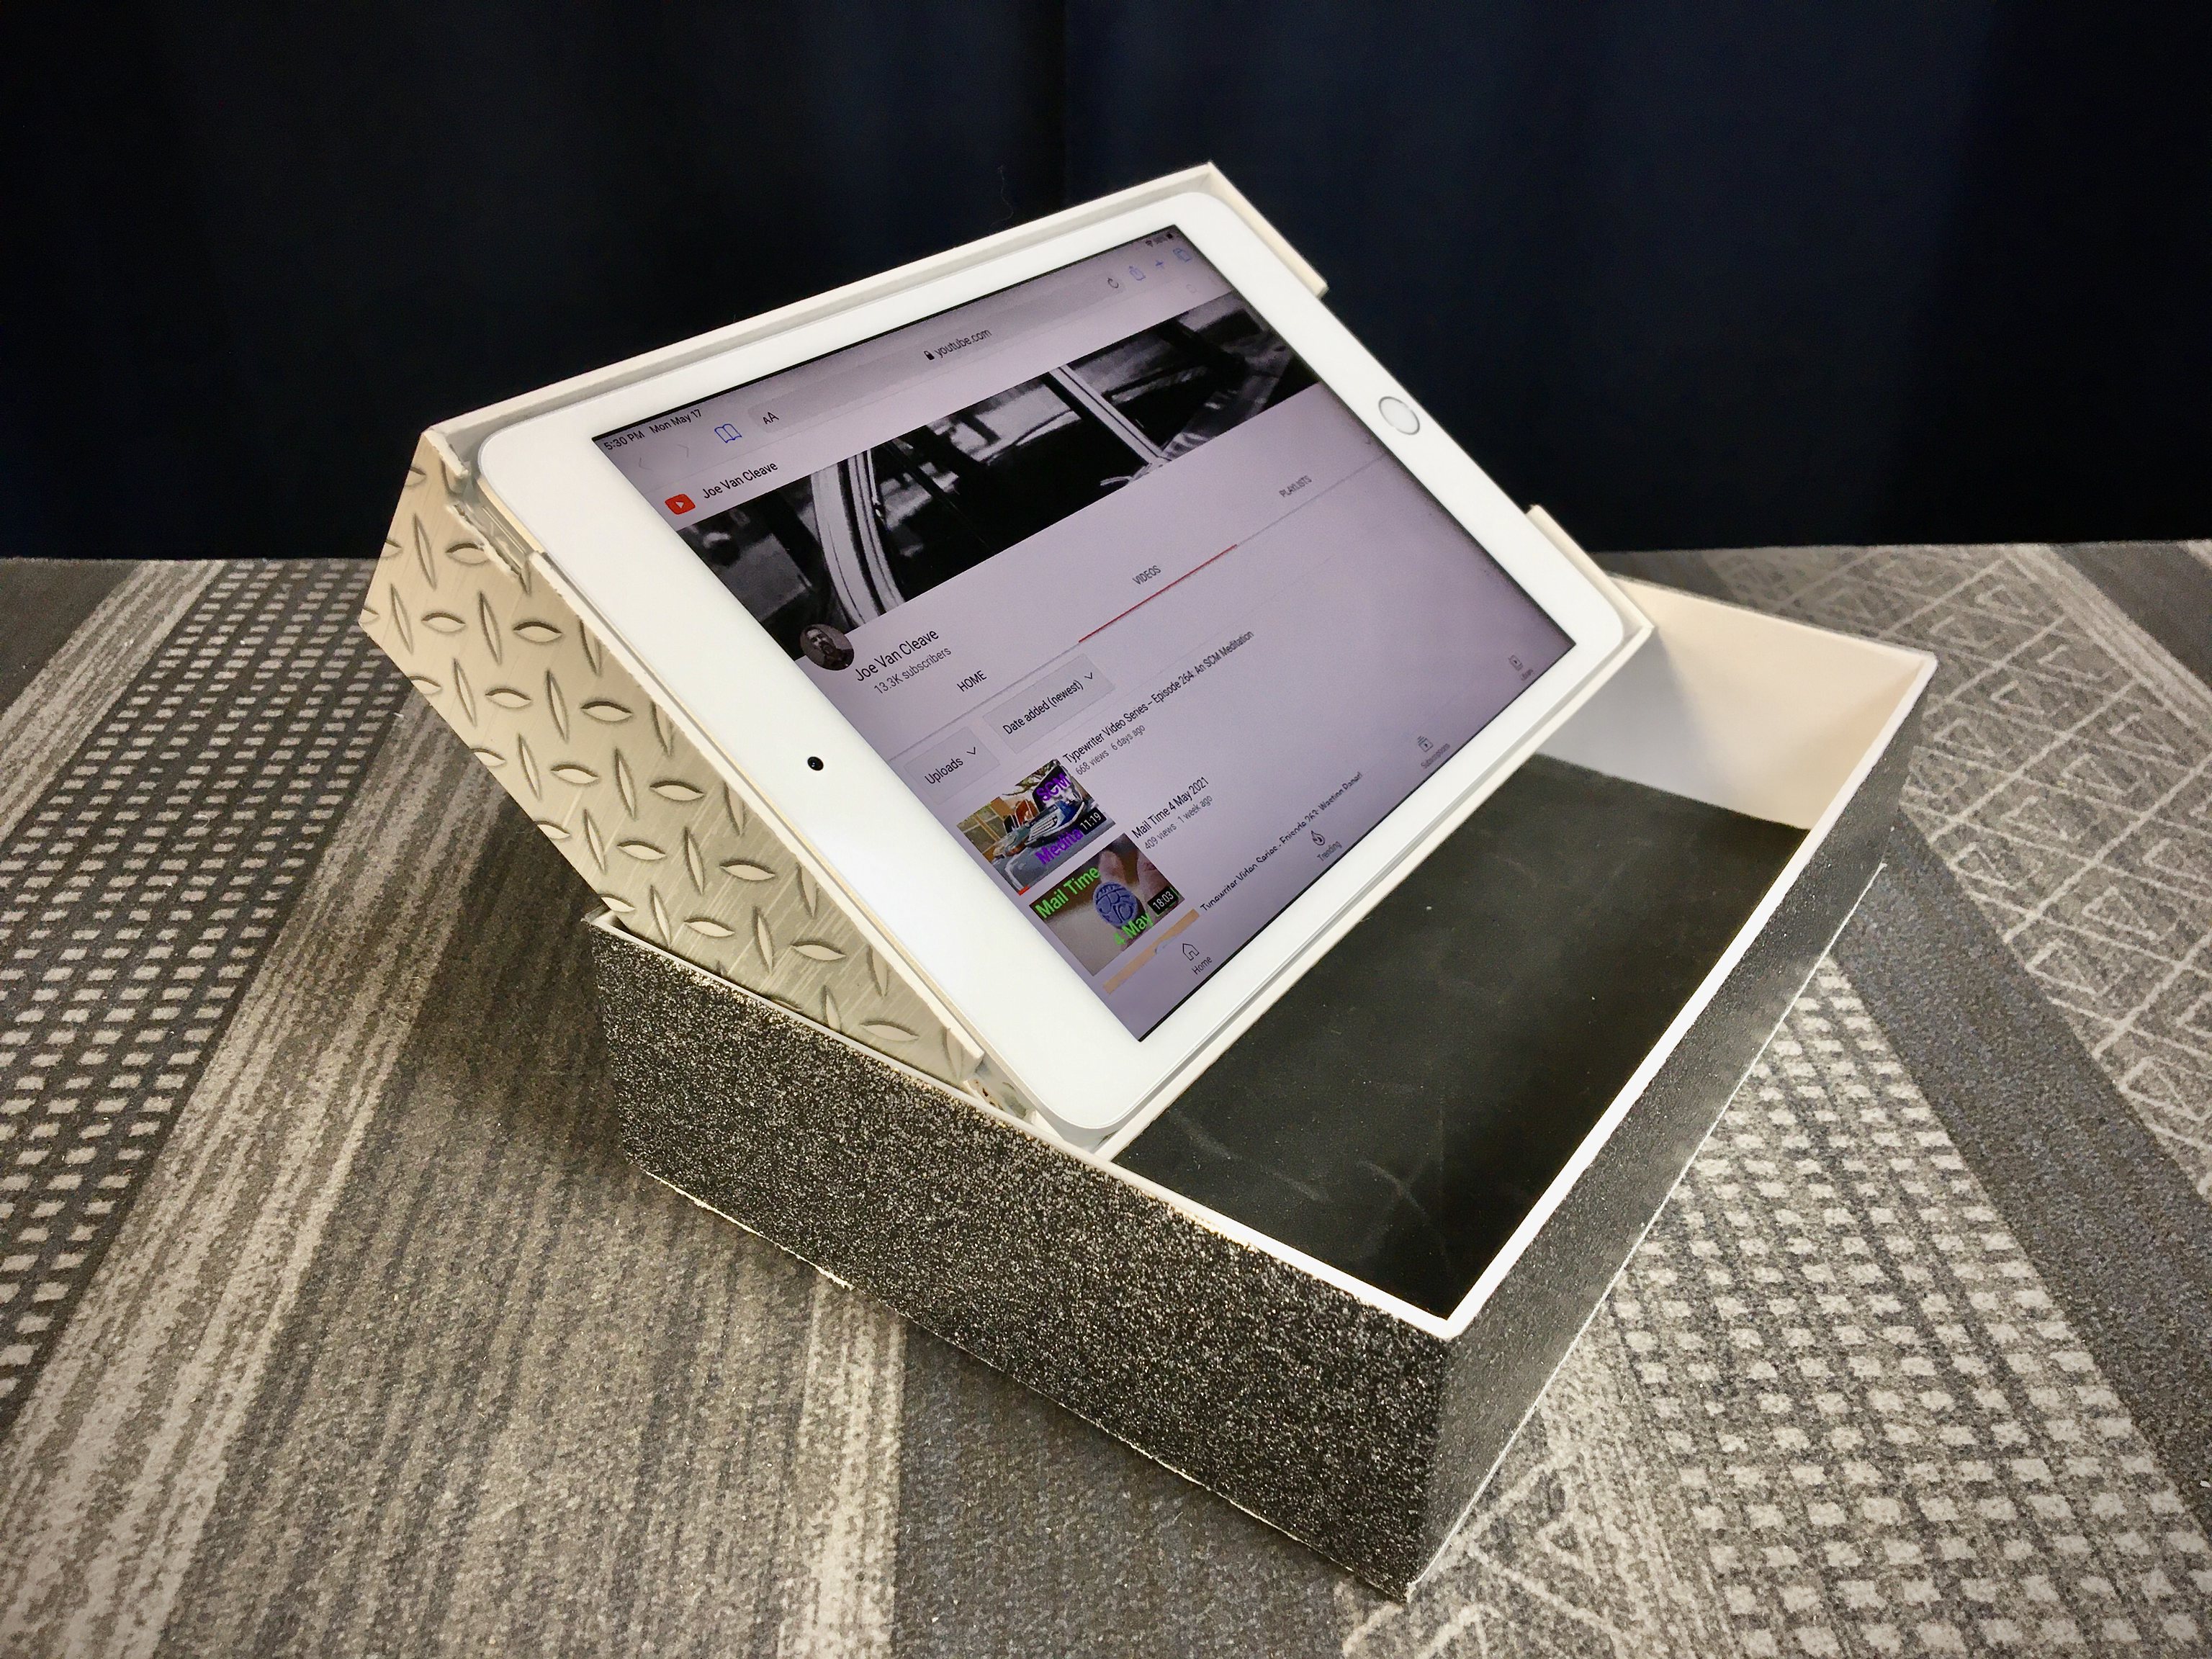
Royal Mercury Patio Typing & DIY iPad Mini Holder Box
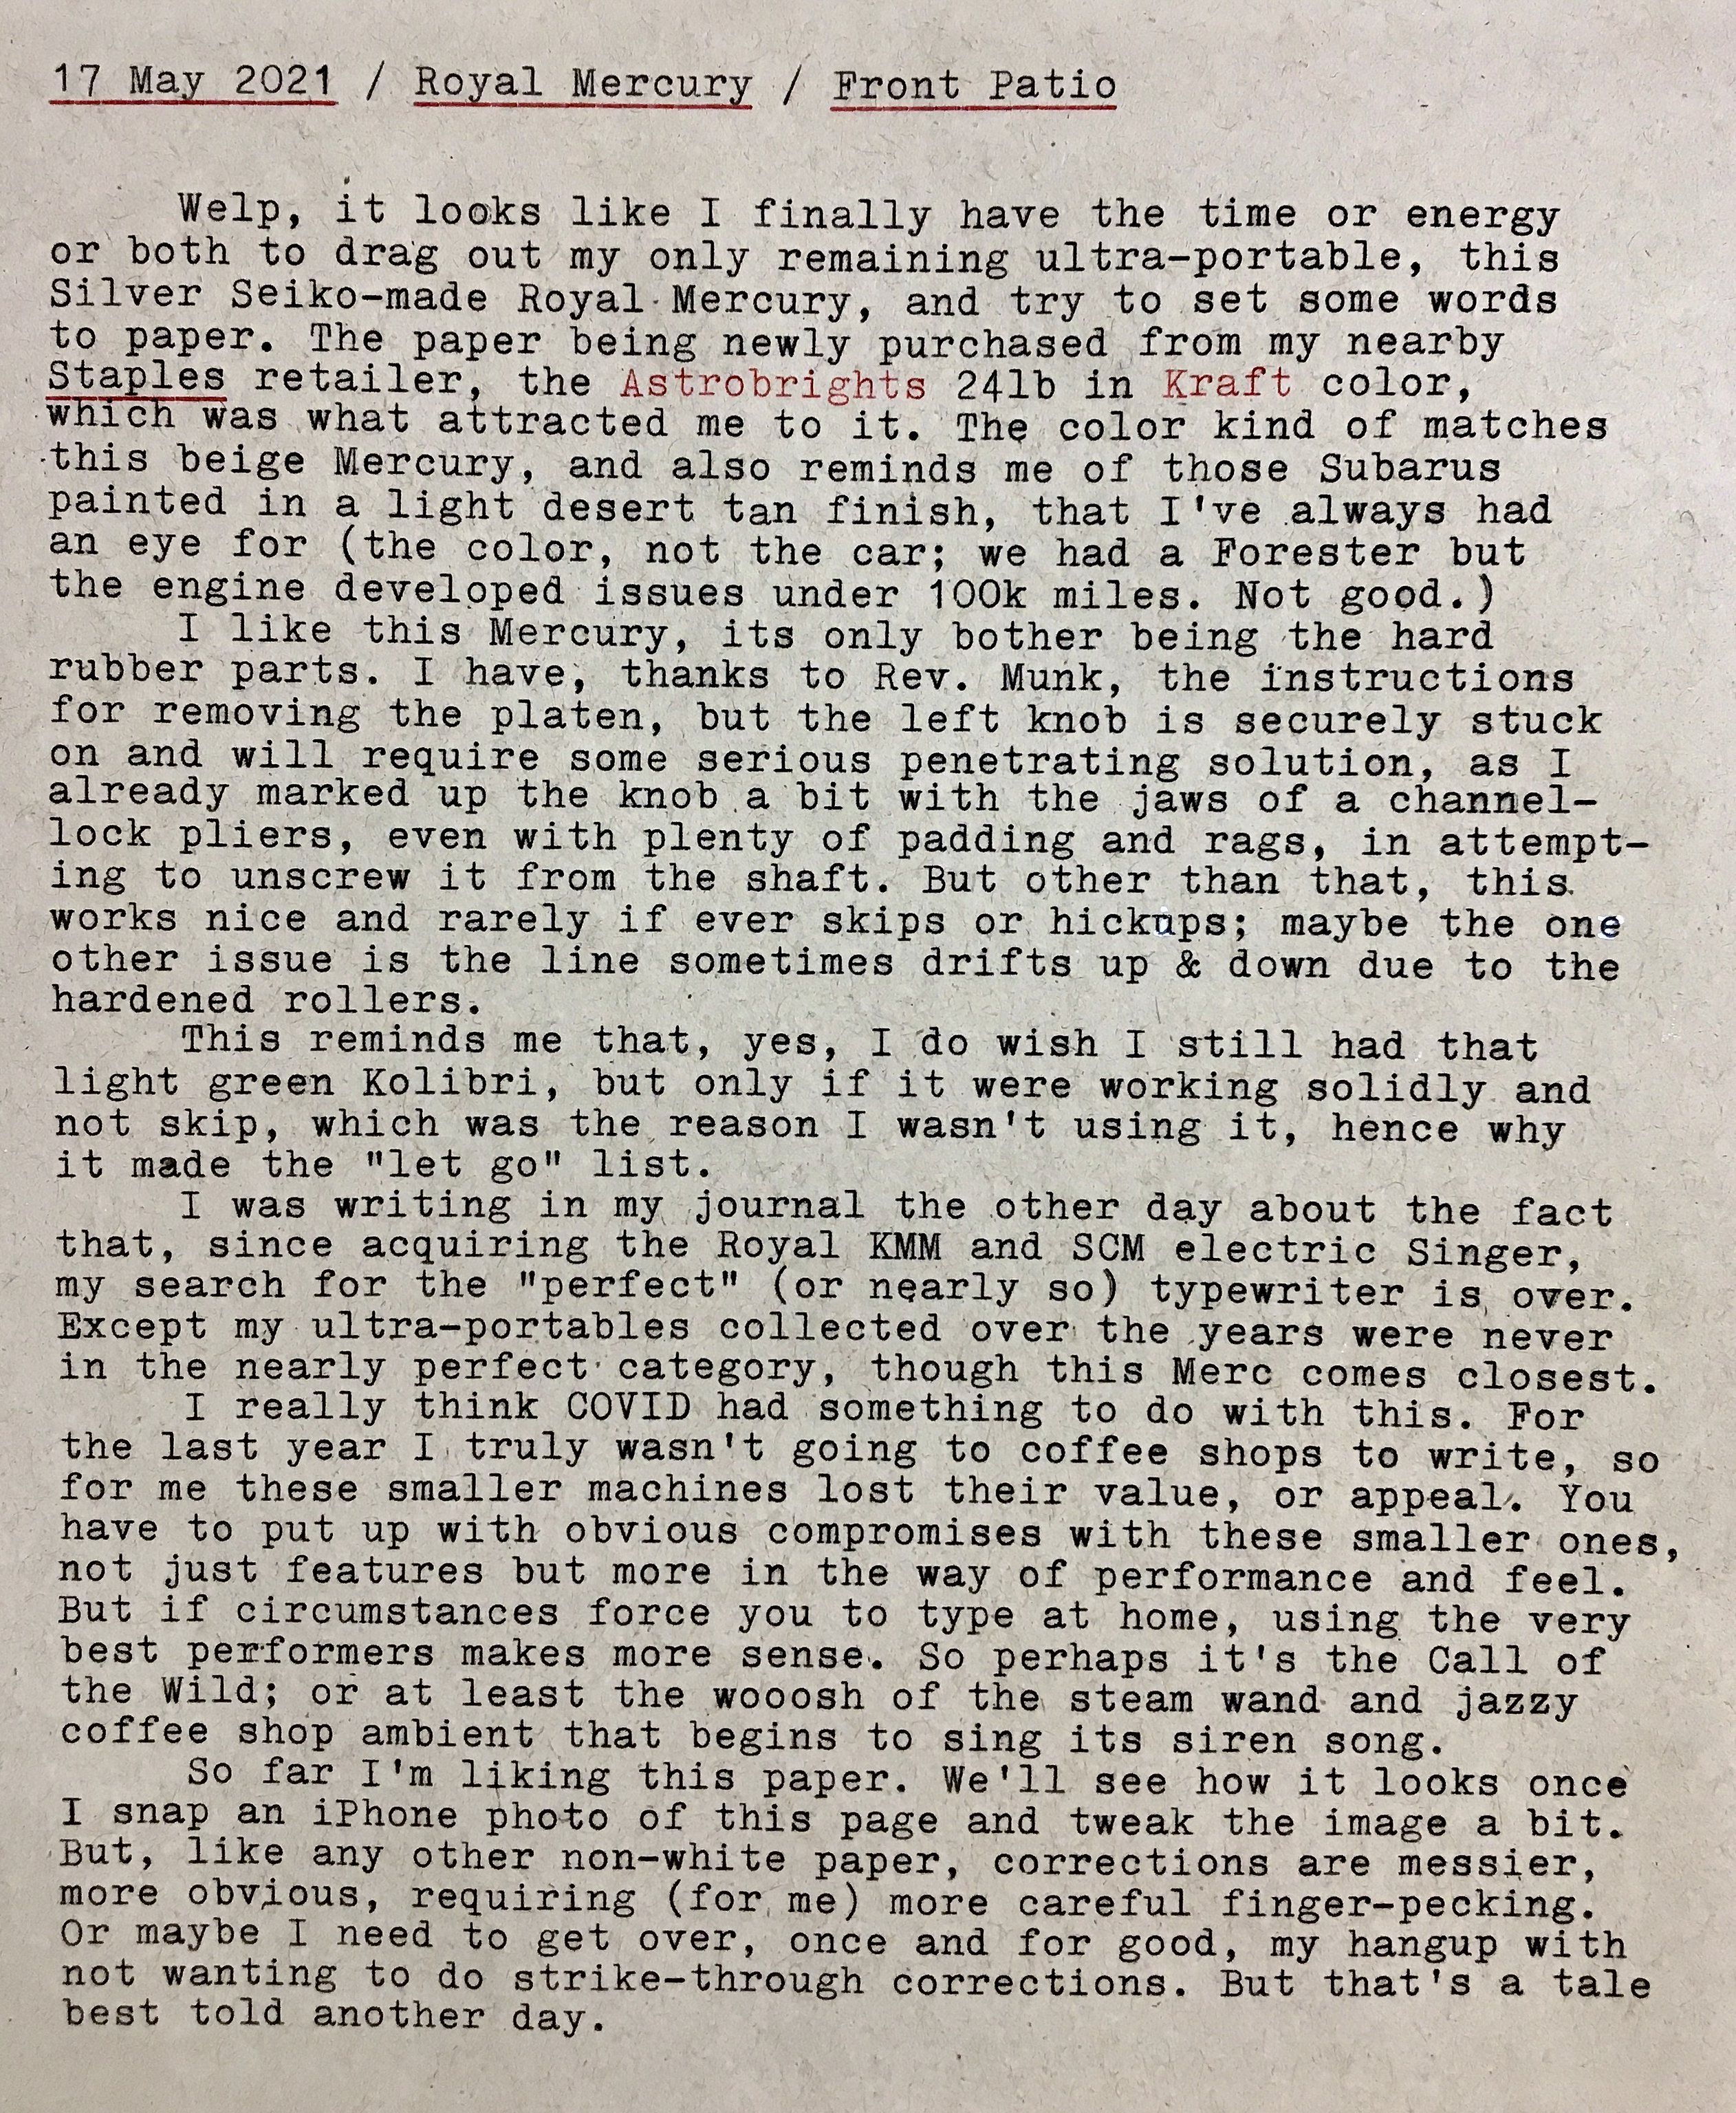
The blue patio table umbrella gives the Merc an unnatural hue, but it's really a bland beige.
The Astrobrights Kraft paper cover sheet, atop one of my favorite clipboards.
The inner box positioned for ideal laptop viewing.
The slots cut in the side of the inner box for headphone jack and power button access.
Slots cut into the interior for headphones and charging cable storage.
The copper sound-bouncer plate in position, ideal for watching (and listening to) more typewriter videos of course! Also note the black craft foam inside the outer box to prevent the inner box from sliding around while positioned at the ideal viewing angle.
The Duck-brand "boiler plate" patterned silver tape really sticks well, but the 3M/Scotch-brand sparkly dark gray tape not so much. Go with the Duck brand, if you have notions of decorating your tablet's original container box.
The clipboard shot above reminds me that I need to make a review video about my clipboard collection. Because you can't have too many clip boards. And with a piece of hardware store masonite board and a large binder clip, you can make custom-sized clipboards too!
It's been several weeks since we -- Ethan Moses and myself -- began designing a storage/transport box for my 1947 Royal KMM. I've had this machine for a few months, since purchasing it from John Lewis Mechanical Antique Repair, here in ABQ. John's been servicing these machines for over 50 years, and the typical way he approaches these projects is a complete teardown, cleaning and rebuild. When you walk into John's shop, he's seated at his bench, which is visible from the front door, with some machine in front of him that's completely torn down to the bare chassis.
On the day I visited John, he had another Royal torn down, which look surprisingly smaller than when completely reassembled. Across from John's bench is a showrooom area comprised of shelves stocked with reconditioned machines for sale, along with a desk area in the middle of the floor, complete with typing paper and comfortable chairs, for clients to test out whichever machine they wish. John is very hands-on and enjoys taking a break from the tedium of repairs to engage with customers.
I've been a portable typewriter collector for some years. One thing I like about portables is, not only being able to easily tote them around but, that they have carrying cases serving to protect the machine while in transit and during storage. Not so with standard (so-called upright) machines; which originally came shipped from the factory in a rugged wooden crate, which typically were discarded after the machine arrived at its final destination, often at some office or school. These kinds of machines are also large and heavy, and don't have carriage locks, important for protecting the delicate escapement mechanism from damage should the machine suffer some sudden shock while being transported.
I live in a small house where storage and space is at a premium. I will typically have only one typewriter out on my desk at any one time, with the rest of the collection safely stowed away in their cases in the closet. It's been difficult, therefore, to justify getting a large standard machine, permanently taking up valuable desk space, given the constraints of my situation. Yet, standing in the showroom at John Lewis's shop that day, I couldn't help but ogle that sweet looking black beauty sitting up on the shelf. I've used standard machines before, notably one or two from Kevin's collection, and so I knew that they typically outperformed portables in terms of build quality and especially their typing action and feel of the keyboard. This also wasn't the first time I've ogled a standard machine at John's. Last year I almost pulled the trigger on a beautiful Underwood Model 5 that had exquisite black lacquered paint, gold decals and chrome trim, fully gone over by John; but I balked, knowing I had too many machines in my collection at home that I wasn't using. I needed to clear up some room, pare down my collection to just the essentials, before I could think about taking on a full-sized standard machine.
This wasn't John's first rodeo, as they say. He probably saw the gleam in my eye, as he quickly helped me get the big KMM down from the shelf and set me up in a padded chair to try it on for size. It was love at first tap. Though the 1947 KMM has round keys, the clear keytops are dished in, offering more comfort to the fingertips from long typing sessions. The touch was marvelous, and I found myself easily touch-typing with no interference from the shift lock key when hitting the letter "A", a common problem I have with many other keyboards. I was sold; but I had to think about it, because one thing I've learned over the years is never try to hide a purchase from the wife, it never ends well. I thanked John and told him I'd be back. He knew I would be, too.
The next day I returned, and the deal was done. He even threw in a new typewriter cover. I could sense John's pride in seeing one of his beauties, gone over with the thoroughness that only comes from 50 year's experience, finding a new home. As for the homecoming, it was surprisingly pleasant and pain-free, as I was directly up front with my wife about the purchase, she also knowing that I'd recently offloaded some little-used typers to better homes -- and the cost of the purchase was covered completely by a gift card I had.
I've been using the KMM extensively since its arrival, and I remain completely satisfied. It has an elite, 12 character-per-inch typeface, and a darkly inked ribbon, so the loops and swirls of some characters tend to fill in with ink, but I've learned to lighten my touch and use certain kinds of paper, which lessens the effect. I expect it to only get better as the ribbon ages a bit. My touch typing has only gotten better on the KMM, which has a carry-over effect of making me better on other portables. I'd say the KMM has afforded me a bit of typerwiter therapy. The machine sits on a metal typing table, so my desk actually retains its usual cluttered appearance, with sufficient room perhaps for one more machine, should the need arise.
Yet, even though I was enamored enough to want to continue using the KMM, I knew that, down the road, there might come a time when I might want to store it away in the closet for a spell; or transport it to some typing event. And so the idea of a storage case came to mind. And when, some weeks later, I mentioned this to my friend Ethan, he immediately offered the idea of helping me design and build such a case, as it would give him opportunity to test out his recently acquired laser cutter on thicker grades of plywood, in preparation for some ULF (ultra-large format) camera-building projects he has planned. I'd call this serendipitous.
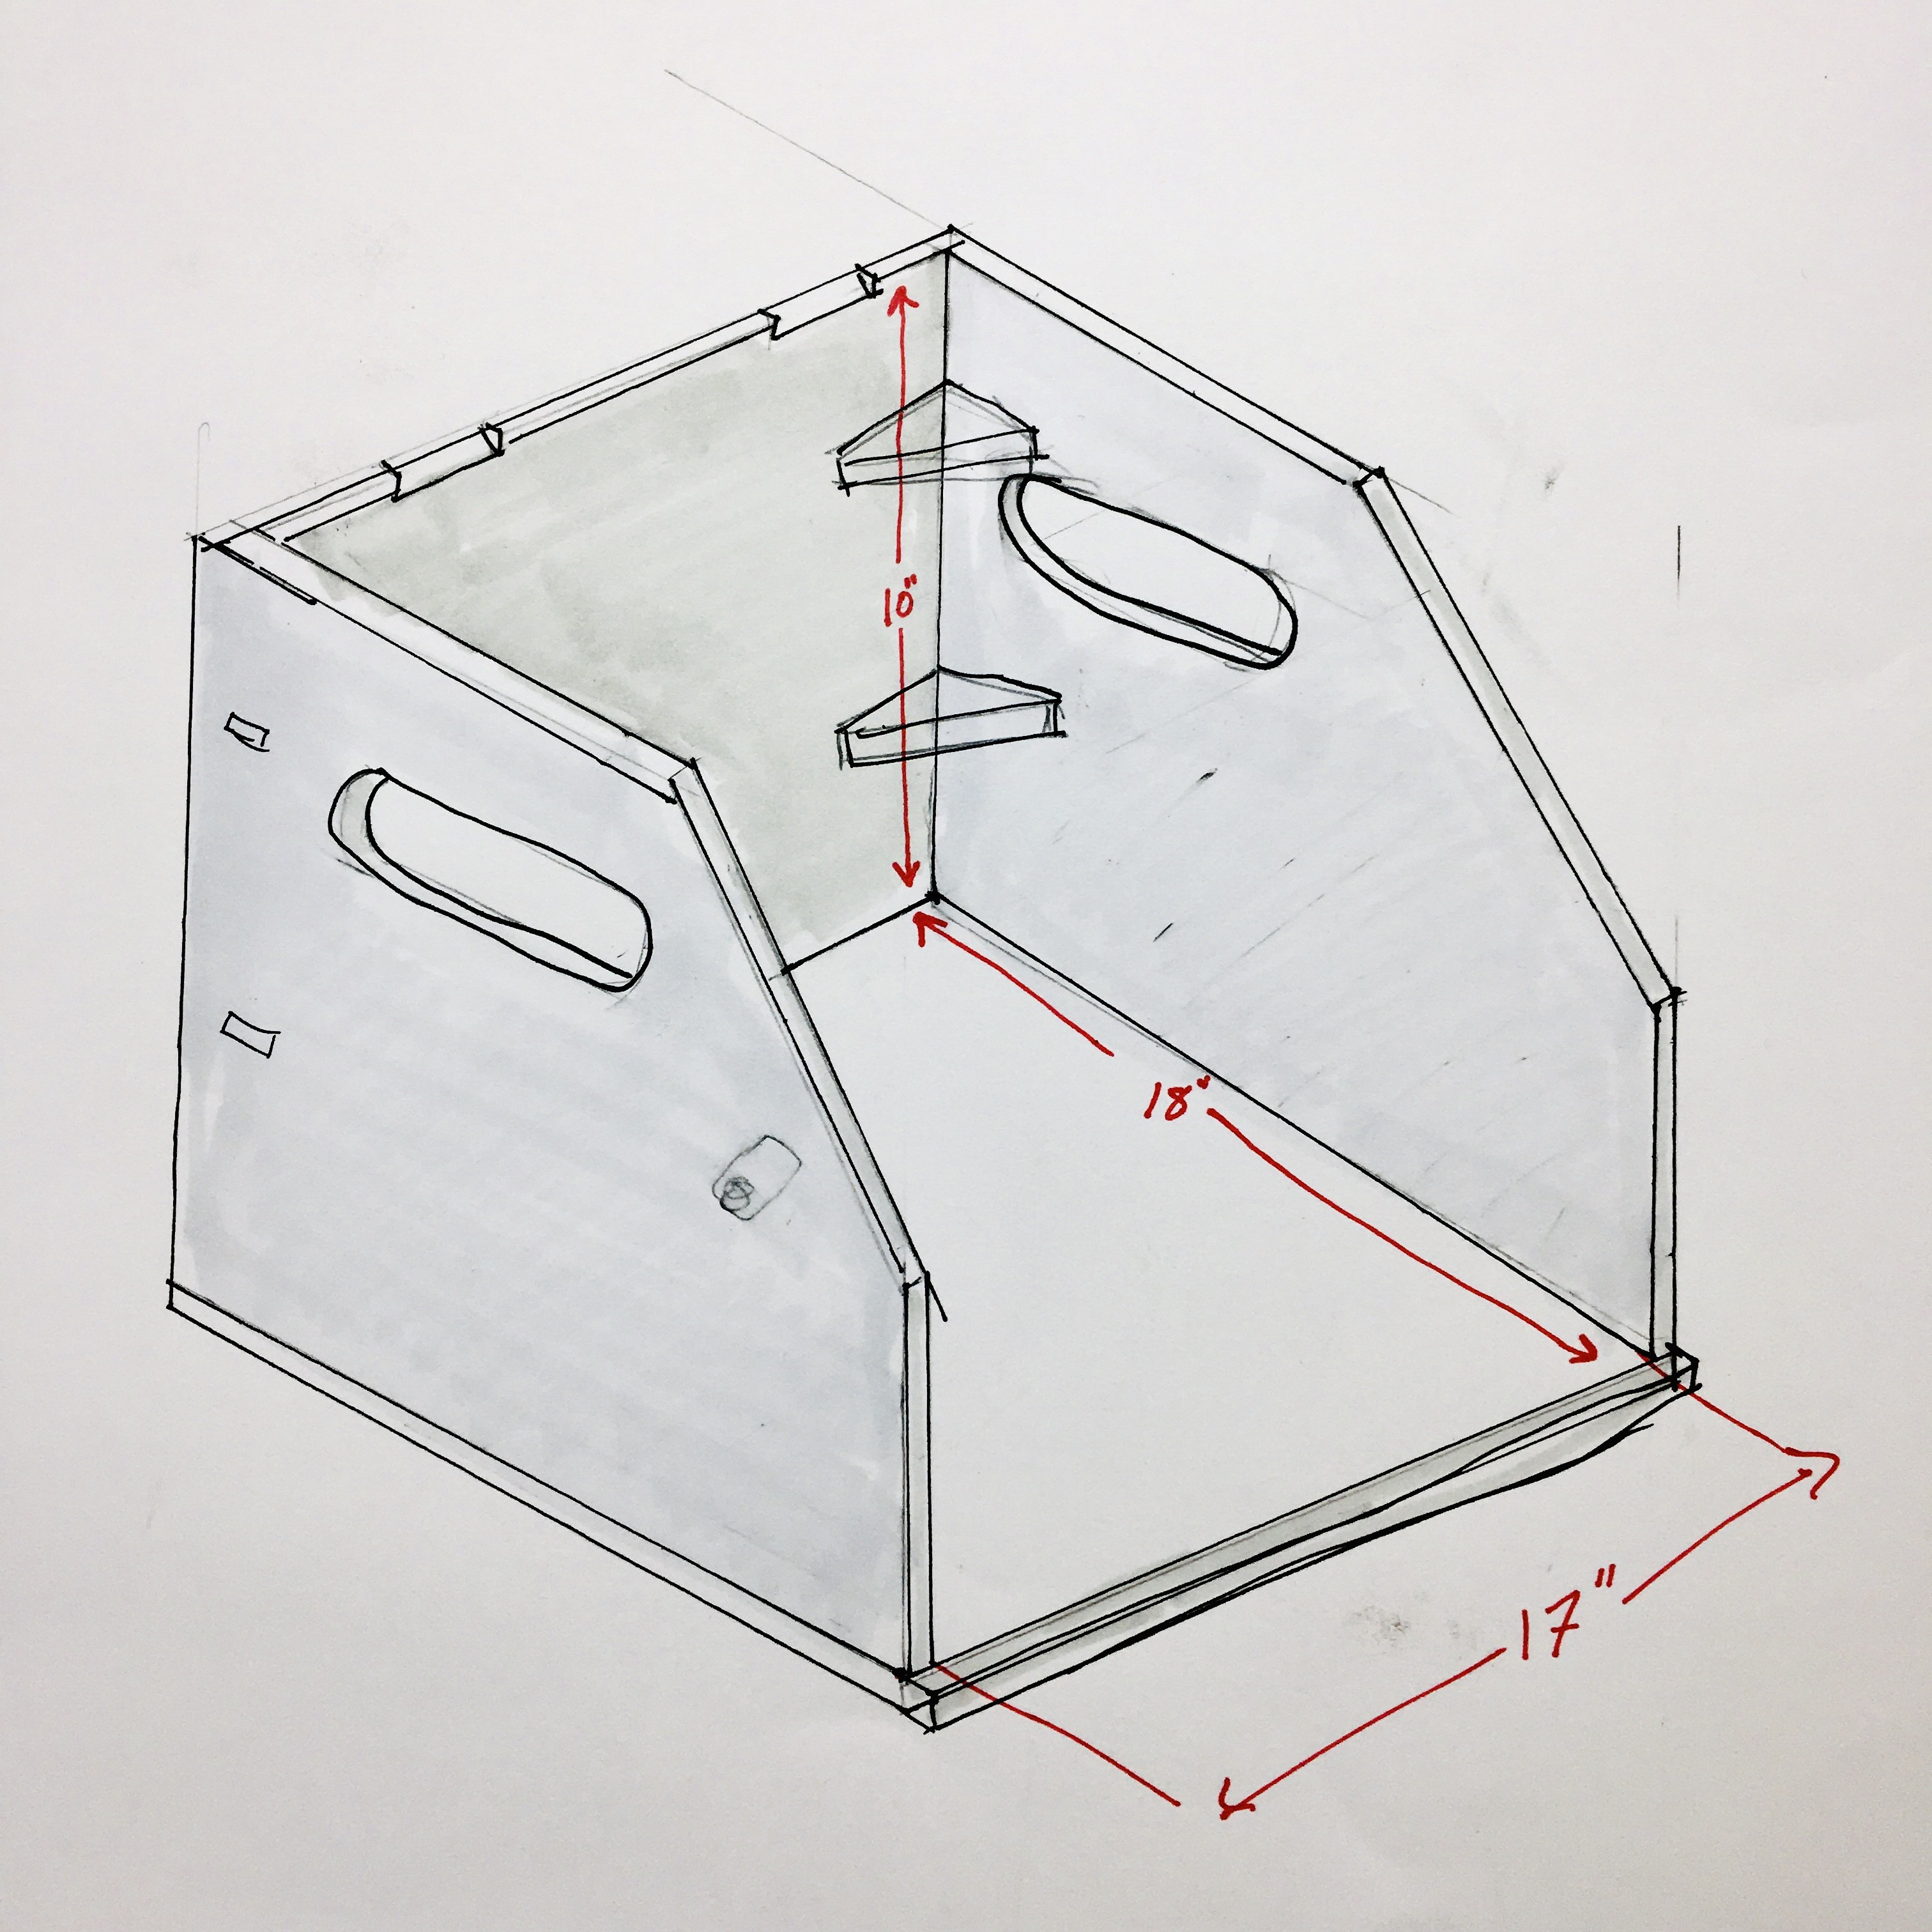
And so, one day a few weeks ago we gathered at Ethan's shop and began the design/build process. Ethan has evolved his design process to hand sketching before he starts in on the Solid Works CAD (computer aided design) software, which is then rendered in a file format compatible with his laser cutter.
Inspired by our conversation, and the fact that I'd brought the KMM with me for reference, Ethan began with a pencil sketch of the basic layout we were thinking of.
The design evolved through several iterations.
Finally arriving at this version, which seemed close enough to begin the CAD process. We'd also taken a break and made a trip to the hardware store for hinges and latches, which we measured and transfered the dimensions to our drawing. It was starting to take shape.
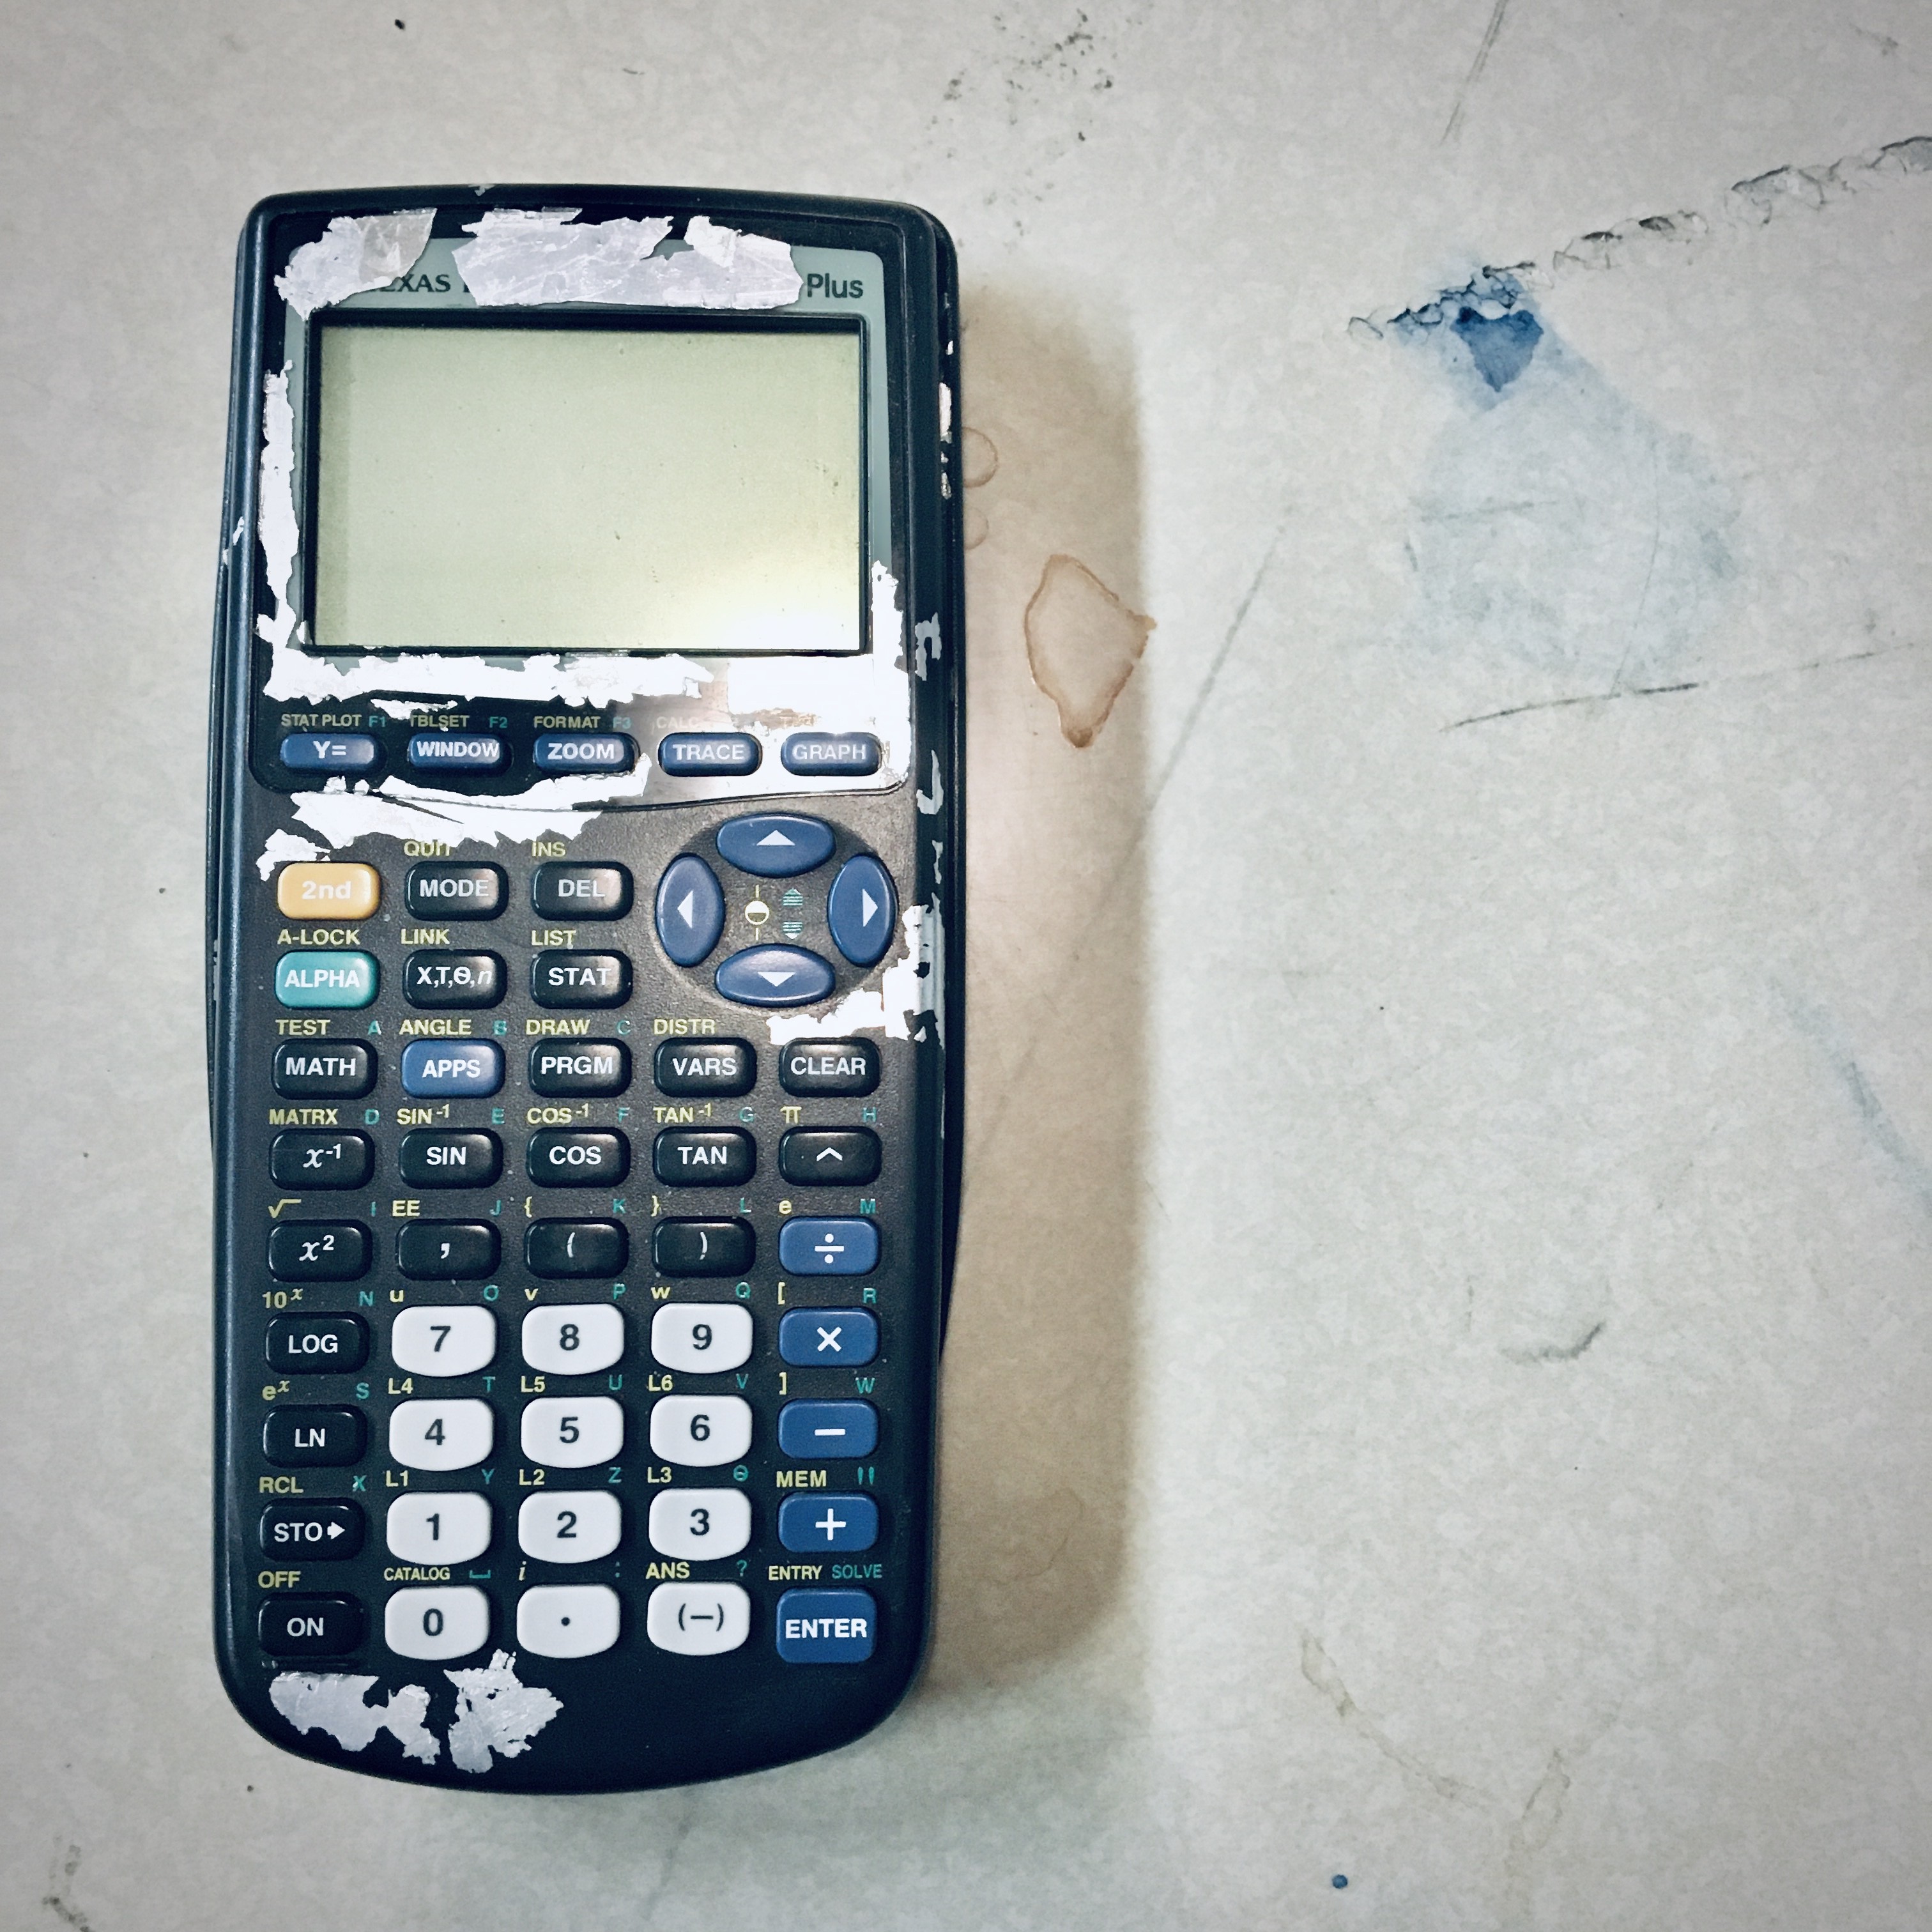
Ethan's high school calculator still finds usefulness even today.
Putting the finishing touches on the Royal logo.
Once the files were done, we had to do some calibration runs on scraps of wood to figure out the optimal laser power and cutting speed for the 1/2" thick plywood. Laminated wood contains layers of adhesive, which can burn at different rates than the wood itself. Also, the gasses and vapors from the cut can defocus the beam, which causes further issues during the cut. But finally we had pieces cut, and the assembly process could begin.
Laser cutting thick plywood, though fast, is frought with difficulties. Ignoring the extensive setup and calibration runs ahead of time, what you end up with are pieces of wood with charred edges. The char can vary in thickness, so it needs to be cleaned up, which results in finger joints that are not as precise as you'd get with mechanical cutting methods. There's also the fact that, once you start glueing up the pieces, you'll inevitably end up with gluey fingers getting caked with messy black powdery char, which then makes unsightly finger prints on the otherwise clean plywood, which then necessitates extensive sanding afterwards; but you can't sand too much, because the outer plywood lamination is rather thin. The result isn't what you'd expect if fashioning perfectly formed, gleeming jewelry boxes -- which wasn't our intent, either. We were looking to create more of an industrial, rugged look, and that's what we got.
We met again that next week to finish up the sanding and some of the finish work. Then this week I put the finishing touches on the box, including sanding the interior and applying a coat of Danish wood oil, then measuring and fitting the mounting blocks which serve to accurately position the typewriter in the case so it's near perfectly centered. The result is as you can see in the top photo of this article.
Here's the case with the lid opened. I used paracord and screw eyes to serve as holding straps to keep the case lid from falling backwards when opened. Inside you can see the mounting blocks for precisely positioning the typewriter feet.
As for protecting the carriage and escapement from unwanted movement, what I did was use a plastic clothespin to lock the carriage release lever in the released position, which disconnects the rack gear from the escapement pinion, thereby protecting the escapement from damage; then I built a set of foam rubber end caps that fit over both carriage knobs, which serve to snuggly position the carriage immobile in the case.
The whole project is documented in the video below. I can easily say that the KMM can now be transported with safety to any venue, and stored securely in my closet should the need arise. It serves to transform what was once a desk-bound typewriter into a mobile (er, luggable) writing tool, in the spirit of those early suitcase-sized luggable computers from the 1980s. Which is no small bit of irony.
Should you make carbon paper ribbons for your typewriter? That's a question only you can answer. Let's suppose you're stuck on some "desert island" with only a typewriter, plenty of typing paper, carbon paper, adhesive tape, a razor knife, scissors and a cutting board. Okay, maybe some driftwood would suffice as a cutting board. And a pair of empty ribbon spools. Let's just suppose.
At first glance, this scenario seems rather unlikely. Maybe you were on one of those special Office Supply Junky cruises to the South Pacific. You know the kind. Hobnobbing with like-minded pen and stapler geeks; seminars on the intricacies of paper sizing in the forward dance hall; unlimited food and drinks - and pens! And then bad weather hits. Maybe the captain was busy with some lovely young ladies, assisting them in refilling their fountain pen converters and didn't see the satellite weather map. It could happen, don't laugh! And then, while you were whiling away the late night, sipping brandy and conversing about fanfold paper reams, disaster strikes, the ship is tossed to and fro and you awake on the sandy shores of some uncharted island with your typewriter satchel and barely your senses intact. What's a person to do? Simple: make carbon paper ribbons.
Of course, to make this unlikely scenario more realistic, you had to have forgotten your extra typewriter ribbons back home, and then were kind enough to loan your last ribbon to the nice couple in cabin 4B, the night before the storm.
And let's pretend that Tom Hanks isn't onboard, because if you and him got stranded together, he's much more likely to survive than you. Just saying.
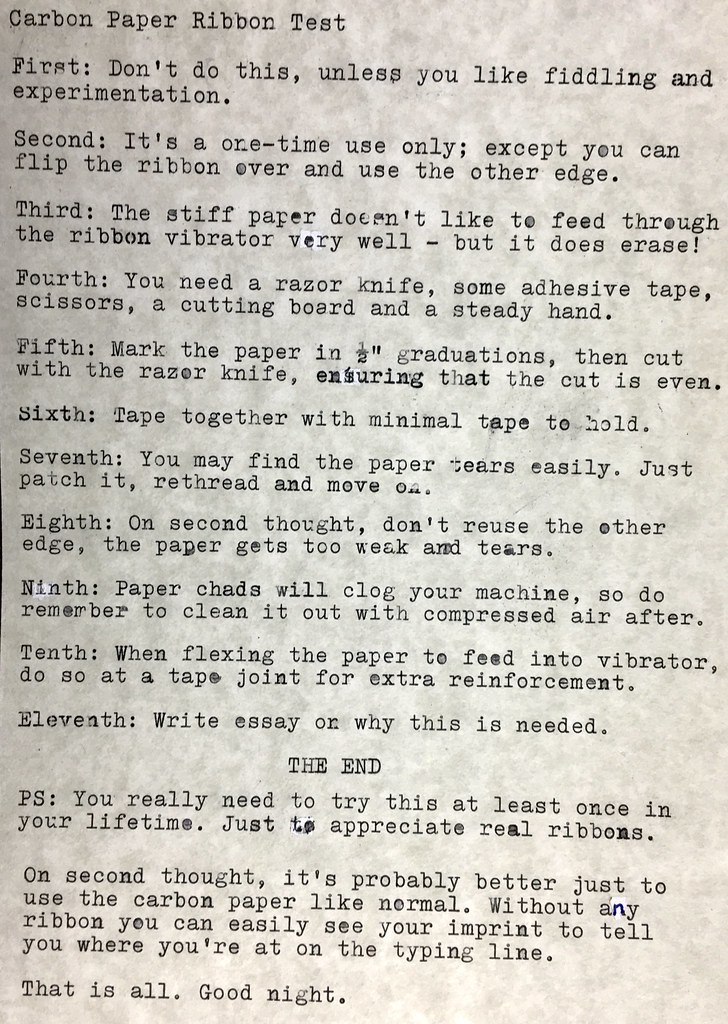
If you did succeed, between looking for drinking water and foraging for food, in making carbon paper typewriter ribbons, here is what the rescuers likely would find, when they eventually found your bones:
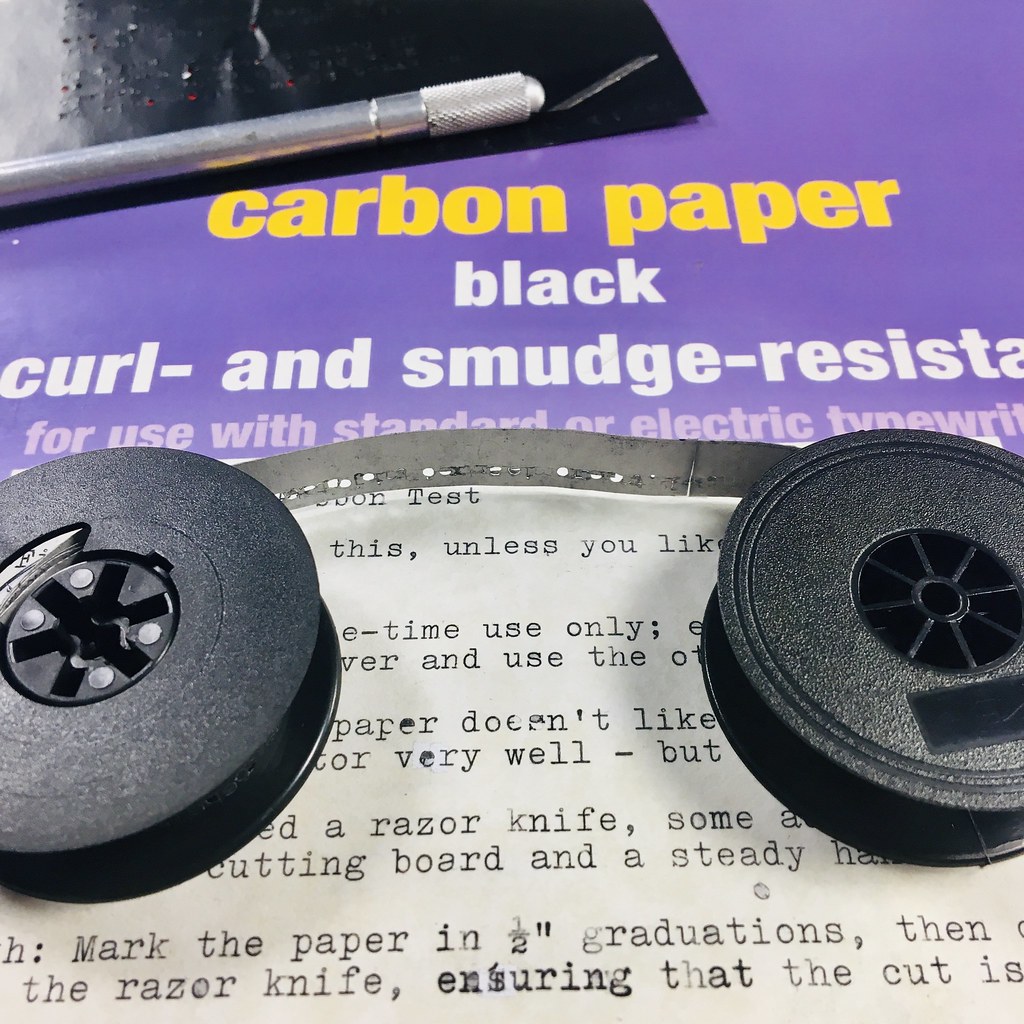
After carefully slicing and dicing the precious carbon paper into precise 1/2" wide strips and taping them together with the equally precious tape, you'd then have to tape their ends to those oh-so-precious ribbon spools, thusly:
It shouldn't have to be mentioned at this point that desert island castaways should tend extra special care to keeping sand out of said precious typewriter, between foraging for food and looking for anything resembling drinking water.
Next, you'll have to carefully thread the fragile paper strip into the ribbon vibrator. You may, between boughts of panic and despair, remember to set the bichrome control to red, and lock two adjacent typebars together to keep the vibrator in the raised position, making threading said fragile paper strip into the machine a bit easier, as you pause to scan the horizon for any sign of rescuers, who by now should be combing the waters of the Southern Ocean for any trace of survivors of the tragic loss of the S.S. Rolodex.
By now your spirits and blood sugar are trending rather low, but you've had it worse, remembering that time the Hermes 3000 was shipped to you broken in pieces by some careless online seller, the scoundrel - why did it have to be you that got stranded, why not him? Is there not any justice in the world? But small victories will save the day - you've managed to successfully thread said fragile paper ribbon into said precious typewriter, and have begun typing ... what? What is there to write about? Hmm, let me think, you think.
Now you're in the rhythm, an idea has caught itself in your craw and you're typing furiously - if only those damned fish would cooperate!
But alas, you've gotten too confident, that fragile paper ribbon shreds itself into tatters as you lie on the beach, sunbaked, and sob in despair at your predicament, wondering why life has to be so unfair, why you couldn't have simply used the carbon paper like normal people do; or wad it up in a ball and set it alight with the cigar torch you forgot you had in the bottom of your typewriter satchel, along with the satellite radio you so wisely brought but so foolishly forgot you had.
And that, dear reader, is why you should never, ever, embark on an all expenses paid transoceanic Office Supply Junky cruise of the South Pacific. Better to stay home and tend to your precious typewriter collection in the safety and security of your humble dwelling, and let the more daring venture forth.
It's 1974 and I'm a skinny, curly-haired nerd, standing in all my teenage awkwardness under the bright New Mexico noontime sun, adjacent to the Industrial Arts building at Eldorado High School, the campus a glaringly bland architectural afterthought comprised of adobe-brown brick rectangles dropped onto a brown dirt landscape on the eastern edge of town. Even today, as I drive by on my way to or from some errand, I'm amazed at its blandness, as if some architect had to go out of their way to achieve this spectacle of aesthetic anonymity.
But it was the early 1970s and Albuquerque's northeast heights was experiencing an explosive population growth, fueled by families whose dads and moms might have worked at the nearby Sandia National Laboratory, a not-so-subtle pun referencing the plowshares being hammered into bombs of unimaginable ferocity. The local school system built campuses like Eldorado, named after that fabled lost city of gold, as an expediency to deal with the enormous population surge. Back then, more school money went to the classroom, in the form of bland buildings designed to house a surge of students; whereas today, in contrast, the administrative overhead of the school system seems bloated and outdated, as the state's educational system ranks near the bottom of the list, in a country that struggles to educate its citizens to any kind of standard that could be considered "first-world."
That skinny, curly-haired nerd is standing outside Rob Mangold's Architectural Drafting class because there are several enormous plastic, air-inflated structures on display, built by said Skinny Nerd. This is the early 1970s, on the waning cusp of the hippie movement, and change is still in the air. One of those articles of change are the works of R. Buckminster Fuller, known affectionately as Bucky, the white-haired messiah-like icon and inventor of the geodesic dome, whose writings Skinny Nerd has devoured in eagerness.
It's over 45 years later and Skinny Nerd is not so skinny any more. But I still have many of those books I collected in my youth, including Fuller's Synergetics, a tome that encompasses his life's work in the form of a structured dissertation that remains, decades later, virtually impenetrable.
Many of my books, once neatly organized by subject matter, are now scattered throughout the house in a manner more fitting the needs of decor rather than library, a compromise I've accepted as the price of living in harmony with my life's companion. I recently pulled down Synergetics from a bookshelf and left it on the patio room table, where my wife, in her curiosity, opened it, glanced at a page, then put it down again, exclaiming "I have no idea what I just read."
Sometimes I feel the same way.
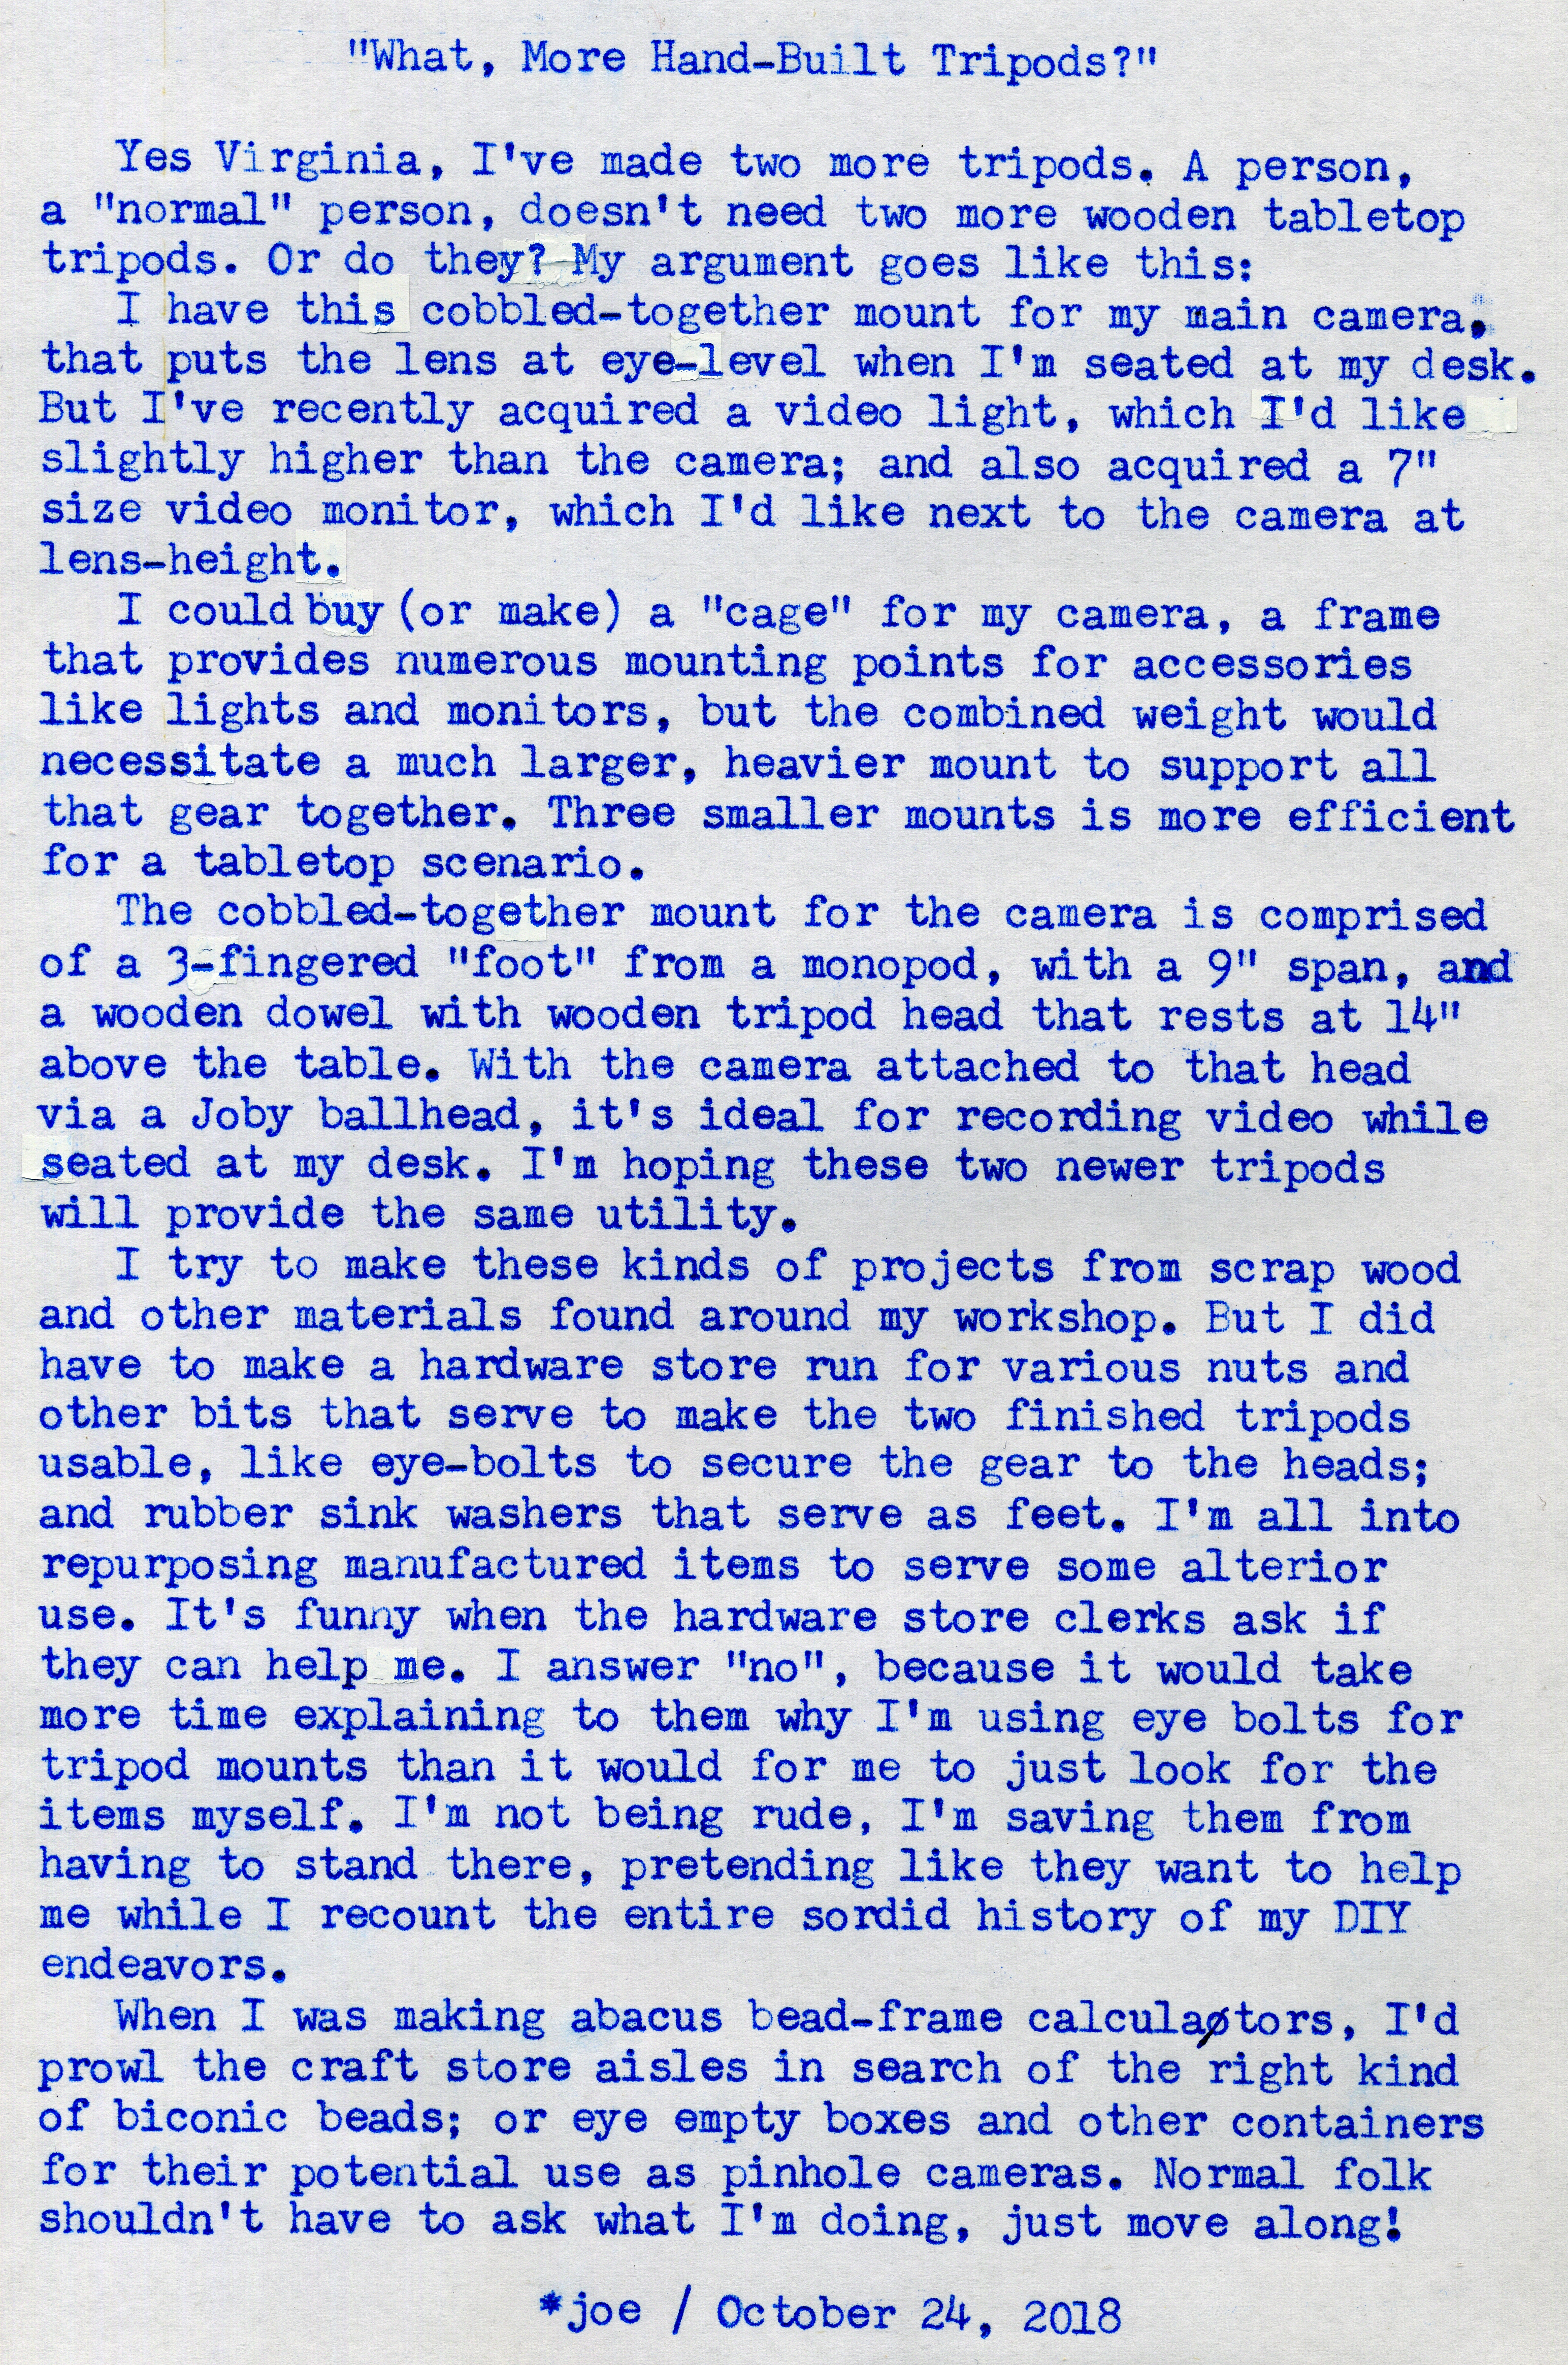
Where this blog article is leading to is a convergence of several ideas. First, there's the concept of what I call "copy-typing," which is sitting down at a typewriter and typing text from some published work, preferably written in the age of the typewriter, where one could easily imagine the work's original author doing much the same thing, in much the same manner. I first started doing this with Jack Kerouac's On the Road, because of my interest in the idea that one of that book's first drafts was written (or typed, depending on whether you agree with Truman Capote's opinion of Kerouac when he quipped "That's not writing, that's typing") on a scroll of paper - which I'd been experimenting with at the time, and wanted to see for myself if indeed the rhythm of the work, its frenetic pacing, could somehow be deduced through the endless roll of paper threaded through a typewriter's platen. I was, and remain, curious to the idea that an author's intention can be deduced by typing what (s)he typed, in the manner of the author's use of the typewriter as compositional aid (while remaining aware than many 20th century writers literally penned their first drafts by hand, relegating the typewriter for the intermediate editing stages). So that's one idea.
The second idea has to do with my choice of author to copy-type from - R. Buckminster Fuller's Synergetics, a dense, obscure, obtuse work that bridges multiple gaps between scientific and philosophical disciplines. While Fuller was perhaps best known for the geodesic dome, his pioneering work on tensegrity structures is more appropriate to my interest in handmade tripods. Tensegrities are structures that isolate structural components into two distinct categories: compressional and tensile. The classic tensegrity structure (the term being a portmanteau of tensional integrity) is comprised of discrete compression-bearing struts suspended within a network of tensile wires or cords in such a manner that the struts don't touch one another. The struts keep the wires tightly pre-stretched, while the wires suspend the struts into a three-dimensional geometric array. They can seem like magic at first appearances, and tend to respond to external stimuli by flexing and redistributing the forces evenly across the tension net and through the load-bearing struts.
I became enamored of Bucky Fuller and his domes while in high school, as Skinny Nerd, and his influence has been periodically felt throughout my life. When, years later, I first happened upon the thought of making my own tripods, I borrowed a bit of the tensegrity principle by using screw-eyes and a loop of cord (serving as a tension member) to stabilize the tripod legs (serving as compression struts) such that as more weight bears down upon the tripod, the system becomes stronger, more rigid - the tension cord loop bears more of the load as compressive forces suddenly transform themselves into tensile stresses.
In the intervening years I've also become interested in tabletop tripods, mainly because of my video-making activities and attendant habit of shooting footage from a seated position at my studio desk. Over the last few years I've cobbled together a handful of primitive tabletop camera supports, the goal being able to assemble them from components readily available at hardware stores, with minimal machining or fabrication needed.
Segue to earlier this week, after I'd finished yet another tabletop tripod build, my fifth, this one an utterly simple design comprised of a central body with legs made from a cheap wooden yardstick cut into thirds (I'd hoped to find painting stir-sticks, but had to make do with the yardstick instead), assembled using simple hardware. It, along with an earlier version, had their legs stabilized with tension cords using the tensegrity principle, as seen in the screenshot below, from my recent video:
After I'd finished the video edit and upload, that next morning I sat at my garage workbench and cogitated over the assemblage of handcrafted tripods before me, representing an evolutionary design process, wondering what I'd do with them, the Skinny Nerd never very far away in my mind. The tripod seen to the right in the above photo had nicely-fashioned round dowel legs, but the head design was a bit wonky, making the camera mount slanted, necessitating the use of a ballhead. The middle tripod featured a handmade ballhead cobbled together from various bits and bobs, but by now I'd begun using Joby-brand ballheads on all my tripods, making this handmade version redundant. What to do?
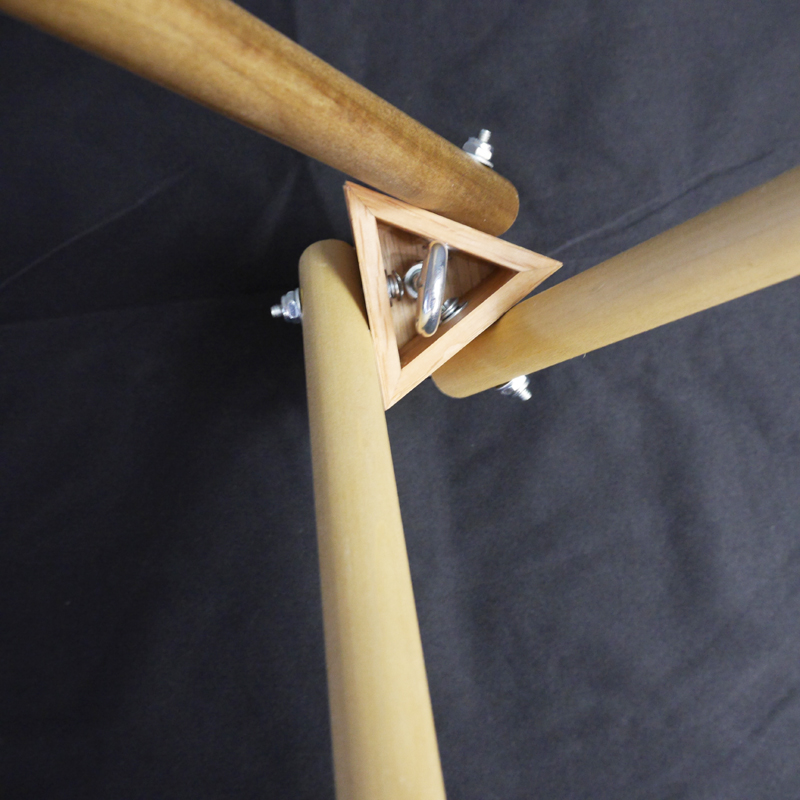
What I did was cut a short piece of square poplar stick to serve as a new tripod body; drill several holes, then borrow the round legs from the righthand tripod, drill out its existing mounting holes; then borrow the head-plate of the righthand tripod, along with the threaded knobs from the middle one, and assemble the whole thing into a new tripod that uses a similar design as the lefthand tripod. Whew!
By now you should be getting to understand that my tripod infatuation was merely an ongoing series of design experiments. Ephemeralization is what Bucky would call it - the continuing process of doing more with less.
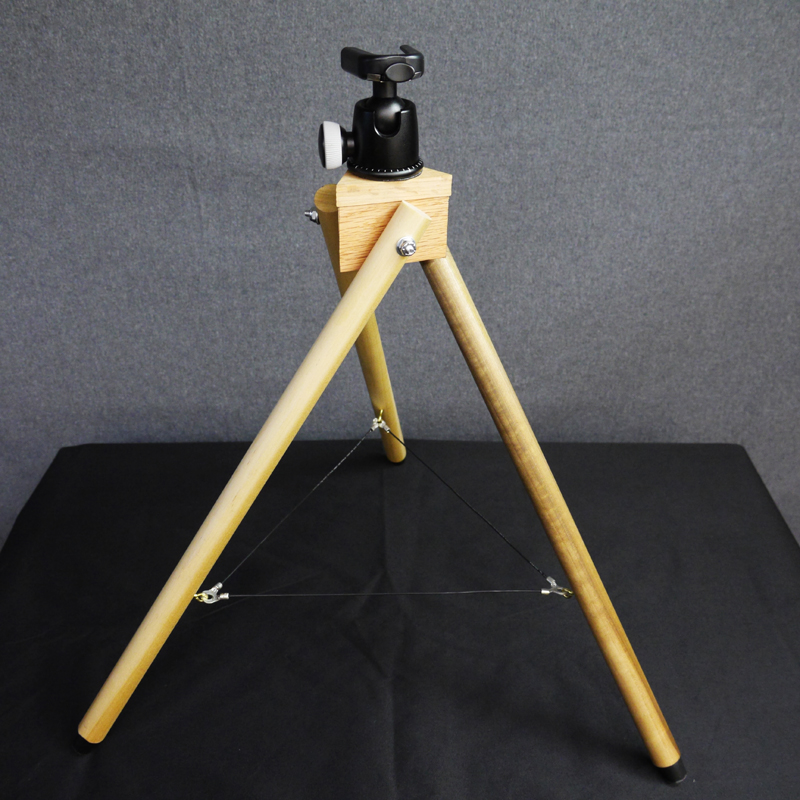
The sixth tripod
Rather than a loop of cord that slips between the screw-eyes on each leg, the triangle of tension cords is made of three discrete segments, so the relationship between each leg is fixed to how far each can be pulled taught, helping to ensure the legs remain in a mostly equilateral triangular arrangement. And once again, the harder you press down on the head, the stronger and stiffer the system gets.
You don't have to stare at a tripod very long before you begin to see it resembles a tetrahedron - a three-side pyramid. The three legs represent three of the edges, the tension cords represent the other three edges at the bottom, and the camera mount on top is the top vertex, with the legs' feet being the other three vertexes. This is important, not only because a tetrahedron is the only stable geometric solid, but because Bucky Fuller's system of geometry is all based on tetrahedrons as its starting point.
Tripods are stable because they're three-legged. One or two legs require some constant servo-feedback-driven articulation system to maintain balance (as employed by bipedal homonids), and four legs will intrinsically wobble, unless the legs are absolutely the same length, on an ideally flat surface (which, being Euclidean, doesn't exist in nature). Three is the ideal amount required to be stable; no more, no less.
Here's what Bucky has to say about the tetrahedron, from section 620.00 of Synergetics:
"In the conceptual process of developing the disciplines for carrying on the process of consideration, the process of temporarily putting aside the irrelevancies and working more closely for the relationships between the components that are considered relevant, we find that a geometry of configuration merges from our awareness of the minimum considered components. A minimum constellation merges from our preoccupation with getting rid of the irrelevancies. The geometry appears out of pure conceptuality. We dismiss the irrelevancies in the search for understanding, and we finally come down to the minimum set that may form a system to divide Universe into macrocosm and microcosm, which is a set of four items of consideration. The minimum consideration is a four-star affair that is tetrahedral. Between the four stars that form the vertexes of the tetrahedron, which is the simplest system in Universe, there are six edges that constitute all the possible relationships between those four stars."
I told you it was dense! (As an aside, I might mention that Fuller's prose is as densely layered, and obliquely structured, as that little Austrian paper-hanger's work, that started all the trouble leading up to WWII - though Fuller's is much more important.)
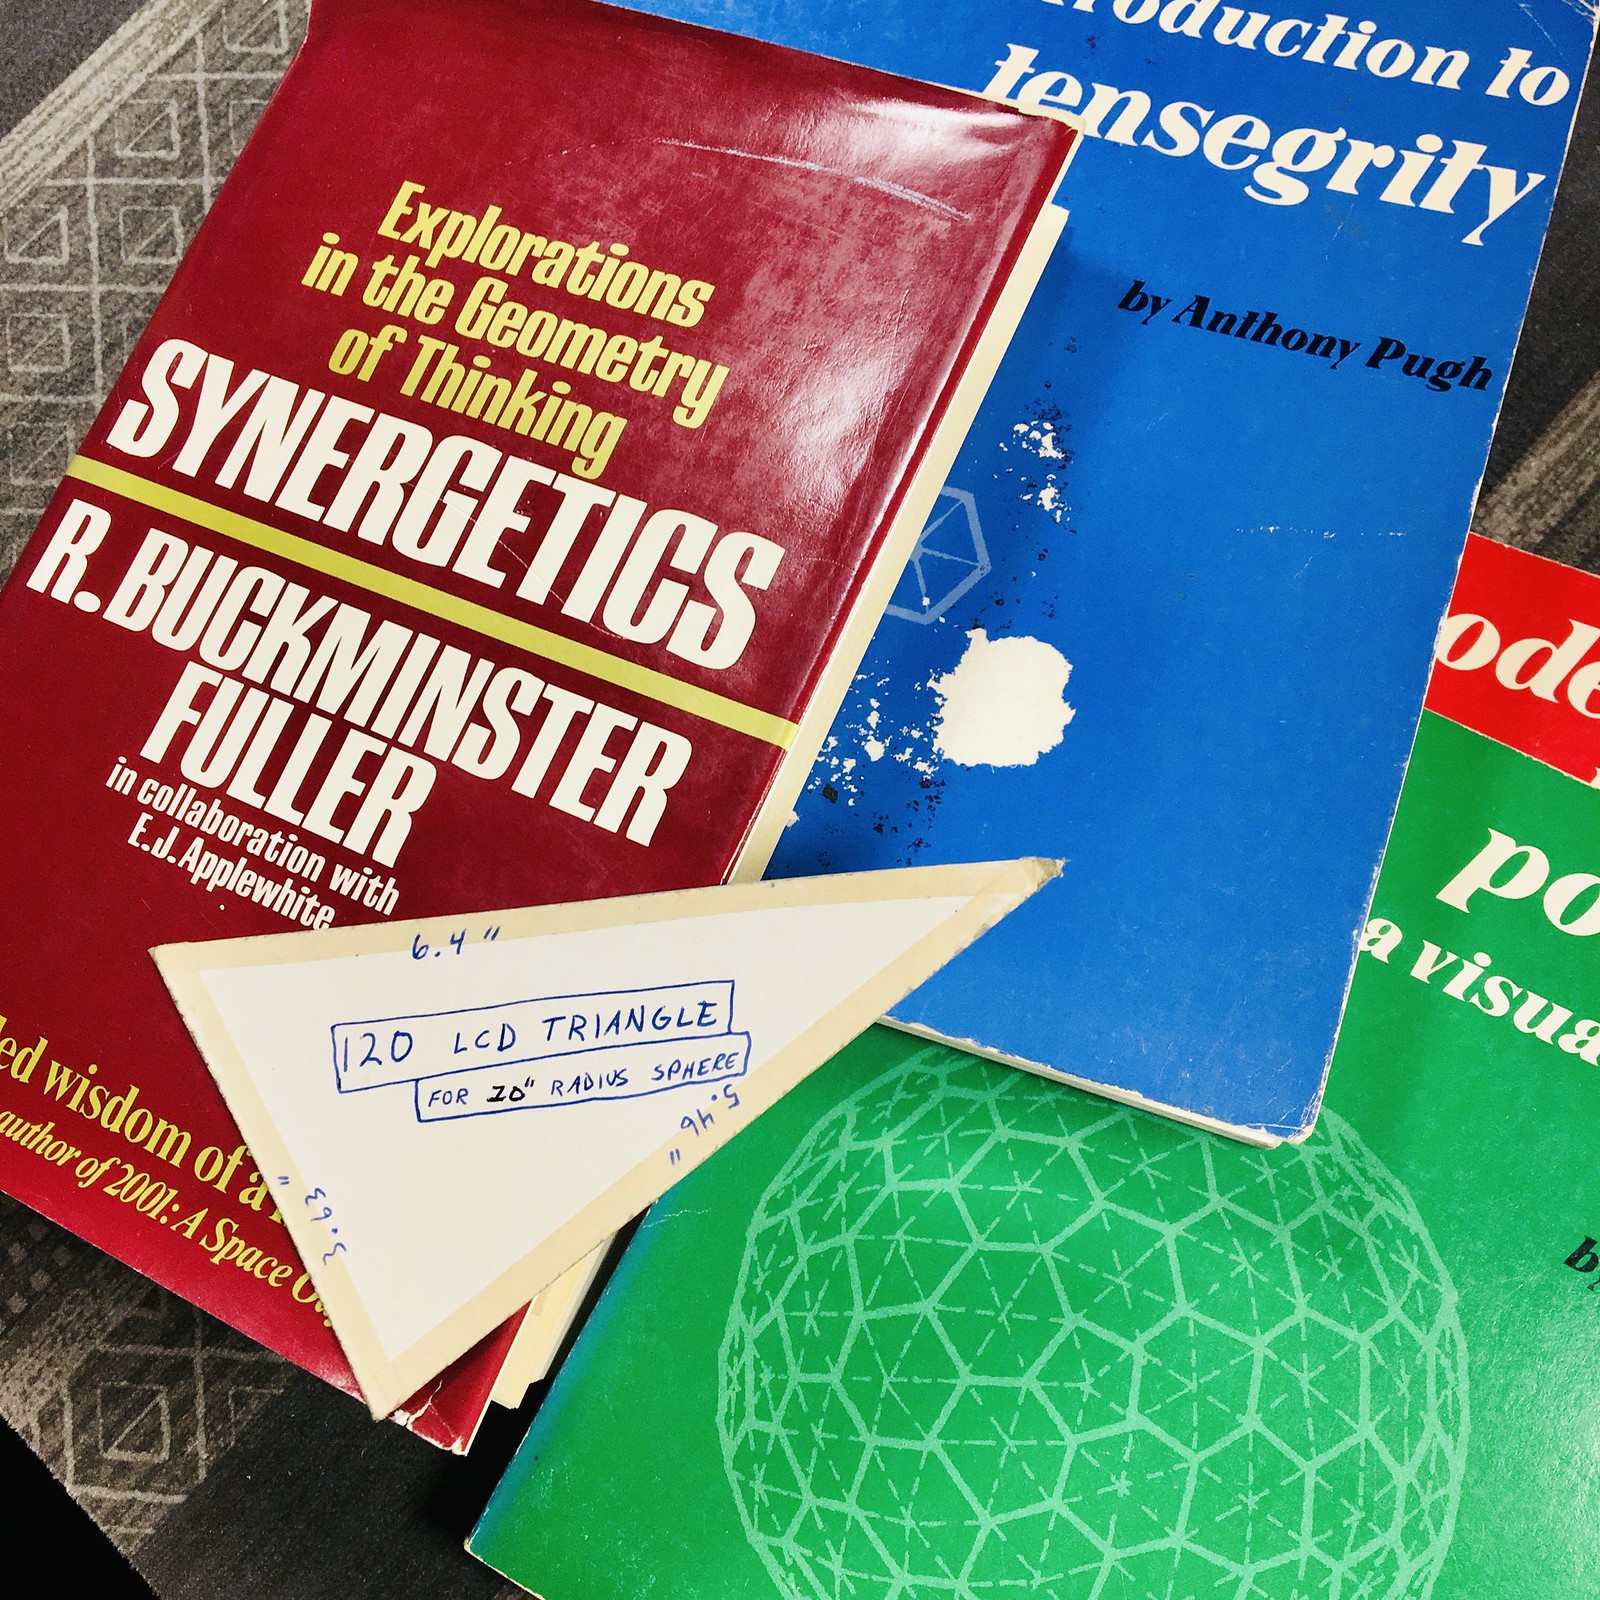
When I opened up my hardbound copy of Synergetics (which appears to be out of print, but is selling used on Amazon for a mere $967 - but rest assured, the softbound version is still available at a mere fraction of the cost!) I found a triangle of cardboard serving as a bookmark, at section 205.00 Vector Equilibrium, seen in the top photo of this piece, a template for making a 20" diameter geodesic sphere. I don't actually remember making such a model, but this triangular template is evidence that I pursued it to some degree, serving as further evidence of my infatuation.
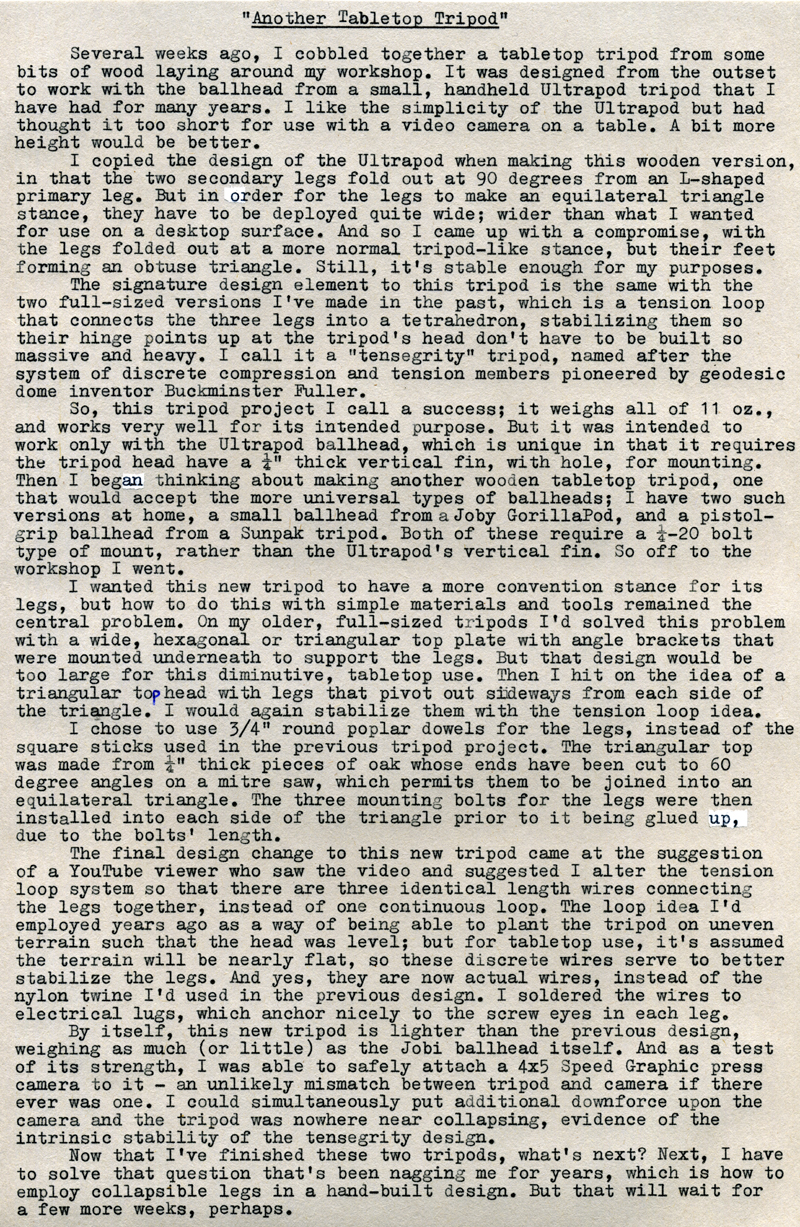
Returning to the typewritten quote at the top of this article, I might be making more of these copy-typings in the near future, excerpted from Fuller's Synergetics, and other books. I've thought about submitting them to the One Typed Page blog of Daniel Marleau, but don't think they fit well alongside the more personal writings other people are sharing therein. So perhaps you may see in the near future more brief copy-typecasts posted here, though with less exposition than today's article, which you can be thankful for.
I've lived long enough that my childhood and young adults years seem to reside in a distant past far removed from the present. Inside this overweight middle-aged guy is Skinny Nerd, still yearning to be set free. Yet every once in a while, in the course of working on some project, I unearth an artifact that once again reminds me of the person I used to be. And those immature infatuations, though seemingly far removed in the past, continue to inform me in ways I've yet to fully understand, reminding me once again that the past, no matter how obscure, serves as preparation for the future.
The tabletop tripod video:
By the way, the title of this article is an allusion to another of Bucky's works, that is selling for a mere $245 used; and somewhere around this place I have that same copy.
Oddly enough, my wife has suddenly taken on a newfound appreciation for my clutter of dusty books.
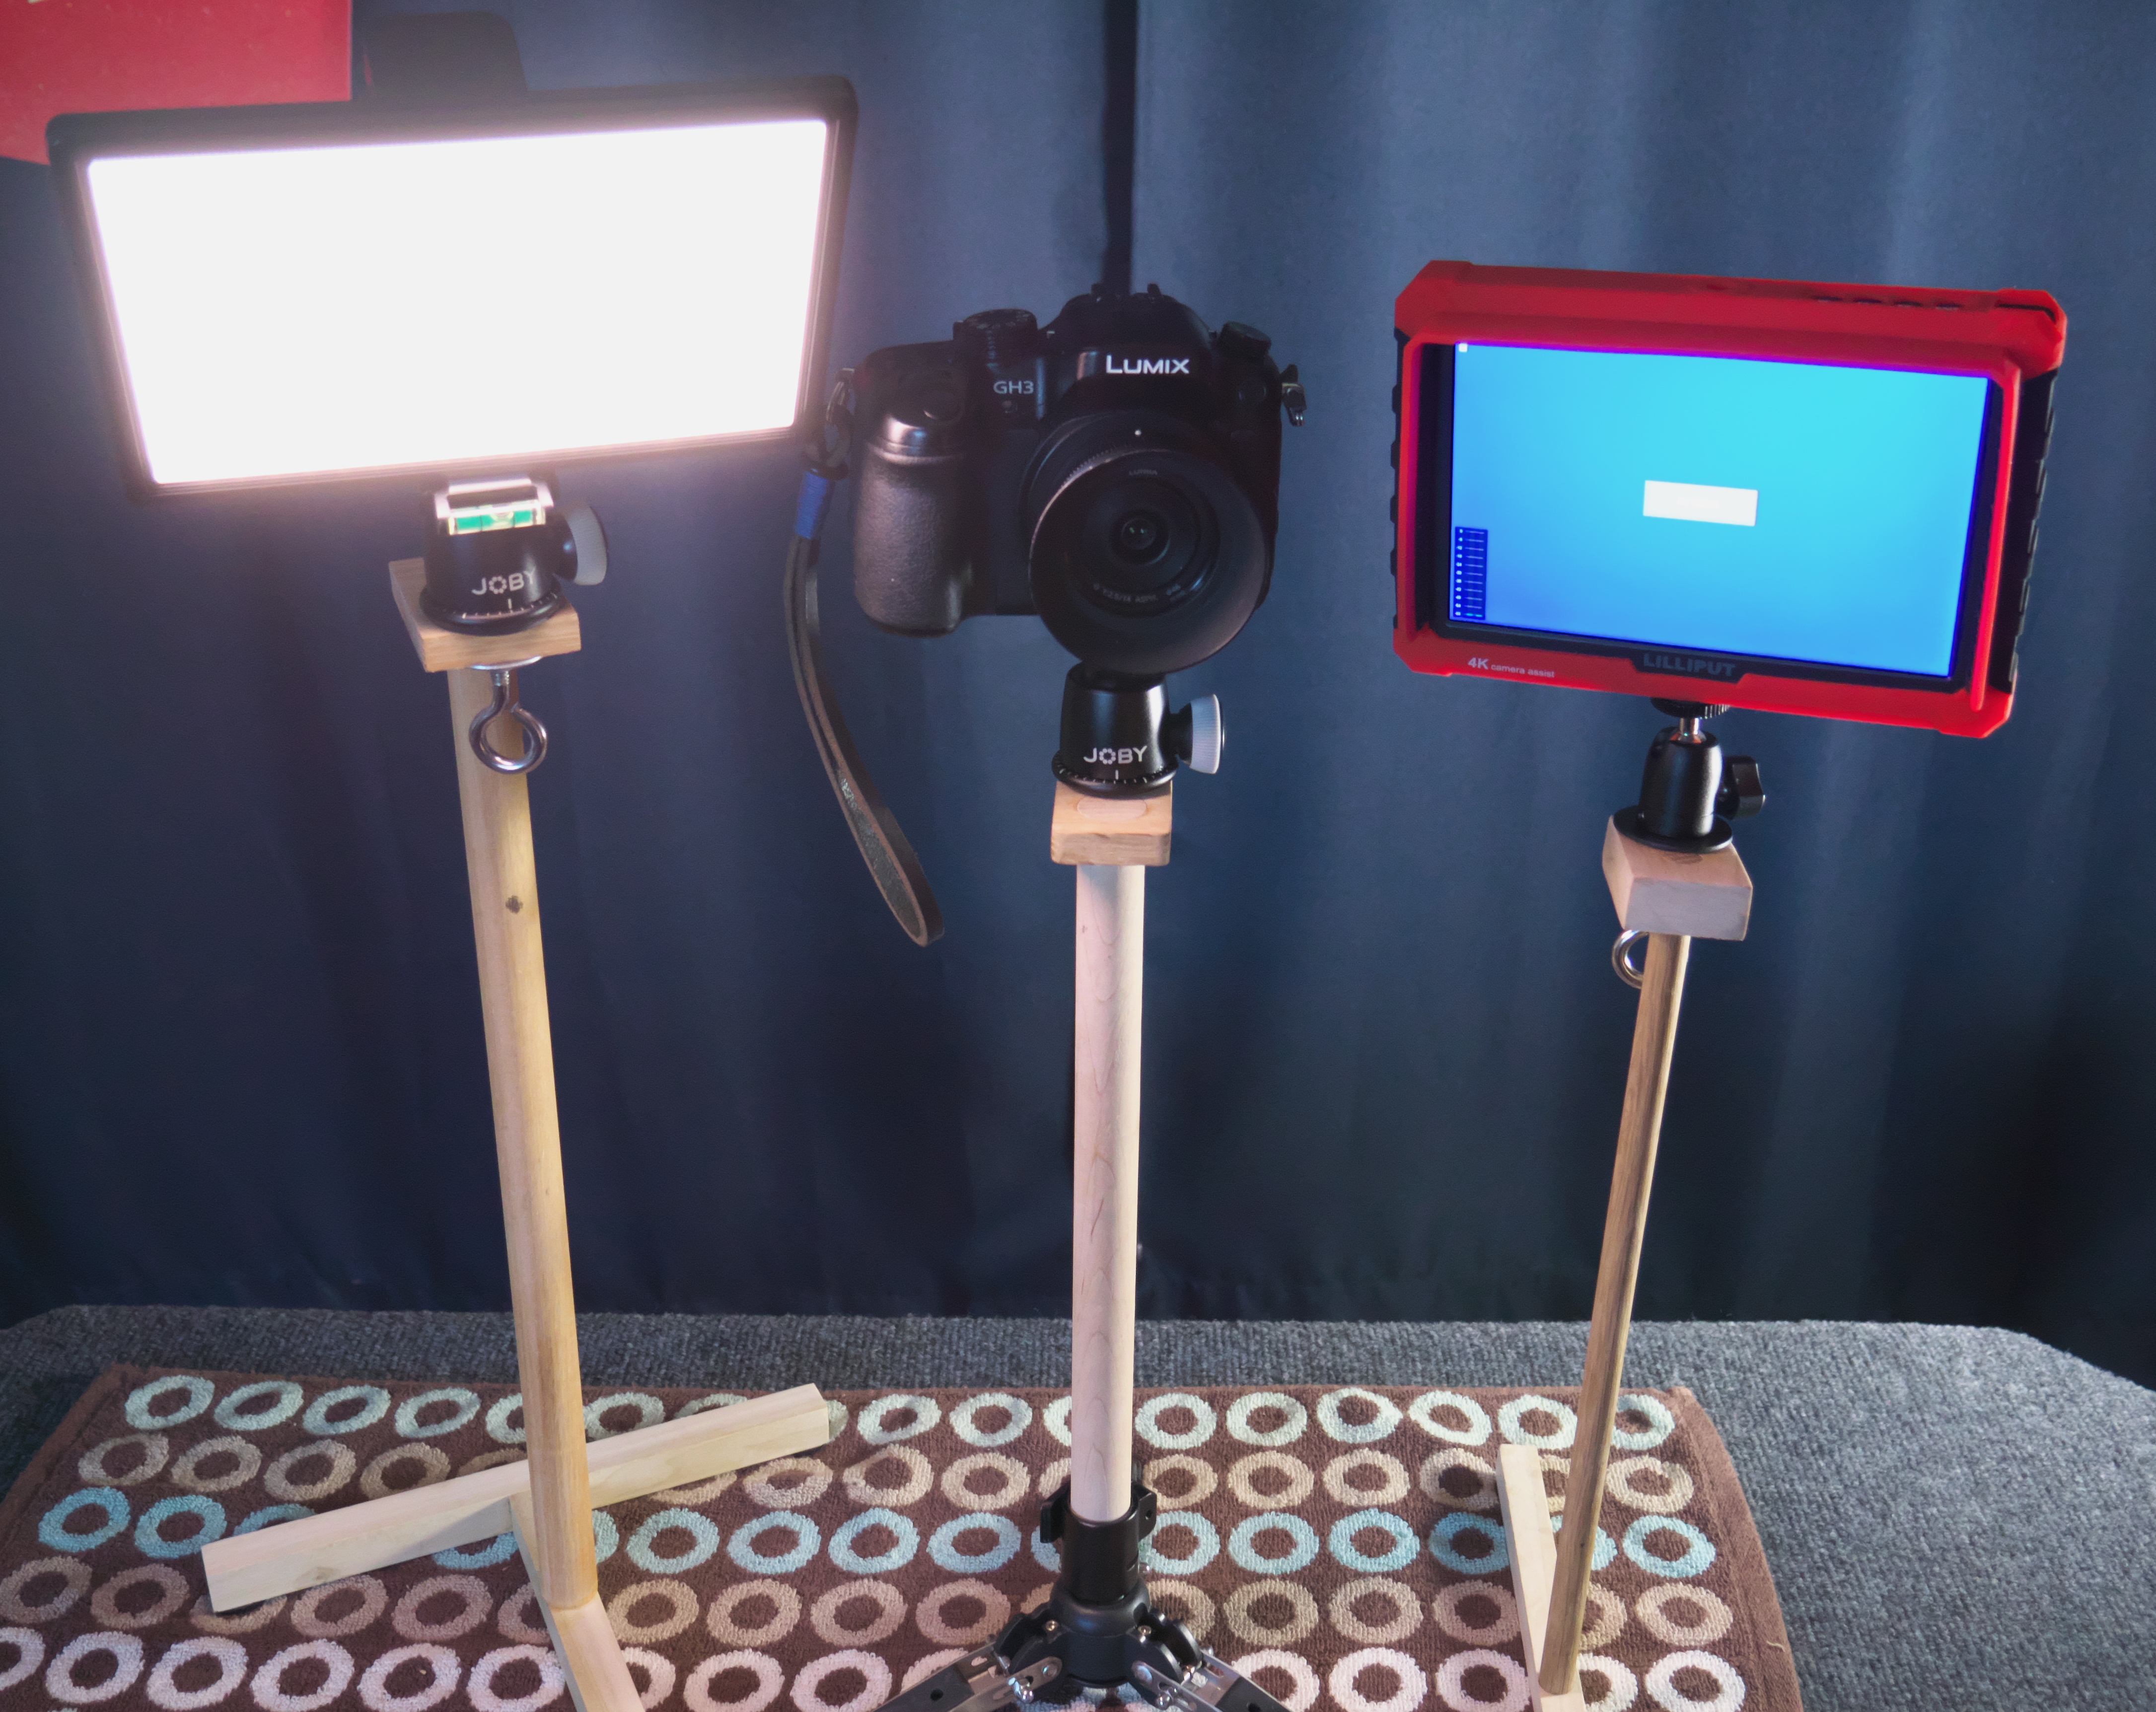
The three tripods together as they'll be used for tabletop video production.
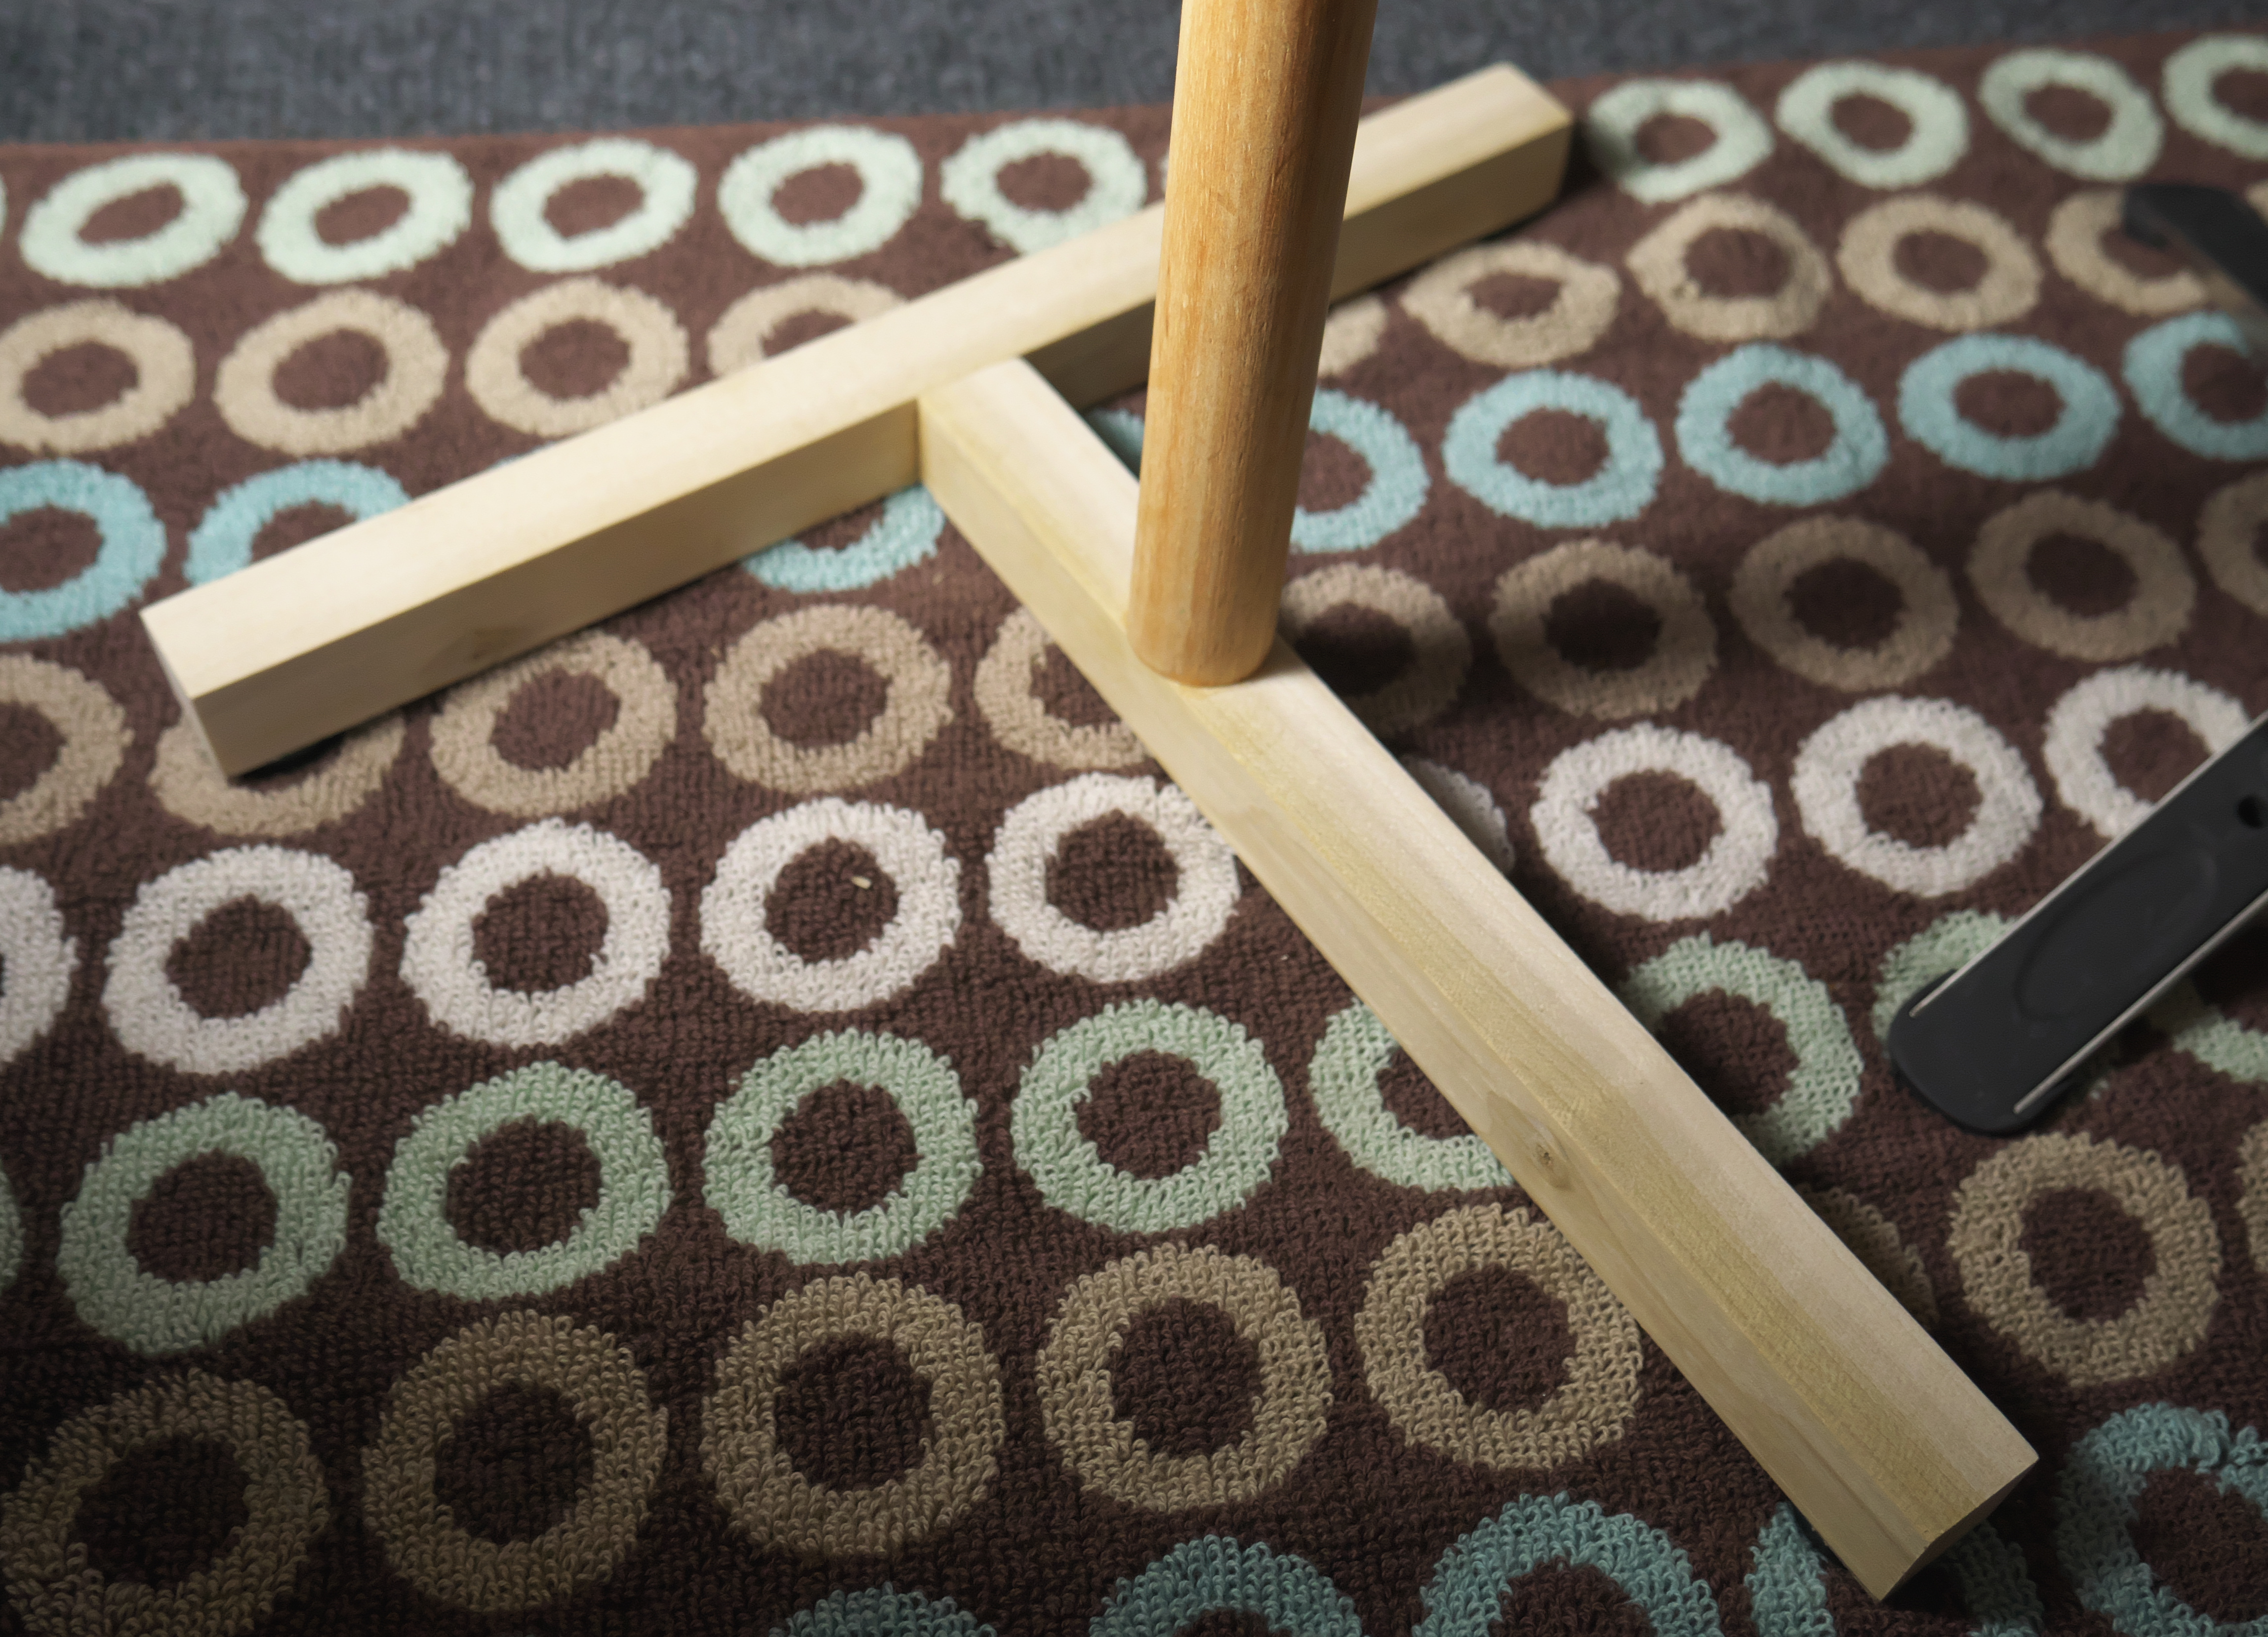
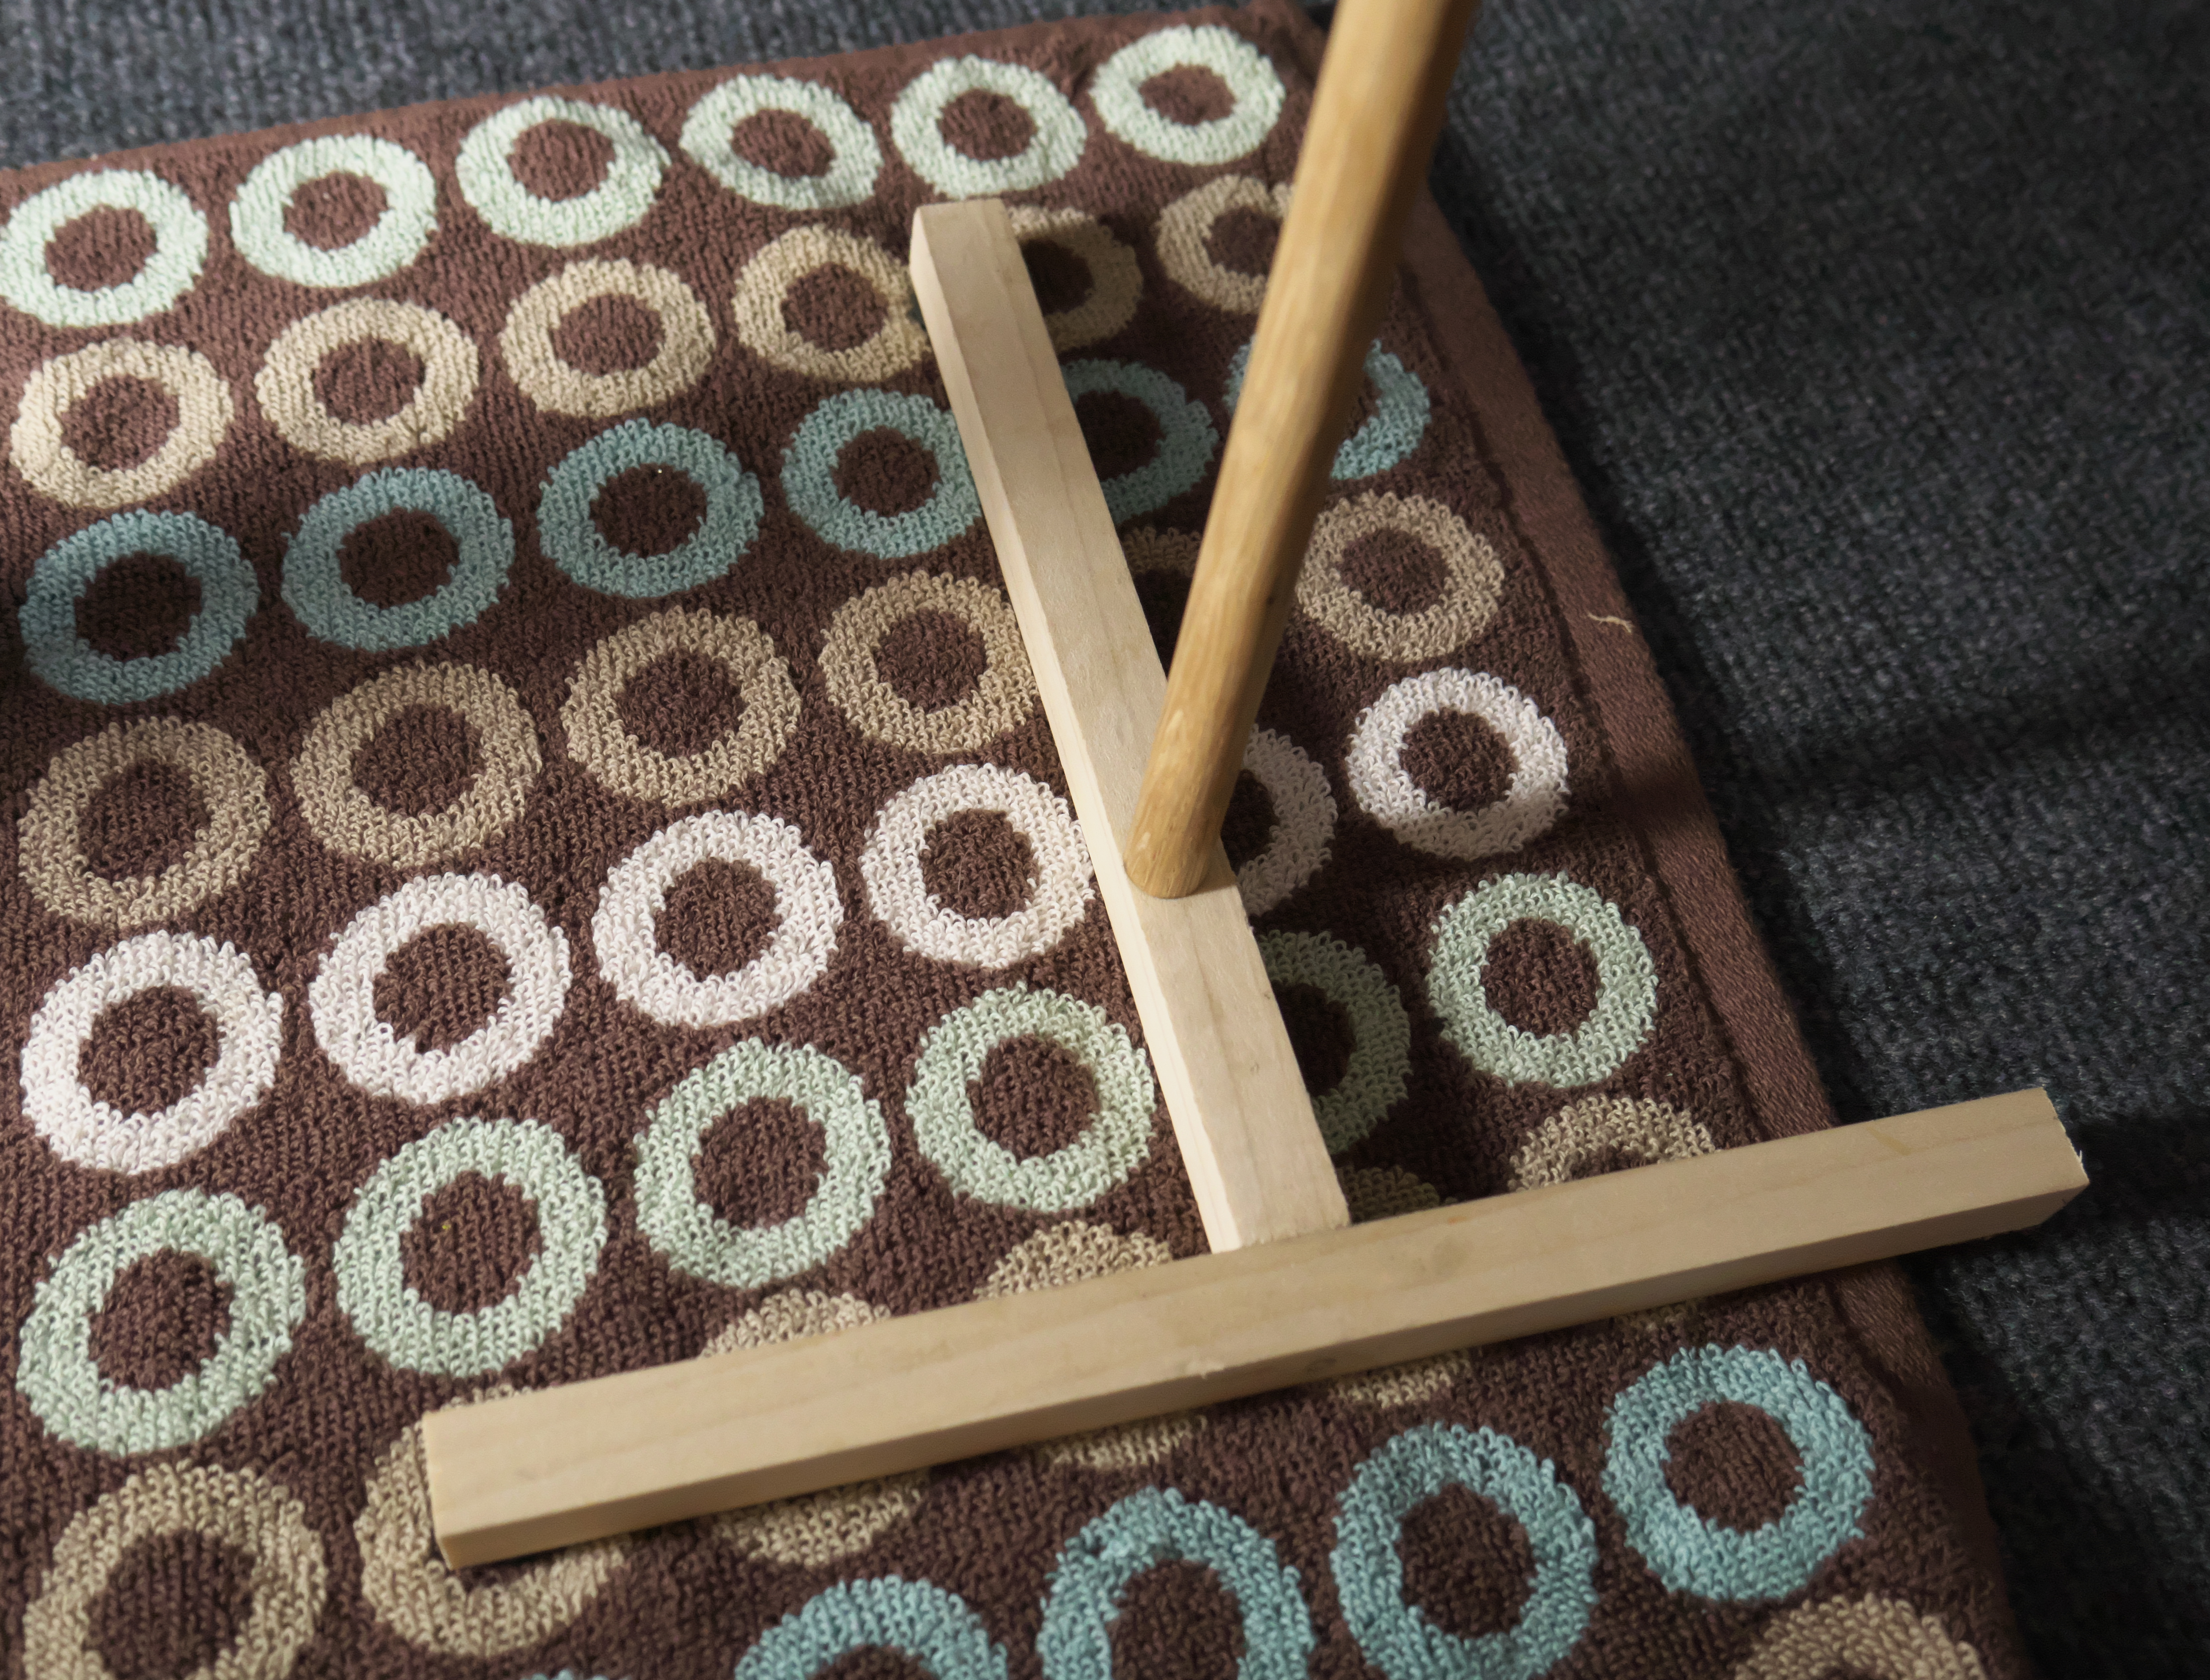
The aim of this project was to build two accompanying tabletop tripods for my video light and monitor, each using a triangular base with vertical support column. Instead of making an equilateral triangle for the base directly from something like plywood, I fashioned two square sticks together in a T configuration, of the appropriate length, such that the ends of the sticks form an equilateral base. Rubber faucet washers are used under the ends of the base for support feet.
These ended up being very lightweight, as you can see in the video, linked below. I find they're more manageable on my desk than a single large tripod with a heavy cage for all the gear.
The 17" tall tripod, with 10" wide base, for supporting the Viltrox video light:
The smaller 14" tripod, with 9" base, for supporting the Lilliput monitor:
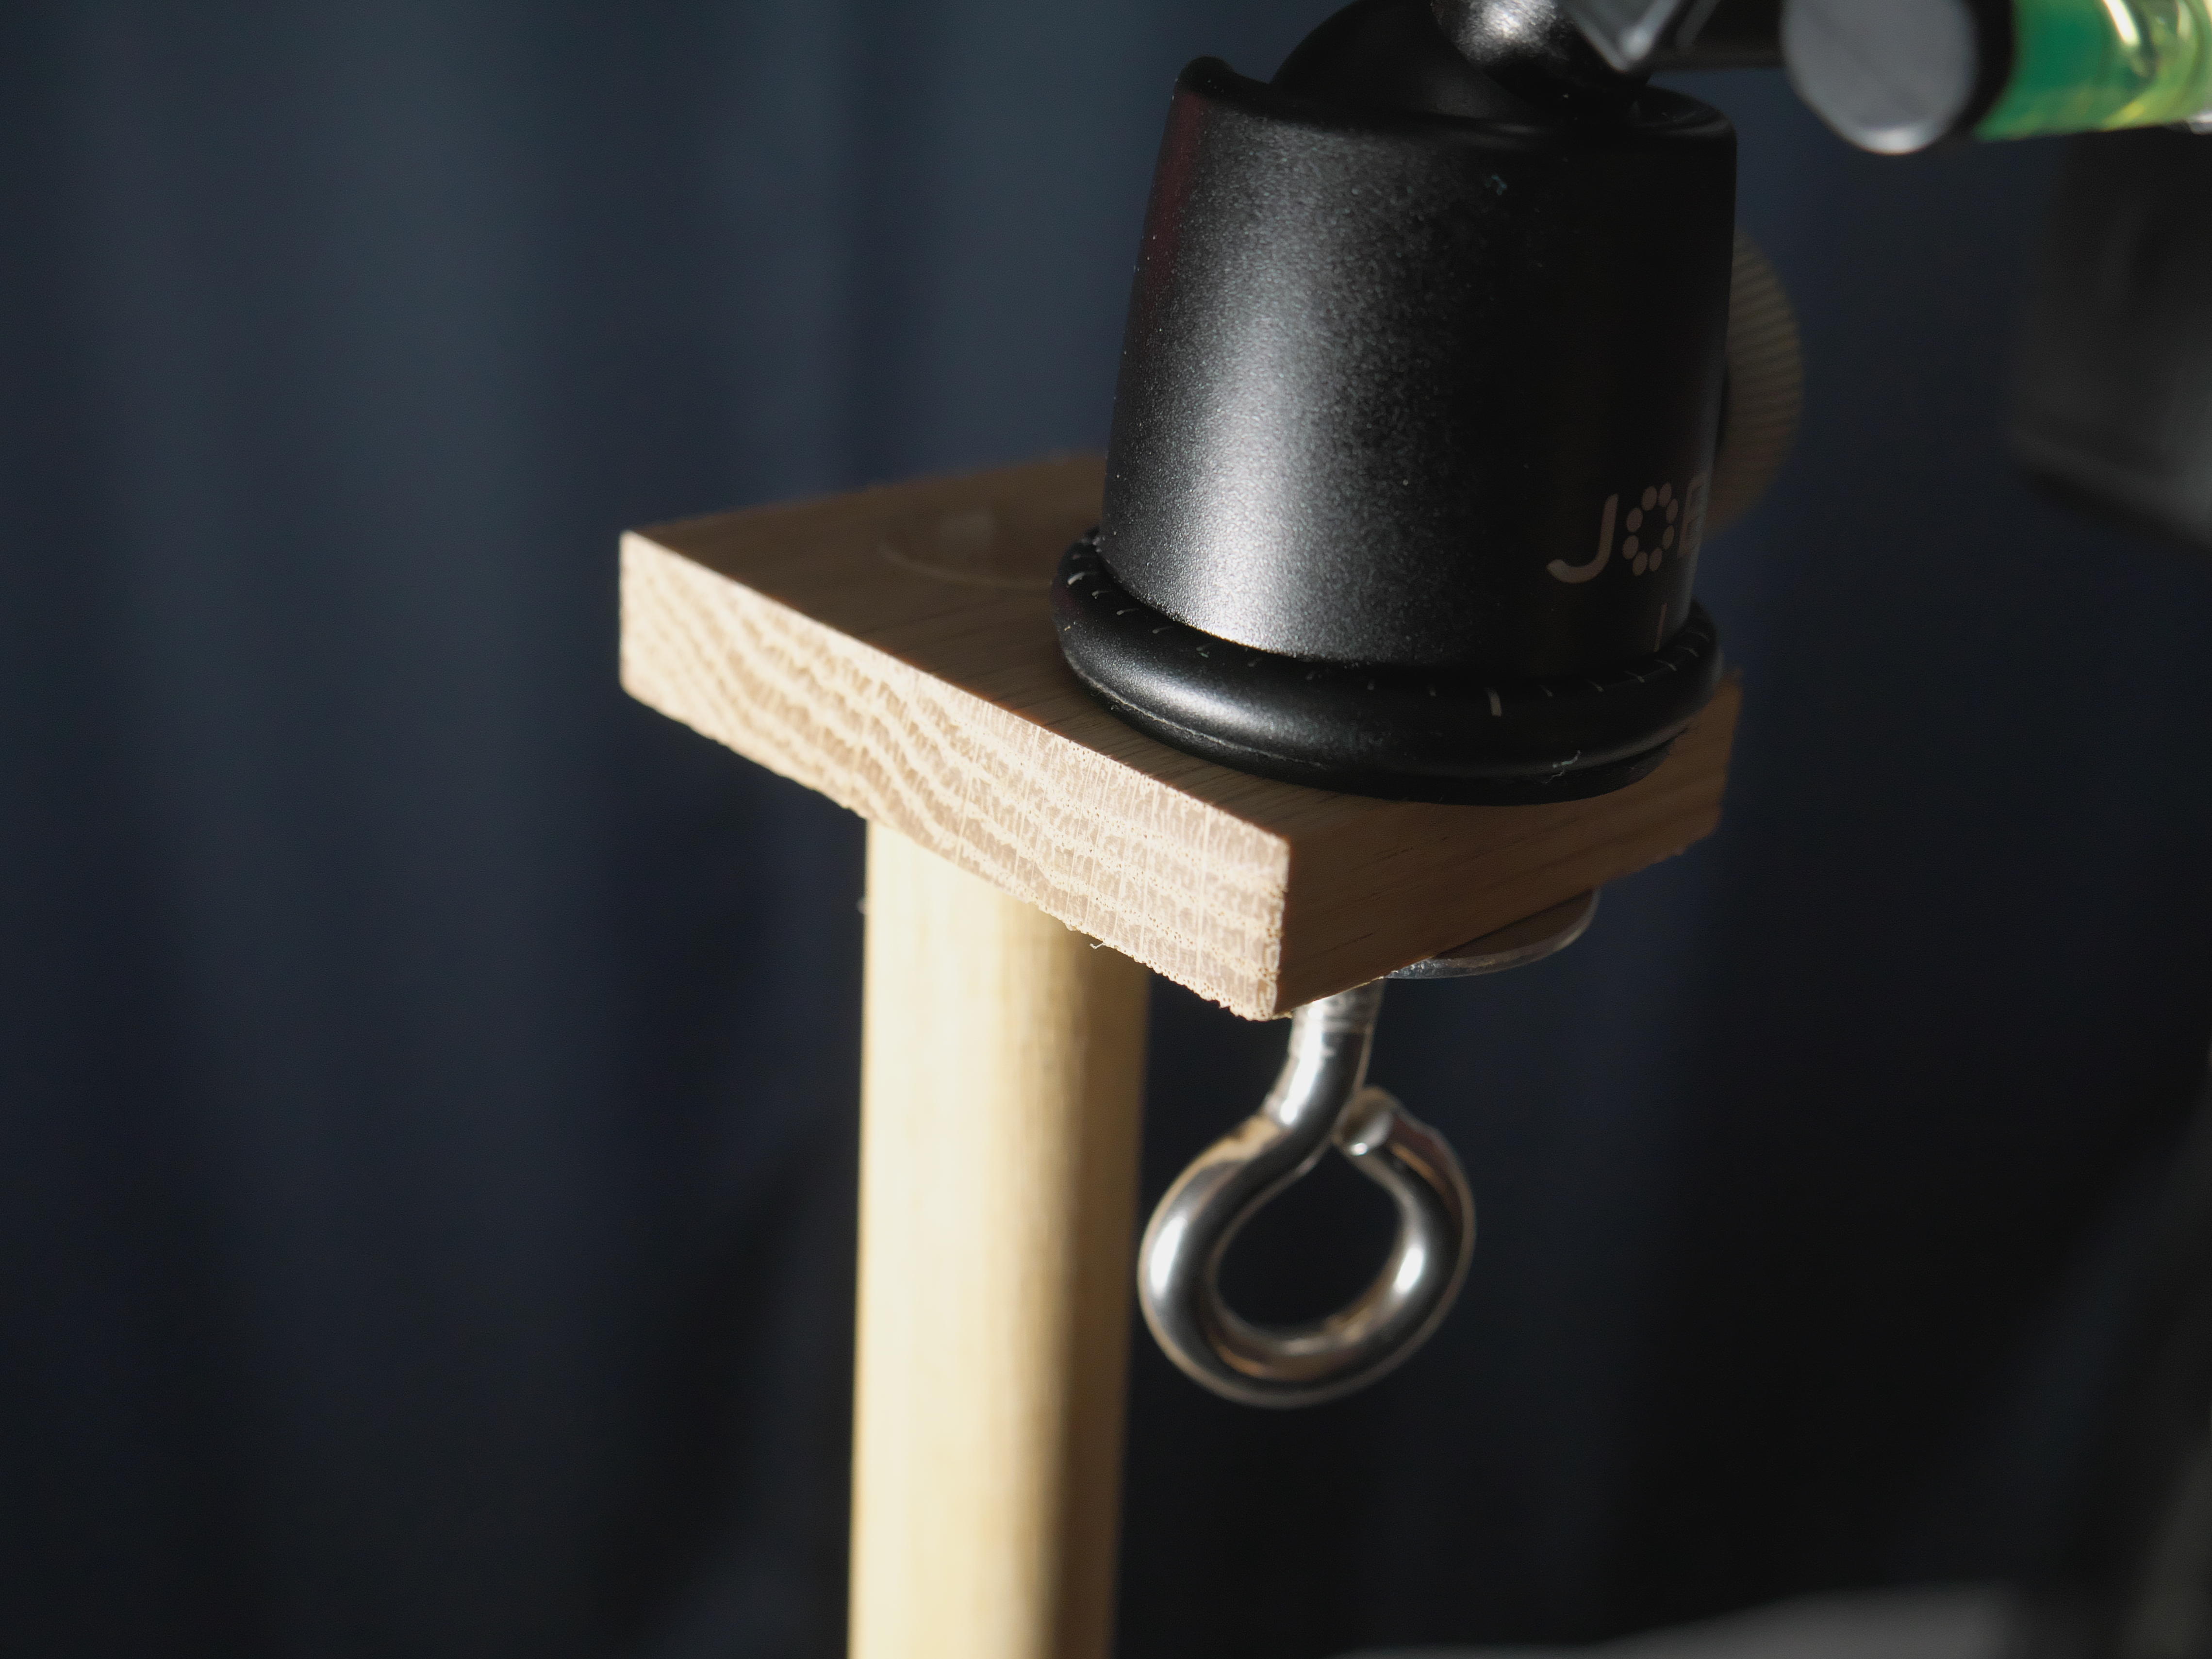
These tripod heads use a block of wood, with the vertical support dowel glued in place and an eyebolt used as a 1/4-20 mount:
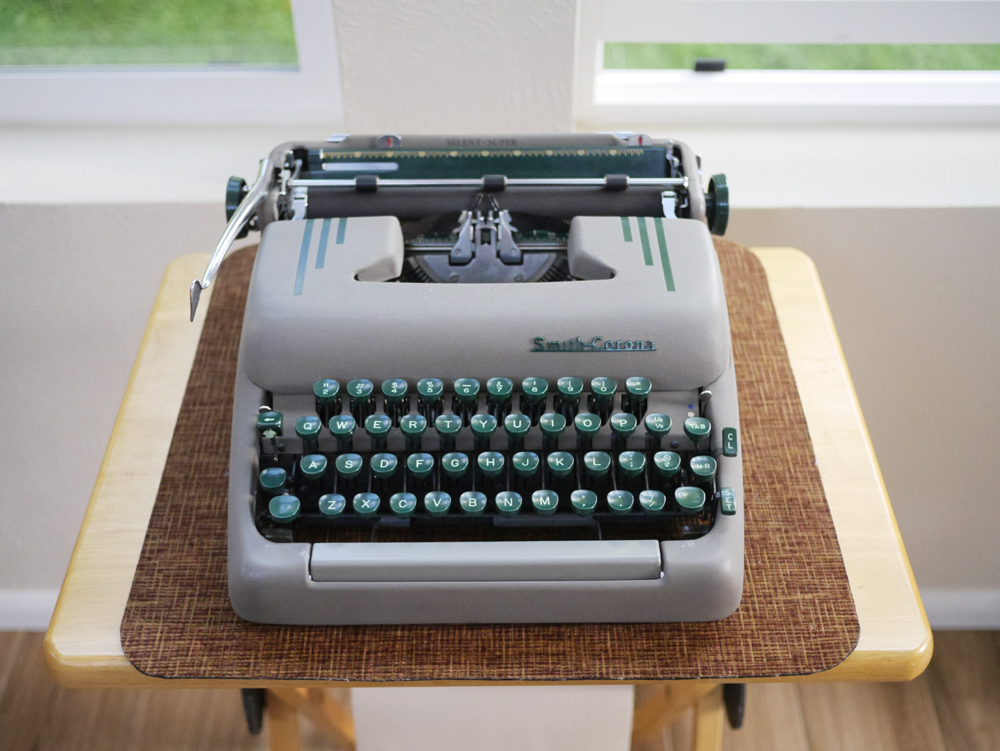
There was a pile of typewriters still sitting on my workshop bench from Sunday's Type-In, most needing to be stored away but several needing to be looked at: both Smith-Corona 5 series machines, especially the Silent-Super, purchased late last year from what I've described previously as a "hippie." Both machines performed fine during the Type-In, but since I'd last attempted to service them, I've acquired the Smith-Corona Floating Shift Typewriter Repair Bible, published by Rev. Ted Munk. I figure this would make for a good opportunity to revisit the somewhat intermittent escapement issues with that machine, and see what effect a good service manual would have upon my tinkering experience; while also serving somewhat as a mini-review of the book itself.
The book is divided into various sections, from the earliest Floating Shift models up to the Series 5. It did take a bit of flipping around to find where the sections begin and end, as they don't have clearly marked dividers; I plan on installing some tabs to the pages for that purpose. Once I found the Series 5 adjustment section I started at the space bar alignment procedure and worked my way through the escapement to the touch adjustments, using as my test subject the somewhat troublesome Silent-Super mentioned previously. It has been performing much better than when I'd first acquired it, due to the "service" I'd performed previously, but I didn't know exactly what I did to make it better. Now with the service manual, hopefully I'd find out, along with any further improvements to be had.
The space bar itself was well-centered in the frame of the machine, with no hanging up or rubbing, but the trip point of the space bar linkage upon the escapement was a bit too close to where the space bar stops at its rubber bumpers; the adjustment was to reform (bend) a linkage arm, to permit the escapement to trip earlier.
Next was checking the escapement pivot arm for freedom. You lock the carriage in the stored position, which also disables the rack gear from the escapement, then disconnect the spring on the pivot arm. It should freely pivot with no binding. I found it necessary to loosen the pivot points a bit, made with a precision open-end wrench and small screw driver; I'm still needing to acquire some gun-smith drivers for this purpose (or, more ideally, a legacy set of typewriter tools - as rare as hen's teeth). Now that the pivot arm was moving freely, I reconnected the spring.
Next was checking the freedom of rotation of the escapement star wheel itself, which is again checked with the carriage locked and the pivot arm manually moved out of the way. Here too I found it necessary to loosen the star wheel shaft nut a bit, to provide freer rotation.
Next was to check when the escapement is tripped as letters are typed. This is done by slowly moving a type bar toward the platen and noting at what position the type slug is relative to the type guide when the escapement trips. It should trip when the slugs are adjacent to the tip ends of the type guide. I found it necessary to reform a linkage to adjust the trip point.
The rest of the escapement-related checks were in good order, which encouraged me.
Subsequent testing on several sheets of paper with random nonsense typing showed marked improvement, with virtually no skipping or piling up of letters. But I did see another section in the adjustment manual about the touch selector, so decided to take a look and see if any improvements could be had there. It turned out that there was some unevenness of touch tension between the left and right sides of the keyboard, which was easily adjusted via the two screws on the touch spring lock bar. Once they were balanced from left-to-right, I then loosened both evenly about a quarter turn, making the overall touch of the machine a bit lighter, something I like in good portable machines.
None of these adjustments could have been made without the service manual, and the nagging escapement issues this machine had been experiencing I feel are resolved. There was not just one adjustment that fixed the problem, but a whole series of adjustments. The manual proved absolutely invaluable.
Once emboldened by my success thus far, I proceeded to the much trickier task of realigning the type slugs for even imprinting. This took me far longer than I'd anticipated, mainly because I lack the special tools designed for precision bending of the type bars. But I can say that, finally, the type imprint is much better aligned vertically, while the upper case imprints are clearer than before. I found that subtle misalignments would still deliver good lower case imprint, but with the type slug hitting one side of the type guide slot it would cause a smearing of the upper case imprint.
I feel this machine is finally in a condition where I'd be comfortable with anyone using it. And credit is entirely due to Ted Munk for making these resources available to the layperson typewriter community.
After servicing the Silent-Super, I proceeded to tackle the much less troublesome Silent version, and I didn't find too many issues to speak of, other than the escapement trip point was a bit too far toward the type guide, so it had to be backed off a bit; just the opposite of the previous machine.
I haven't gone through every area of these typewriters with this book, since I haven't been experiencing other issues. But I can rest assured that, if need be, I have the technical resources to tackle virtually any problem.
Another item of interest in the adjustment section was doing custom adjustments to compensate for individual user's typing styles, specifically what they call "Follow -Through, Hang-on Typists" and "Speedy Galloping Typists." Some of these adjustments involve reforming parts, while others involve measuring tolerances of clearance between neighboring parts and, if necessary, machining parts or ordering replacements.
Aside from the adjustment section, I found it interesting in the section on model features that various platens were once available for these machines, including extra hard platens intended to be used for stencils or thick sheets of carbons; and also slotted platens of various sizes for typing on smaller cards. It makes me wonder, when I read about someone's super hard platen, that perhaps they have one of those purposely-made extra-hard platens.
Any person owning one of these Floating Shift models owes it to themselves to get this manual, because these service adjustments are written with the technician in mind, using down-to-earth language that is rarely found in tech manuals of today's era. I especially love the way that terminology in the text is underlined, then the underline is connected to a call out arrow that points to the exact part in the associated diagram on the same page, making it easy to locate the part being described.
Keeping these machines running into the future is going to be much easier with this factory-supplied service literature available to anyone. What we still need, however, is a supply of replacement parts, currently only found from donor machines too far gone to fix. Perhaps some machine shop will rise to the challenge and start fabricating these rare and unique items. But until then, we need to keep these machines in good working order with a bit of tender loving care. Thanks, Reverend Ted! Yesterday I couldn't spell technician; today I are one!
Now that I've altered the design with discrete tension wires between each leg, this new design is more stable atop a table. I think for the full-sized tripods, intended to be used outdoors on potentially uneven terrain, having the continuous loop system works better to help level the tripod head. Here's a video describing how they work.
Here's the video about my first tabletop tripod design:
And here's the video on this latest version:
Typecast via Facit 1620. Pronounced like "faucet" (I think).