Monday, October 07, 2019

Overdue Update

1962 Torpedo De Luxe
Recently acquired 1962 Torpedo De Luxe, featuring the wonky 5 & 6 keycaps, and decades of grime.

“Overdue Update”

I've been tinkering some more with the citric acid / hydrogen peroxide reversal process for direct-positive prints from silver gelatin photo paper exposed in-camera. Here's a recent still-life.

Owl, Citric Acid + H2O2 Reversal Process, Fujinon 135mm @ F/5.6, 45 second exposure, 4x5 format Arista RC grade 2 paper

I've found better results by processing the print face-down in the citric acid and peroxide bleaching solutions, and also do two passes, before the second exposure and development.

While up till today all of my reversal tests have been under shaded daylight, the multi-seconds-long exposure times were not compatible with the possibility of seated portraits. So today I made a series of test exposures in the bright morning sun of my front patio, with Your's Truly as subject. For focus I used a test card tied to the camera with a string. I use a yard stick to stretch the target out in front of the camera until the string is taught, then focus the camera on the target. Then I approximate the composition, based on my experience, and once the exposure is determined via light meter and set on the lens, I sit down in front of the camera, long shutter release cable in one hand and focus target in the other. I assume my pose, bring the target up to my temple and adjust my fore-aft seating position to tighten the string; then slowly lower my arm and trip the shutter.

I thought the results were rather fair, given the harsh light; and the 1/2 second exposure time at F/5.6 was quite adequate for seated portraits.

Self-Portrait, grade 2 RC paper, direct reversal using citric acid + H2O2 process, 1/2 second exposure at F/5.6

I have the 8x10 sliding box camera, currently fitted with a Fujinon Xerox machine lens, 240mm at a fixed F/4.5 aperture. Fast glass, but no possibility of a variable aperture. And the box camera is fixed at a landscape orientation, whereas I'd like to use it for portraits. Perhaps I can rebuild the camera so the cross-section is square instead of rectangular, and the sliding rear portion could therefore be inserted into the front half in either orientation - dark slide facing to the right for landscape orientation, or facing up for portraits. Of course, for accurate exposures with sub-1 second times I can't rely on the accuracy of a lens cap shutter, so perhaps an ND filter can lengthen the exposure times to around 1 second in bright sun - long enough to be timed accurately by hand, while short enough to reduce the chance of motion blur. Always another project!

I'm still using the same batch of citric acid and H2O2, so I don't know how long I can go before they expire. Thus far it's proven to be a very economical process, as long as I ensure consistency in everything I do.

Labels: , , ,

Tuesday, October 31, 2017

Reversal Print Progress

Pumpkin003
Never give up. That's good advice for anyone. I learned this lesson just recently, as I'd taken a pause from experimentation with this peroxide/citric acid reversal technique for creating direct positive prints from conventional photo paper.

What I had been doing was mixing the bleaching solution by combining the hydrogen peroxide and citric acid solutions together. I'd tried various concentrations of both but, not really understanding what I was doing, had mixed success; sometimes I'd get good reversal, other times it would take an hour or longer - or the bleaching simply wouldn't happen at all.

At the suggestion of a fellow APUG member (there's a thread on APUG documenting our progress with this new process), I tried separating the two constituent components of the bleaching process into individual trays. I also had a hunch that we'd been using way too much citric acid. So I mixed 1/5 gram (about 1/5 teaspoon) of citric acid powder into 200mL of water for the acid bath; then made a 300mL solution of 9% hydrogen peroxide (by diluting 77mL of 35% peroxide with 223mL of water) for the peroxide bath.

I was able to successfully process eight prints in a row with this batch of chemistry, with negatives exposed in both direct sun and shaded daylight - a far better success rate than I've experienced previously. Here's a synopsis of my process:

*Expose Freestyle Photo's Arista Ultra grade 2 RC paper (semi-matte finish) in-camera at ISO 1.6 (I also tested ISO 0.8, but it appears to be a bit too much exposure).

*First developer: Ilford Multigrade concentrate, mixed 1+15 to 1+20, developed for 1:30. The concentration and strength of the first developer has a lot to do with the overall contrast of the finished print, even with this fixed-grade 2 paper. The negative image on the paper usually appears very dark.

*Rinse: Thoroughly rinse the print in fresh water, to remove residual base-pH developer.

*First Citric Acid bath: process face-up for :30 with gentle agitation, ensuring the paper remains submerged.

*First Peroxide bath: process face-up for 2:00, ensuring the paper remains submerged. Avoid excess contact of paper surface with tongs. Gently press paper down with rubber tip of tong to ensure paper remains submerged. Avoid excess agitation. After about 1 minute the image will begin to reverse, with a sabbatier or solarization effect visible, as the darker tones (representing the image highlights) begin to fade. The fading or bleaching will slow or cease.

*Second Citric Acid bath: process face-up for :30 with gentle agitation, ensuring the paper remains submerged. The image should slightly fade even more, as the carry-over peroxide mixes with the fresh citric acid.

*Second Peroxide bath: process face-up for 2:00, ensuring the paper remains submerged. Avoid excess contact of paper surface with tongs. Gently press paper down with rubber tip of tong to ensure paper remains submerged. Avoid excess agitation. Most of the remaining darker tones should fade to near paper-white, with only a few areas of slight gray remaining. Total bleaching time is 5:00.

*Rinse: Thoroughly rinse residual peroxide solution from paper under running water.

*Fogging Exposure: Expose the remaining silver halides in the paper emulsion under enlarger, set to 16" height and f/22 aperture, for :15.

*Second Developer: Process for 1:30-2:00 in same developer solution as first developer.

*Stop Bath: Process for :30 in acetic acid or white vinegar stop bath solution (i.e. standard paper stop bath).

*Fixer: Process for 2:00 in standard paper fixer solution.

Complete the processing by a rinse aid and a 10 minute rinse, then squeegee and heat dry the print with a clean, dedicated hair dryer.

Processing the paper in separate bleaching solutions using this two-step technique seems to consistently produce a reliable bleaching of the darker tones after the first developer step. Careful monitoring of the image as it bleaches is helpful; some subtle moving of the print in the peroxide bath seems to help, but too much agitation is to be avoided. The process seems to require a specific technique to master. Gently and slowly pushing the paper down into the solution as it tends to float to the surface is important, as the peroxide solution seems to stratify as it's used.

The one remaining process issue left to resolve are little spots, that I call "freckle defects," that seems to happen on brightly exposed highlights, and more near the edges of the print than the center. This might be an indication of excessive exposure; or insufficient bleaching. More experimentation is needed.

I intend on repeating this same technique time and again, to verify its consistency, before scaling up the image size to 8"-by-10".
Pumpkin002

Pumpkin001

Joe002
Excess exposure at ISO 0.8. Note too the freckle defects in the highlights.

Joe003
Here I reduced the exposure using ISO 1.5, but a light leak resulted from a wonky film holder. Note the freckle defects are only evident at this highlight area of fogging.

Labels:

Friday, September 15, 2017

More Direct Positive Print Experiments

Reversal MG RC WT002

I've continued to make slow but steady progress with reversal processing black & white photo paper, used as an in-camera "film," to make one-of-a-kind monochrome prints. But I have not been working alone. I first heard of this new method from photographer Federico Pitto, who has been pioneering the use of hydrogen peroxide/citric acid as an alternative bleaching agent, making the process less toxic and using more readily available materials.

In case you are not familiar with reversal processing of photo paper, this involves exposing a sheet of paper in a camera, as if it were a sheet of film but with a much slower speed (ISO 1.5-3); much like a paper negative. Then the paper is processed in developer, followed by a rinse. At this point, the paper exhibits a negative image and is still light-sensitive; the areas of great exposure have turned dark, while the shadow areas are much lighter.

Were this a "conventional" paper negative, it would be stopped and fixed, producing a negative image. But instead, the print is placed into a bleaching bath, which selectively bleaches only the metallic silver - the formerly dark parts of the image - while leaving intact the remaining unexposed silver halides in the light parts of the image. Coming out of the bleach, the image is faint and faded in appearance, as the formerly dark (negative) highlights are now bleached nearly white, while the unexposed paper is also white.

Following a brief rinse, the paper is then re-exposed with light, which serves to fog the remaining silver halides that had yet to receive any exposure. Then the paper is once again developed, this time causing the remaining silver halides, that had not been exposed in-camera (representing the shadow areas of the image) but were fogged during the second exposure, to turn dark. The result is a positive image on paper - a direct positive print.

Earlier experiments were successful, but the highlights, or lighter parts of the image, had a strange blotchy, mottled appearance, that wasn't consistent from one test to the next. Federico Pitto came up with the idea that perhaps, during the second exposure, we were grossly over-exposing the paper, and that perhaps the mottling was the result of still unexposed, residual silver halides in the light areas of the image getting a fogging exposure and turning dark after the second development. He therefore did a series of test strips, and determined, using his enlarger as a controlled light source, the optimal settings for this second exposure.

Armed with this new knowledge, I this week attempted to use Federico's settings with my process, and I can report a great improvement in the results. Here is a synopsis of the process (times unless otherwise noted are minutes:seconds):

Expose in-camera at ISO 1.5
Develop in a 1+15 dilution of Ilford Universal Paper Developer (300mL water + 22 mL concentrate) for 1:30
Rinse in water for :30
Bleach in solution of 175mL water + 125mL 35% hydrogen peroxide + 2 teaspoons citric acid for 3:00
Rinse in water to wash off residual peroxide
Squeegee print dry
Expose under enlarger, set to 20" height at f/8 aperture, for 8 seconds
Develop again for 1:30; you can see, under the red lights, the image turn positive
Rinse or stop bath for :30
Fix in paper fixer for 2:00


All of the above is performed under red safelights, until in the fixer for about a minute. The only white light the paper sees during the process is during the second exposure, under the enlarger. I think this contributes greatly to the quality of the highlights.

Because I used multigrade paper for this test (Ilford RC, MG, WT luster finish), the contrast was more than what I'm used to seeing with grade 2 RC paper. But it also opens up a larger source of paper, of various manufacturers and finishes.

Going forward, there are more experiments yet to do. One, I'd like to do more tests of the second exposure under the enlarger, using colored filters with MG paper, hoping to improve the shadow detail. As you can see from the top image, the shadows are very blocked up, indicative of the high contrast resulting from exposing MG paper under UV-laden daylight. Perhaps less second exposure would result in lighter shadows.

Two, I'd like to do more experiments with pre-flashing the paper. I've been applying a standard pre-flash to the paper during all of these tests, but perhaps it needs more, to get more shadow response. The top image had a pre-flash twice what I usually use, with little in the way of increased shadow detail. So perhaps a combination of the above two ideas might see some results.

I also need to try this new processing method with my older grade 2 paper and see if it also has positive results (no pun).

Finally, since it appears to be a working process, perhaps it's time to break out the 8"x10" box camera and do this on a larger scale! Stay tuned for more results soon.

The top image was made after the developer and bleaching agent had been sitting in their trays for several hours. I also had left the print sitting wet in a holding tray for about a minutes, under red lights, between the bleach and the second exposure, as I had to fumble in the dark with my enlarger timer. Whatever the cause, close examination of the highlights shows a slight unevenness, with faint streaks, still present; this was not present on an earlier image, made when the chemicals were fresh. I need to nail down the cause of this. So, more refinements yet to make.

Here are the first three videos documenting my experiments thus far:


Labels: ,

Sunday, August 27, 2017

Direct Positive Print Experiments

Reversal Raven001
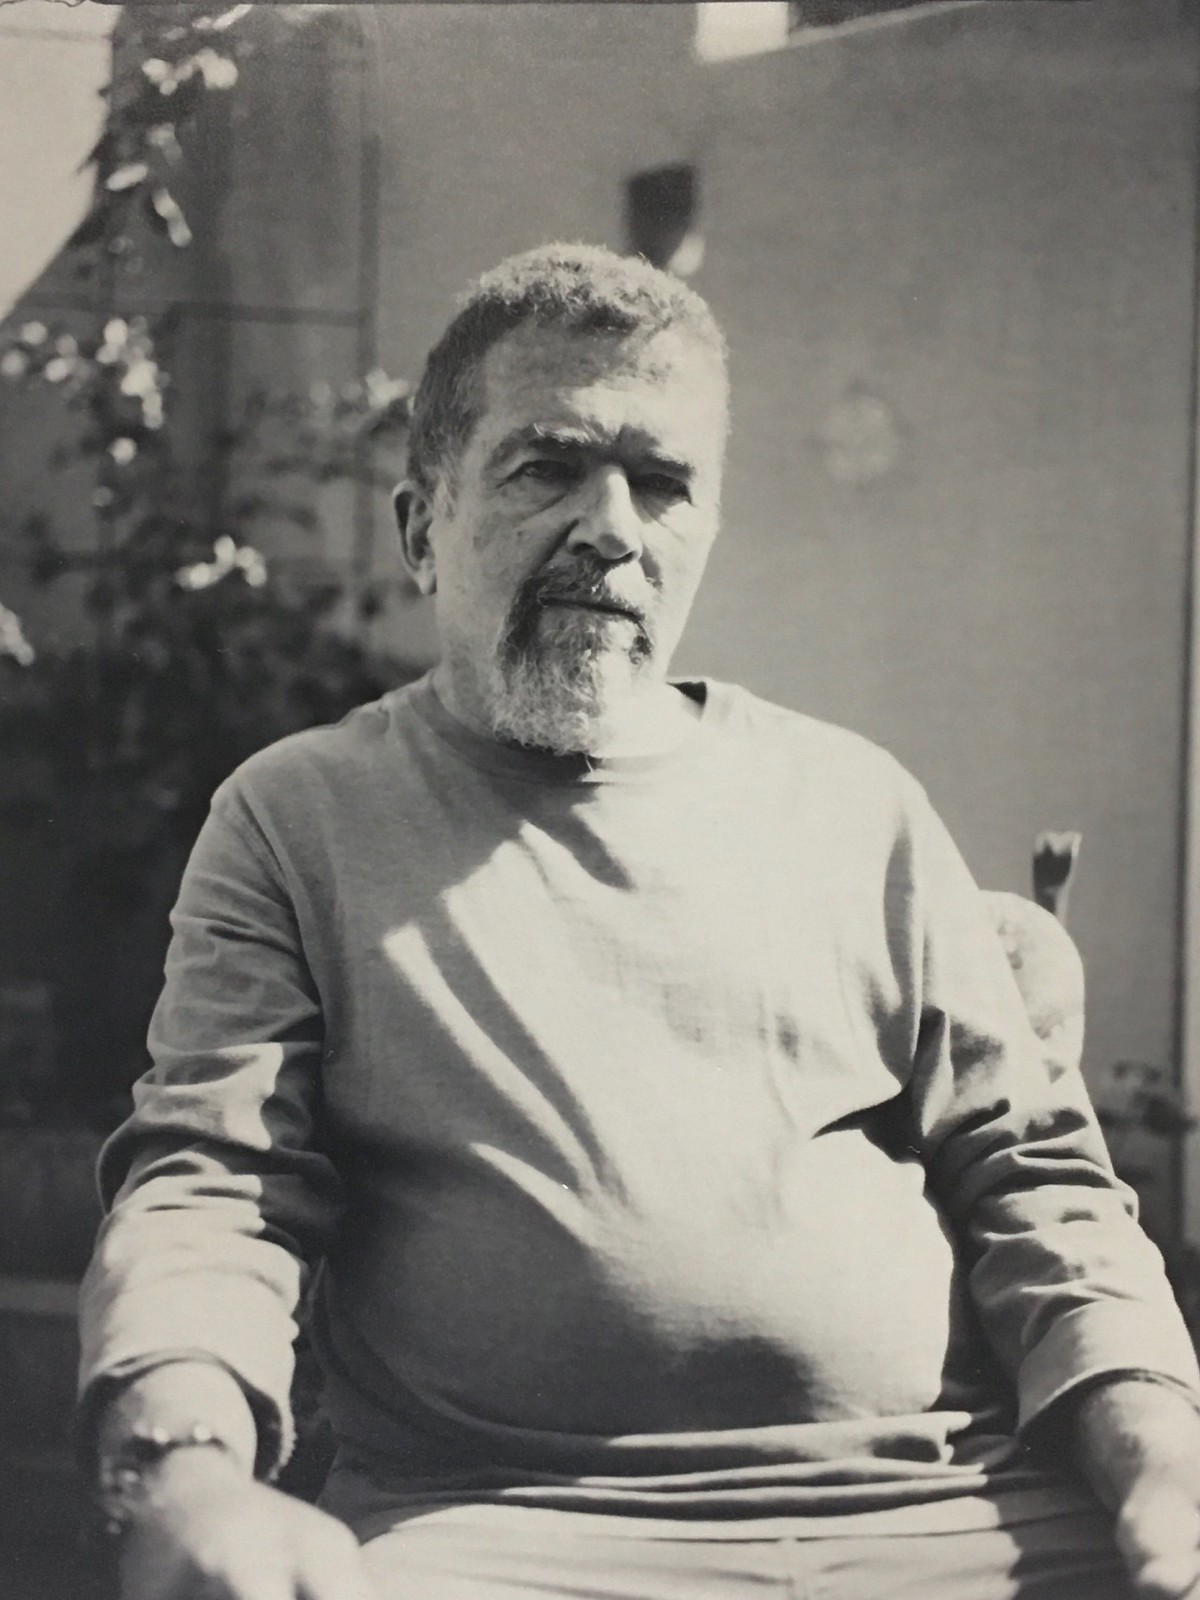
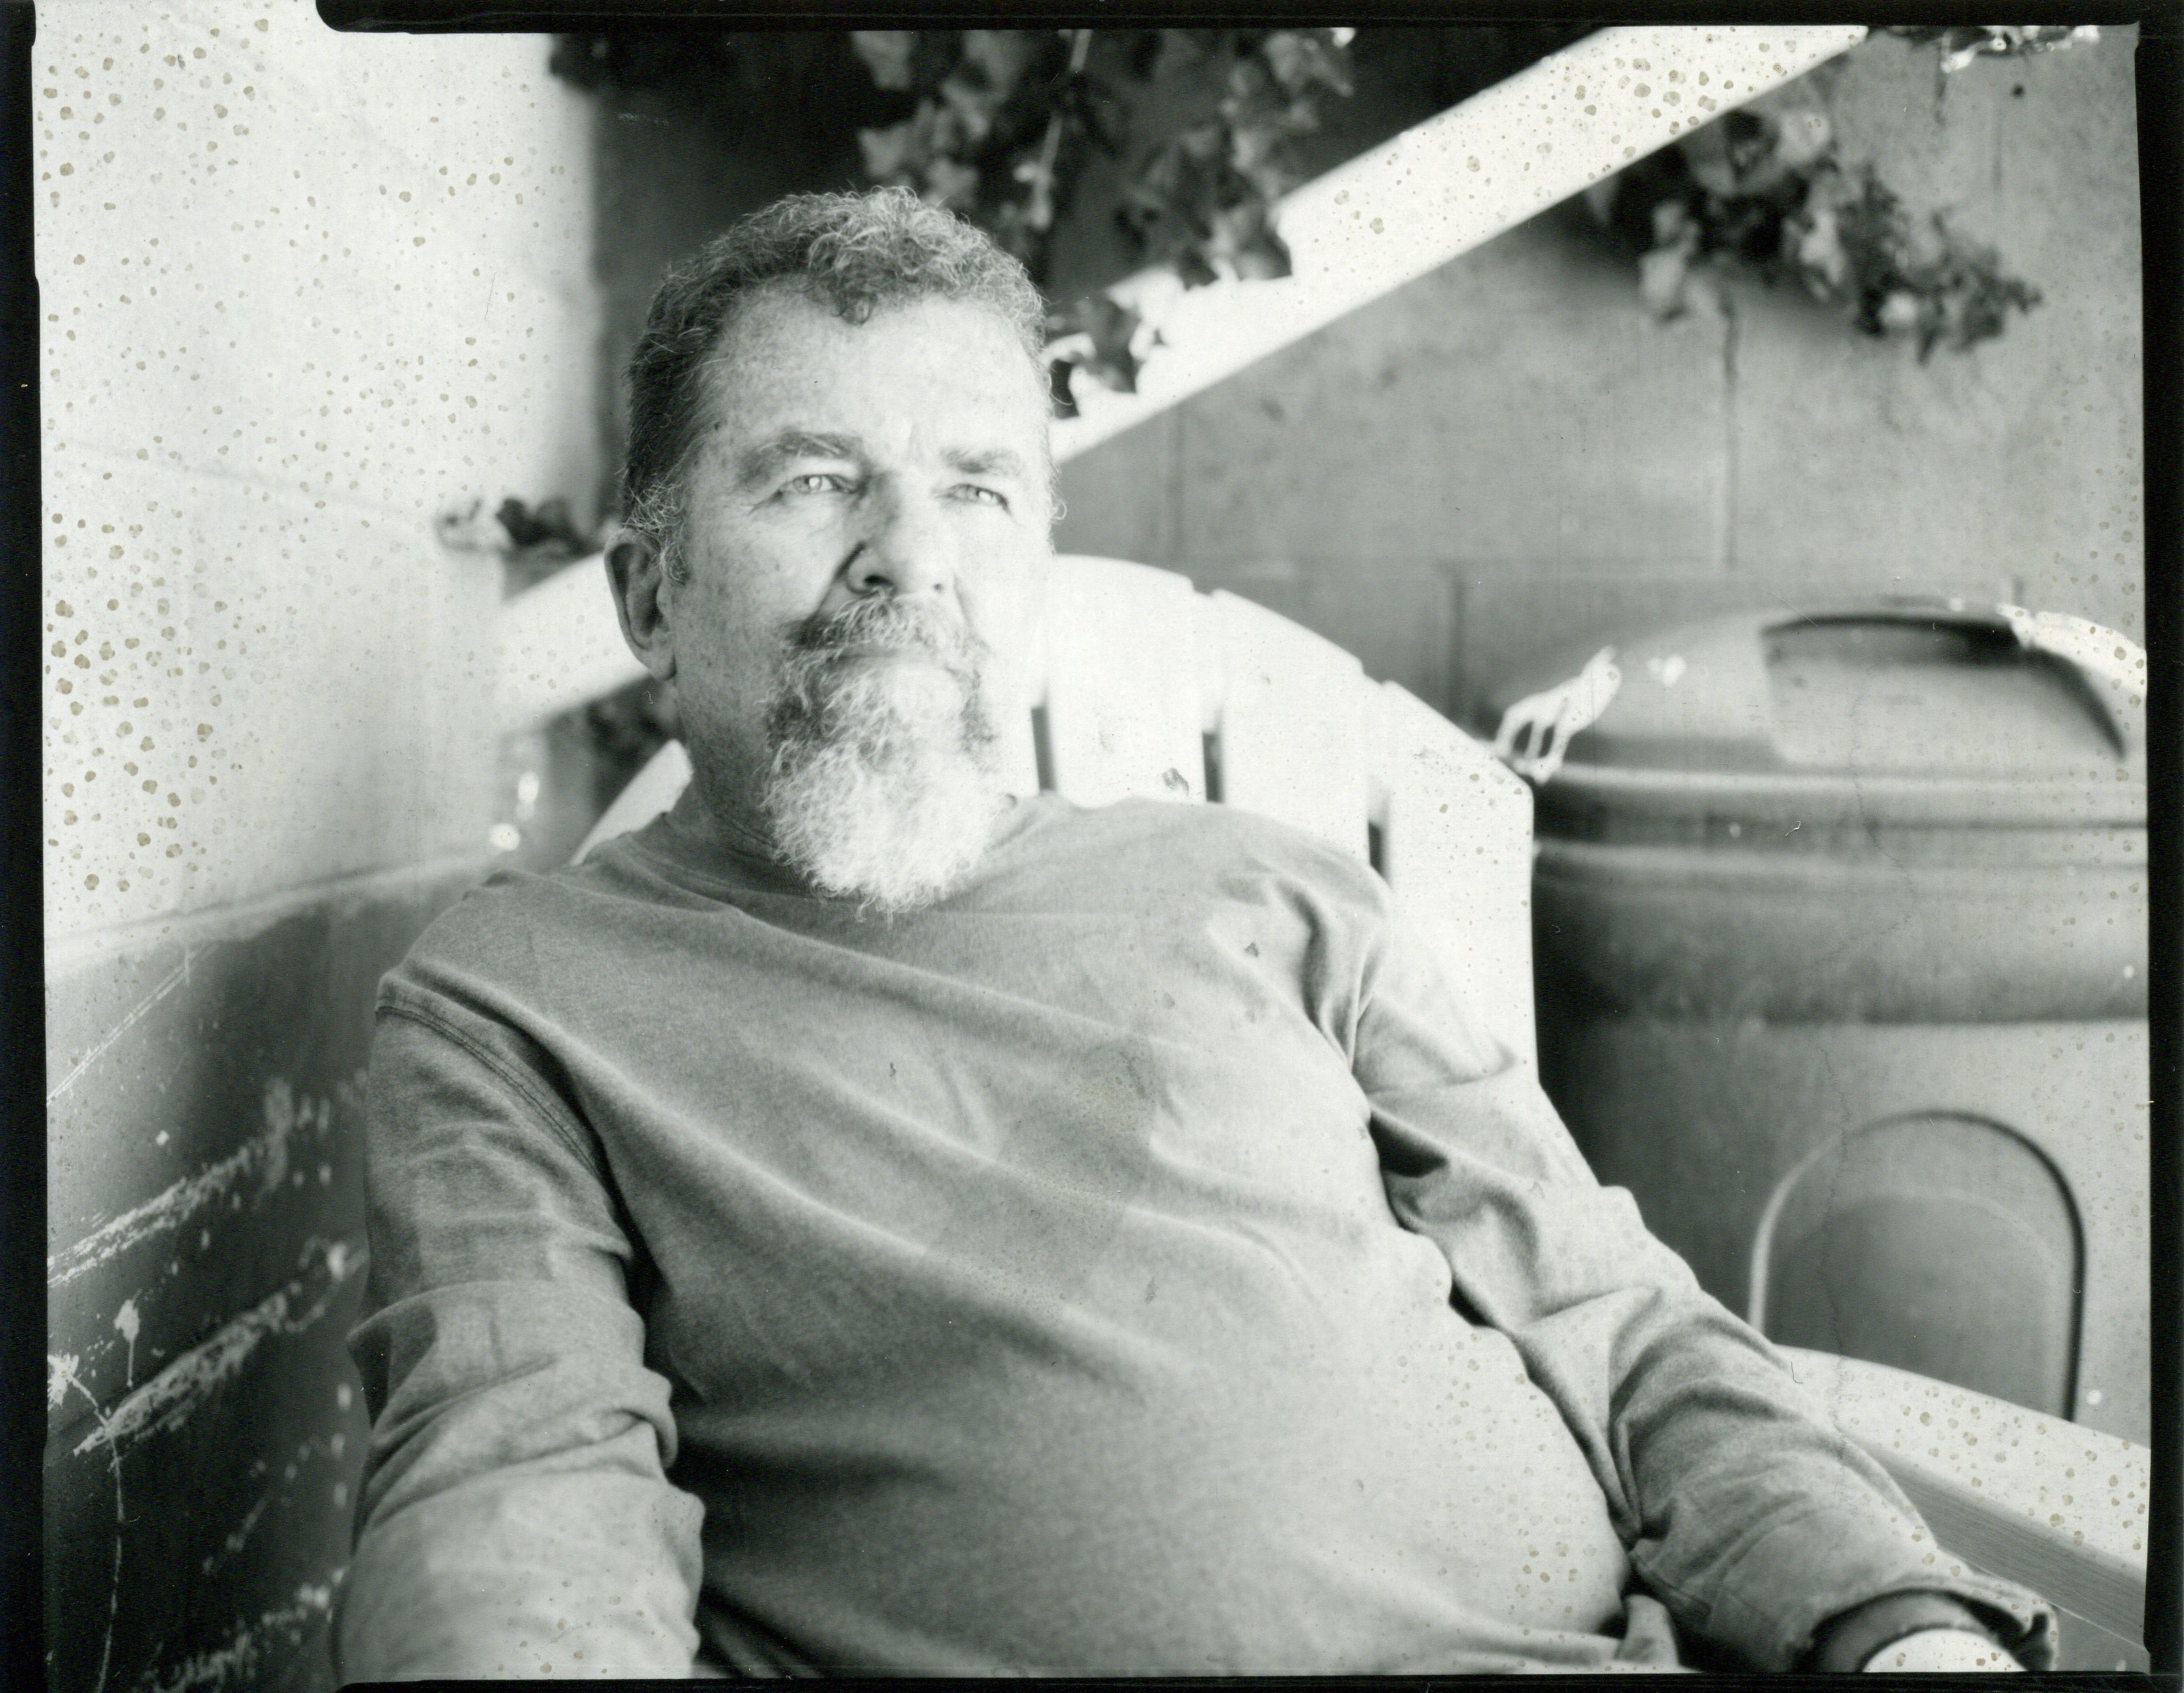
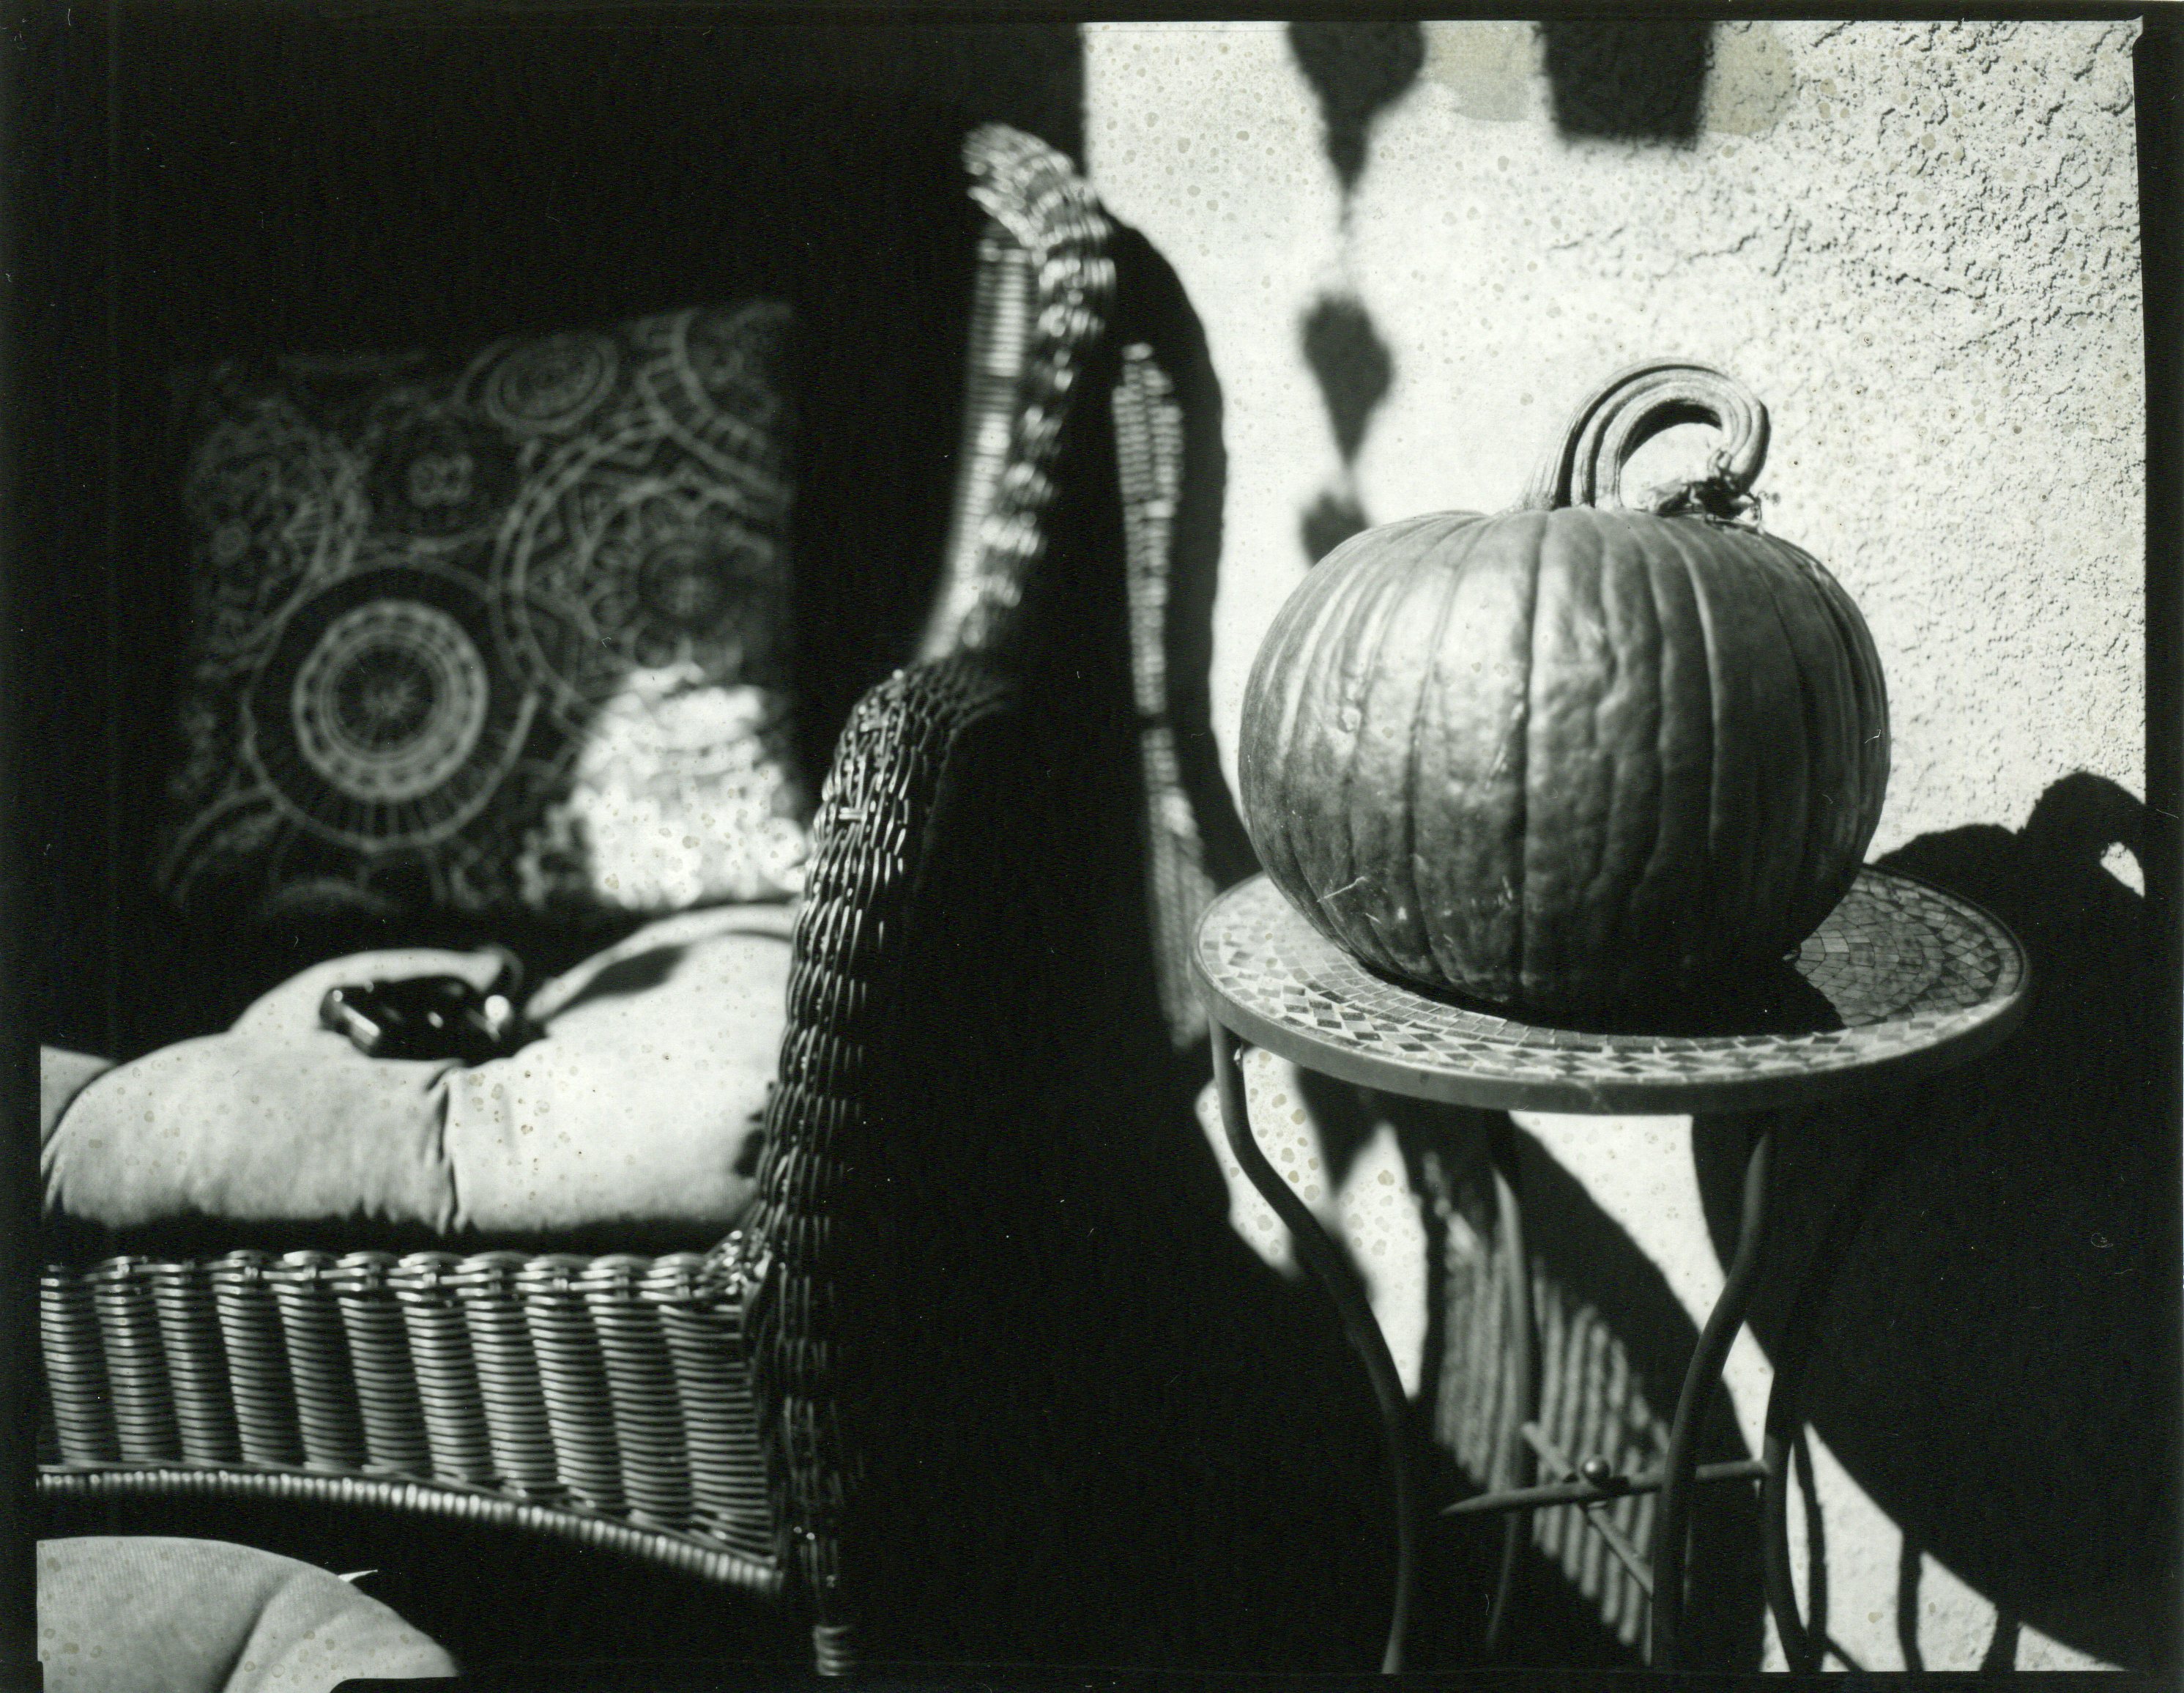
Exposure: 1/8 second at f/5.6 in morning light

There was a time, only a year or so ago, when I took for granted that Harman's Direct Positive Paper would be available for us creatives to use. But it seems that change is the only constant in life. In case you haven't heard, Harman/Ilford have been experiencing manufacturing difficulties with their direct positive paper and so, for the time being, it is no longer available.

So, what is direct positive paper? Think of it as a wet-processed Polaroid print. You fit sheets of the fiber-based print paper into your large format camera's film holders, expose it as a very slow-speed film, then process it in standard black-and-white print chemistry (developer, stop bath and fixer) to get a one-of-a-kind, fiber-based positive print. Were you to do that with conventional black-and-white printing paper, you'd end up with what we call a paper negative: a photographic negative on a paper supporting medium. Harman's Direct Positive Paper represents a kind of hybrid process, combining the best of modern chemistry with traditional alternative photographic processes.

There have been methods for creating such direct positive prints in the past, using exotic and dangerous chemicals in what is termed a reversal process. This is what happened inside those old-fashioned photo booths, the ones that spit out a strip of black-and-white prints. These traditional reversal processes used a dichromate-based bleaching compound and chemical fogging agent to do the reversal part of the process. Theoretically feasible at home, yes, but impractical for most of us and requiring considerable care in handling, storage and disposal of chemicals.

Several weeks ago, through some fortuitous Internet surfing, I happened upon several blog posts that describe a different chemistry for achieving the chemical bleaching part of the reversal process. Rather than using toxic chromic acid-based compounds, the method described uses hydrogen peroxide and citric acid. Armed with little more than these blog articles to go on, I decided to try my hand at it.

The first step was acquiring a more concentrated solution of hydrogen peroxide than the 3% topical solution found in the drugstore. The blog articles describe using a 9% solution in the bleaching agent formula. I was able to source a local supply of 35% hydrogen peroxide at the same place as the citric acid powder, strong enough to be diluted down for my purposes.

Pause must be made at this point to remind anyone contemplating doing this that, although this new formula isn't toxic like chromic acid, concentrated hydrogen peroxide deserves to be handled with respect, as it is a strong oxidizing and corrosive agent, will do direct harm to your body if it makes contact and will react violently with many flammables, including spontaneously combust. You must wear protective gear on your exposed skin, including shielding your face and eyes, (and think about protecting your legs and feet if something erupts at table-height) and mix it only in a safe location, away from flammables and other corrosives. This warning is not intended to scare you off from considering doing this process, only as a common-sense precaution, since the laws of physics don't care who you are.

I purchased a 1 liter plastic bottle, which was kept refrigerated at the store. I therefore decided to store my bottle also in a refrigerator, which helps reduce its reactivity during storage and prolongs it shelf-life.

The basic reversal process is this: develop the exposed paper in standard paper developer, then a quick rinse or stop bath. Next is the bleaching bath, in this case comprised of a dilute hydrogen peroxide solution with citric acid added. Next is a quick rinse, then the front of the paper is squeegeed dry, and the paper is then exposed directly to a bright source of white light, to fog the remaining unexposed silver halides in the emulsion. Then the paper is developed, stopped and fixed as normal. These last steps, from the fogging to the fixing, can be done in normal room light.

How the image reverses from a negative to a positive is that the bleaching agent acts selectively only against the developed metallic silver, produced by the first developing step, that represents the highlights of the scene. These dark silver molecules are bleached near paper-white, while leaving the unexposed silver halides intact in the remainder of the emulsion. Then the fogging with light exposes those remaining silver halides which, after the second development, turn into dark metallic silver and represent the shadow portion of the image.

The articles reference using a pH meter to accurately determine the acidity of the bleaching agent. Since I don't have such a device, I decided instead to employ empirical testing. I used Freestyle Photo's Arista grade 2 RC paper, initially rated at an ISO of 3 (I normally rate this paper at ISO 12 as a paper negative; it seems the reversal process requires a denser latent image to work properly). I mixed a 300mL solution of bleaching agent using 77mL of 35% peroxide and 223 mL of water, to which 2 teaspoons of citric acid powder was thoroughly dissolved. This amounts to a 9% concentration of hydrogen peroxide. To do this safely, I performed the mixing out doors, wearing protective gear, diluting the peroxide into the water, thoroughly stirring, then adding the citric acid powder after, with more stirring.

For my initial tests, at ISO3, I developed the paper for 2 minutes, bleached the paper for 5 minutes, fogged the paper under bright light for several minutes, then finished the process with a 2 minute develop, 30 second stop bath and 2 minute fix (pretty standard times for developing print paper). My developer was Ilford Multigrade concentrate diluted 1:15. After the bleaching step I rinsed the paper and turned on the white lights. The paper had a negative image with an irregular brass-colored mottling. Fogging the paper with direct exposure to light didn't change its appearance. But it did dramatically change when put back into the second developing bath, where the image quickly went from negative to positive.

Though the results were promising, the contrast was very low and the intensity of the highlights was very muted. You'd need to view the print under bright illumination to see the image with any kind of clarity. I next decided to add more citric acid to the bleaching agent, but the results didn't improve.

So I decided to make two changes at once: 1) increase the exposure by reducing the ISO to 1.5 (since my new meter only goes down to ISO3, I simply used the next slower shutter speed); and 2) double the concentration of hydrogen peroxide, from 9% to 18%. It turns out that this makes mixing the bleaching agent more convenient, as I can mix a 1:1 solution of 35% peroxide with water. So 150mL of 35% hydrogen peroxide to 150mL of water, plus 2 teaspoons of citric acid powder, makes the new solution.

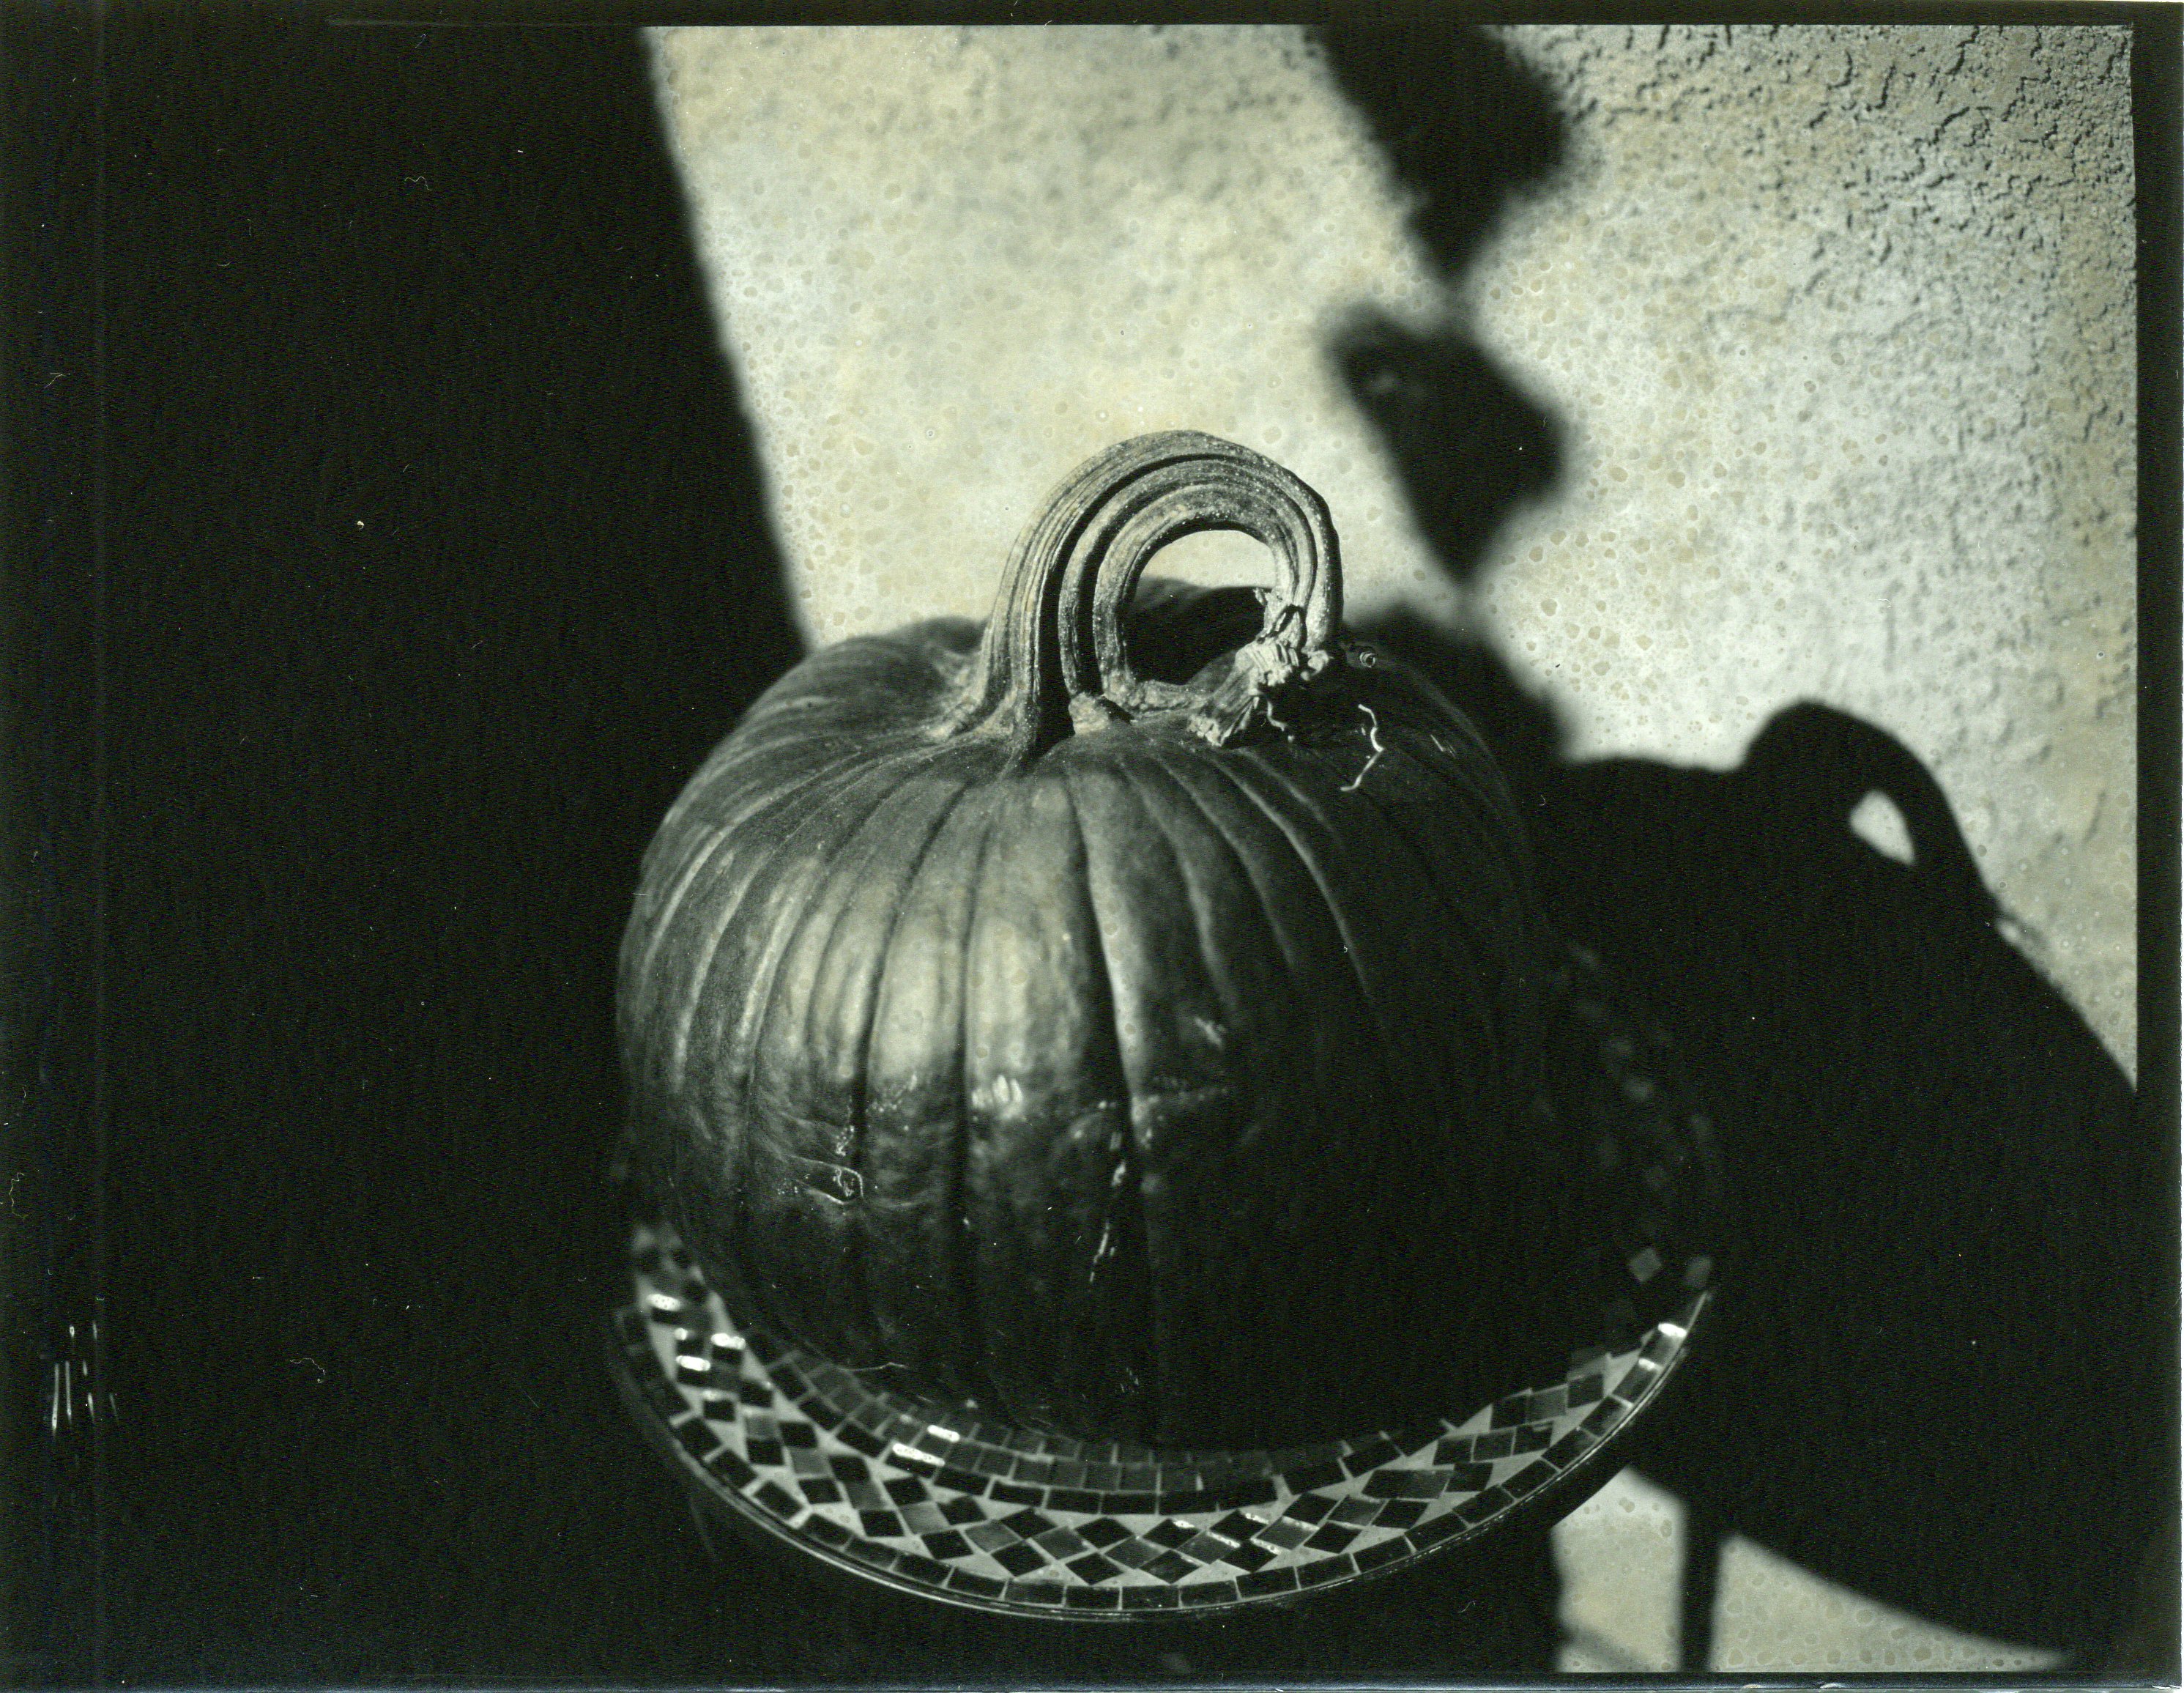
The results are very promising, as evidenced by the above image. Coming out of the bleaching agent the highlights were already reversed white, even before the light fog and second development; it seems the bleaching agent activity determines the highlight density. The print has a nice warm tone to it, although the background shadows have a somewhat mottled appearance, evidencing its experimental nature. Held in hand, it's not much different from the Harman paper, other than color tone and the RC paper's surface finish. In processing this print, I reduced both development steps to 1:30, reduced the bleaching step to 2 minutes and the fogging step to 1 minute under a strong LED lamp of 5000k color temperature. I use the same developer tray for both development steps, to make things more convenient; which works well as long as you remember to thoroughly rinse the paper after the bleaching step.

It's not as convenient up front to process print paper this way, as compared to the Harman Direct Positive paper. But what you use in time up front you save on the back end of the process, since the RC paper only requires a brief rinse aid treatment and 5 minute wash, then can be quickly dried to completion, using a squeegee and hair dryer. Contrast this with fiber prints, that require an hour of rinsing and hours of drying time, taped flat to a sheet of glass to prevent curling.

I'm excited to try this process with other RC papers in my collection, including multigrade warm tone papers with a luster finish. I might also try increasing the concentration of peroxide to about 20-25%, and see what effect it might have on the results.

I'll be happy when Harman/Ilford returns their direct positive paper to the market, for the sake of others who would like to dabble in this interesting alternative process but don't want to get more involved than standard print chemistry. For myself, I'm grateful that this shortage has forced me to seek alternatives, as it has opened up a new avenue for my creative expression.

Post-Script: There is a photographic paper called Galaxy Direct Positive Paper which has entered the market recently. Despite its name, it does not produce a direct positive image in standard print paper chemistry, but rather requires a reversal process, like what I've described above. Still, I'd like to try it out, since it's supposedly very similar to the old photo lab print papers and has a thicker, more silver-rich emulsion.

Labels: ,